
Number pools help you track calls generated by advertising campaigns, landing pages, and websites. They display tracking phone numbers to visitors based on their traffic sources, helping you attribute incoming calls to the campaigns or pages that generated them. You can also configure how incoming calls reach your team and view available attribution details in call reporting. This guide explains how to create number pools, install tracking snippets, test number swapping, configure call routing, and track keywords.
TABLE OF CONTENTS
- What Is a Number Pool?
- Key Benefits of Number Pools
- Prerequisites and Limitations
- How to Set Up a Number Pool for Call Tracking
- Ring Number Pool Calls to Multiple Users
- Integrate the Tracking Snippet on Your Website
- How to Test Number Swapping
- How to Set Up Keyword Tracking
- How to Swap Numbers in a Button
- Group ID
- Frequently Asked Questions
- Need Help?
- Related Articles
What Is a Number Pool?
A number pool is a group of tracking phone numbers used to identify where incoming calls originate. By displaying different phone numbers to visitors based on their traffic sources, you can connect calls to advertising campaigns, landing pages, and websites.
Number pools are particularly useful for tracking calls generated by paid campaigns. Tracking numbers appear on designated pages according to the visitor's activity or traffic source.
These tracking numbers are also associated with call tracking codes. The number pool helps collect information about visitors who call after arriving at your website.
Key Benefits of Number Pools
Number pools help connect incoming calls to the visitor activity that generated them. This information makes it easier to evaluate traffic sources and configure how calls are handled.
- Call Attribution: Identify the campaigns or website pages associated with incoming calls.
- Dynamic Number Swapping: Display different tracking numbers based on visitor traffic sources.
- Keyword Tracking: Review available search keyword information associated with tracked calls.
- Flexible Call Routing: Ring up to six selected team members through their configured receiving channels.
- Website Integration: Use tracking snippets with websites and funnels.
- Call Reporting: Review available keyword, page, and contact activity information for tracked calls.
Prerequisites and Limitations
Review the following requirements before creating a number pool. These details affect how tracking numbers are configured, how calls are forwarded, and how visitor activity is attributed.
Prerequisites
Confirm that the required phone settings, website access, and call destinations are available before starting the setup.
- Access to Settings > Phone System > Phone numbers.
- A website or funnel where the tracking snippet can be installed.
- An external forwarding phone number if calls will be forwarded to another number.
- A minimum of four tracking numbers in each number pool.
- Access to the relevant user settings when configuring multiple call recipients.
Limitations and Important Considerations
Tracking behavior depends on your selected visitor conditions, forwarding configuration, and the format of phone numbers displayed on your pages.
- Pool Size: A number pool requires at least four tracking numbers. The number of tracking numbers needed depends on call volume.
- Forwarding Number: Do not use a phone number from the same connected calling system as the forwarding destination. Forwarding calls back into that system can create a routing loop. Use an external number.
- Paid Search Tracking: When PPC search is selected, number swapping occurs for visitors arriving from paid advertising traffic.
- Direct Visits: When All Except Direct is selected, direct browser visits do not meet the selected tracking condition.
- Phone Number Formatting: Number swapping does not automatically treat differently formatted phone numbers as equivalent. The configured swapping number, displayed number, and clickable phone link should use consistent formatting.
- Selected-User Ringing: Number-pool calls can ring up to six selected team members simultaneously.
How to Set Up a Number Pool for Call Tracking
Create a number pool to display tracking phone numbers to website visitors and connect incoming calls to their traffic sources. The following steps cover visitor selection, pool configuration, tracking numbers, and call features.
Important: The gclid parameter used for Google Ads tracking must originate from actual Google Ads traffic. Manually inserting the parameter into a URL does not simulate a genuine Google Ads click.
Step 1: Open Phone Number Settings
Begin in the Phone System settings to access the number-pool configuration options.
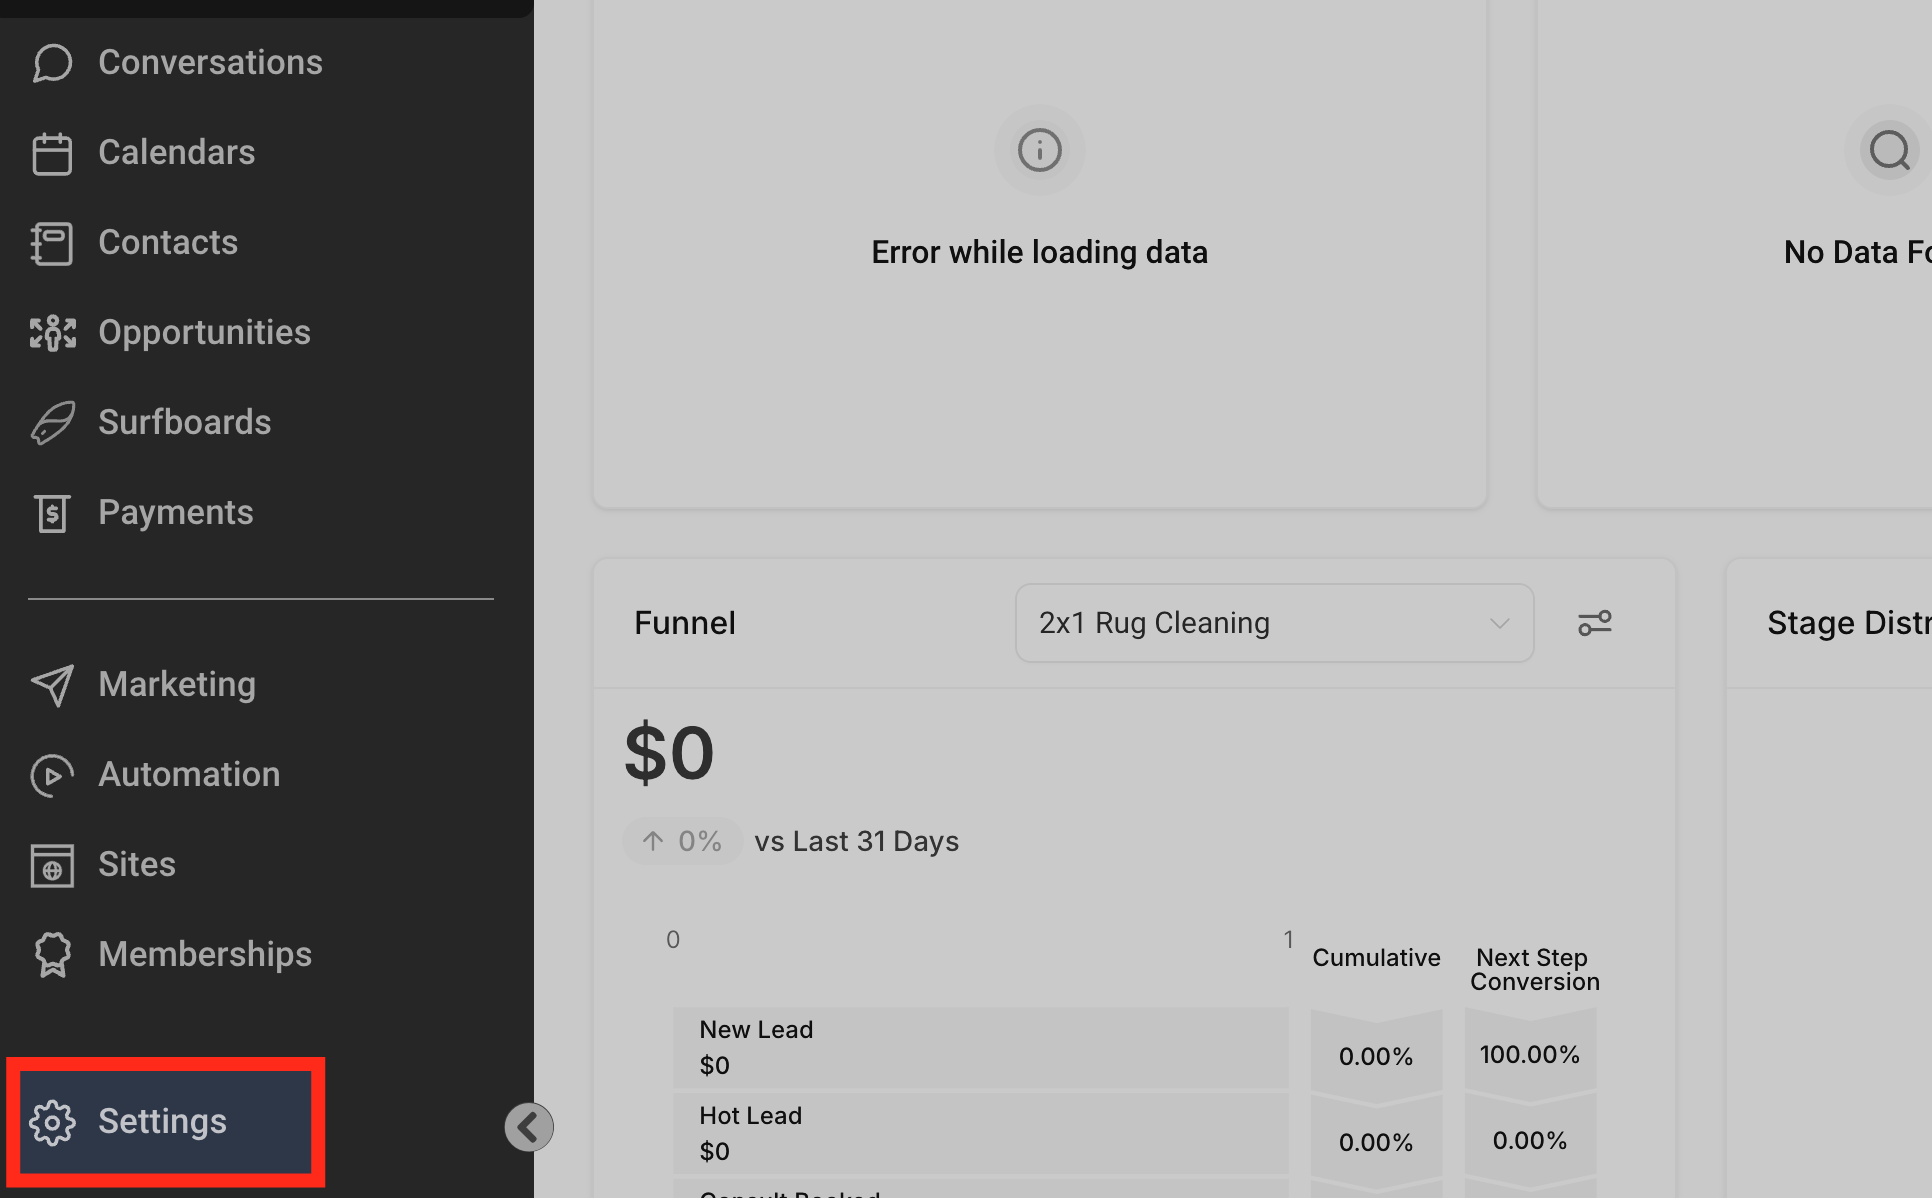
- Click Settings.
- Select Phone System.
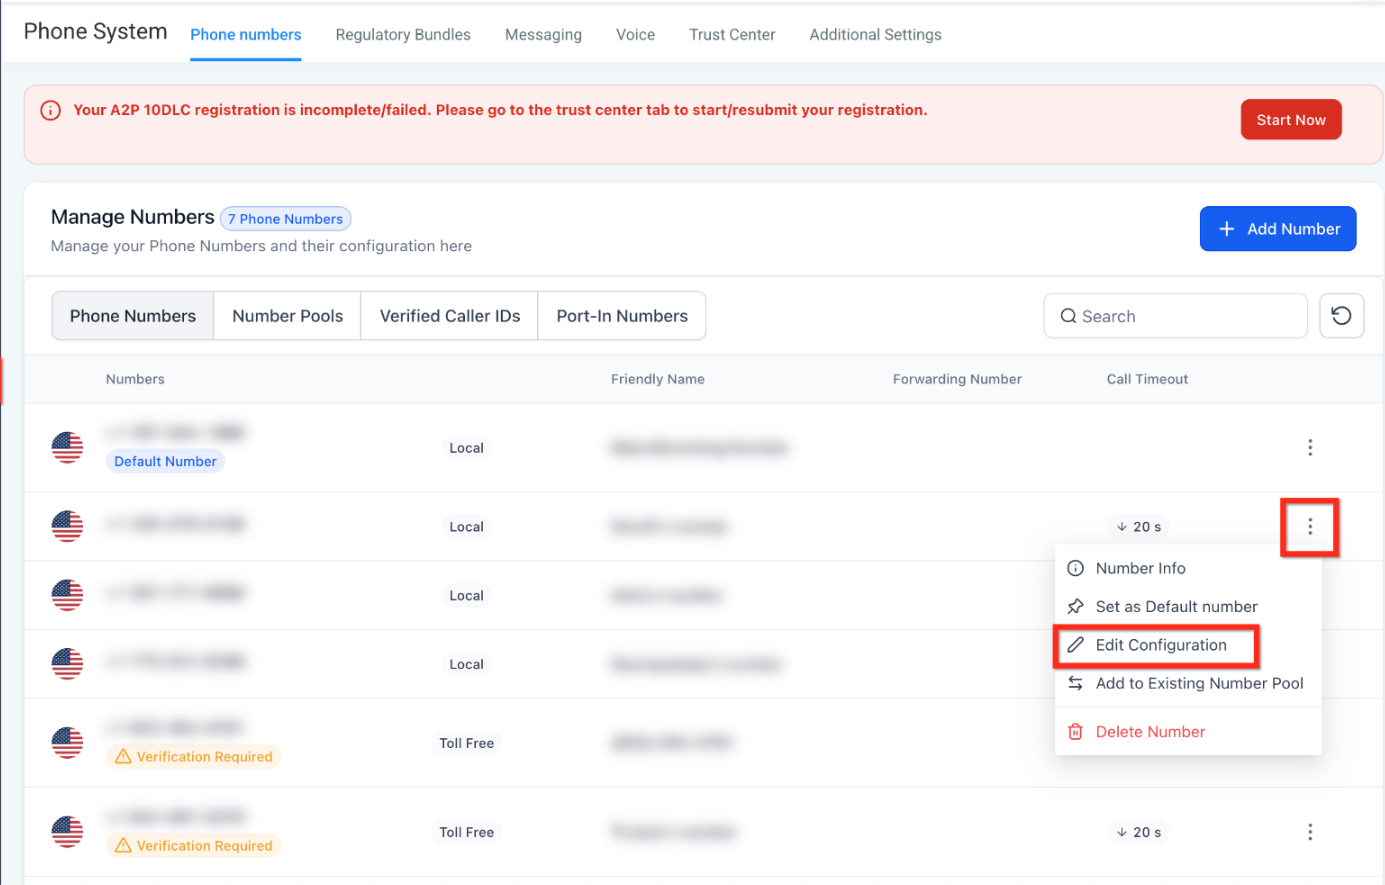
- Open the Phone numbers tab.
Step 2: Add a Number Pool
Open the number-pool setup process from the phone number management page.
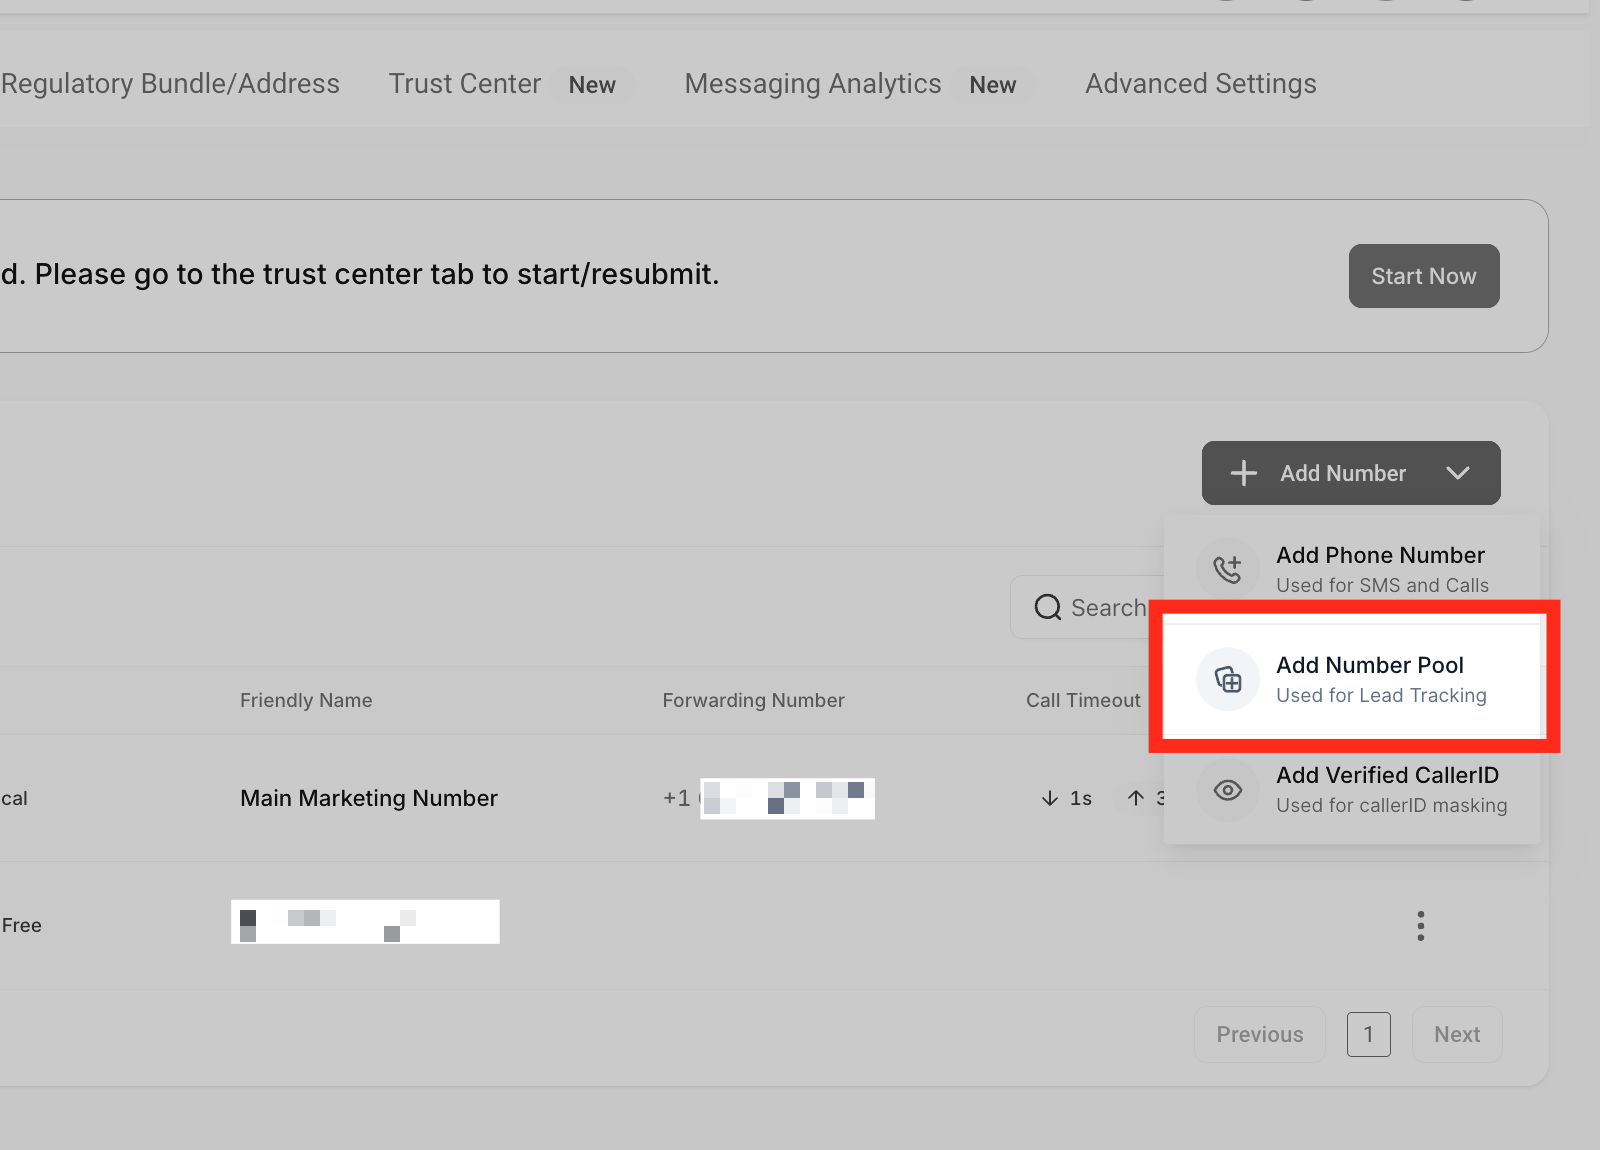
- Find the + Add Number dropdown on the right side of the page.
- Open the dropdown.
- Select Add Number Pool.
Step 3: Choose Visitors Activity
Visitor activity settings determine which visitors receive tracking numbers on your website.
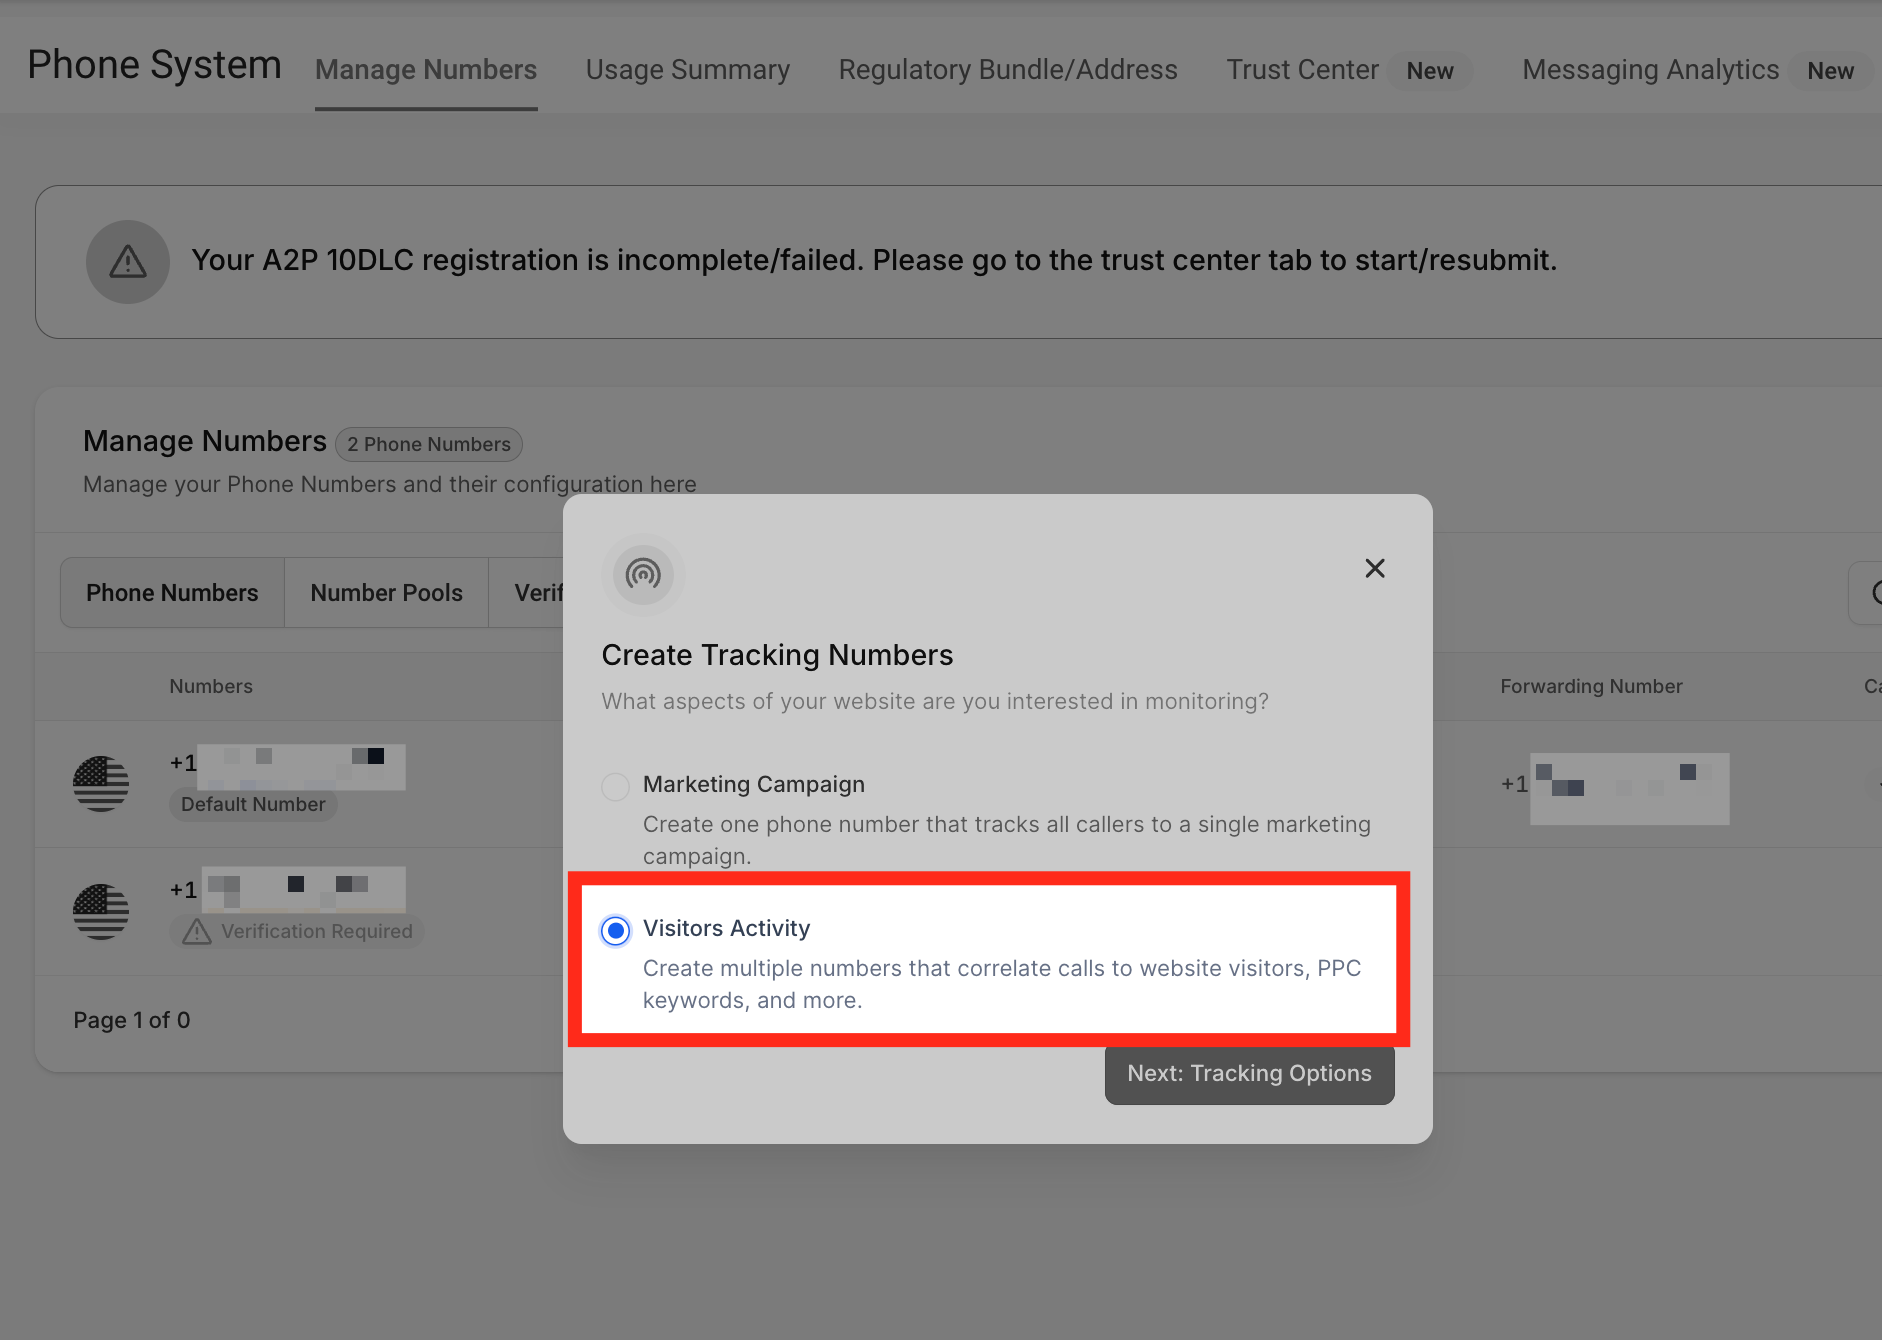
- Select Visitors Activity.
- Choose which visitors you want to track.
- Click Next: Create Pool.
For broader call tracking, select All visitors.
Note: If you select PPC search, the phone number on the website switches only when visitors arrive from a paid advertisement.
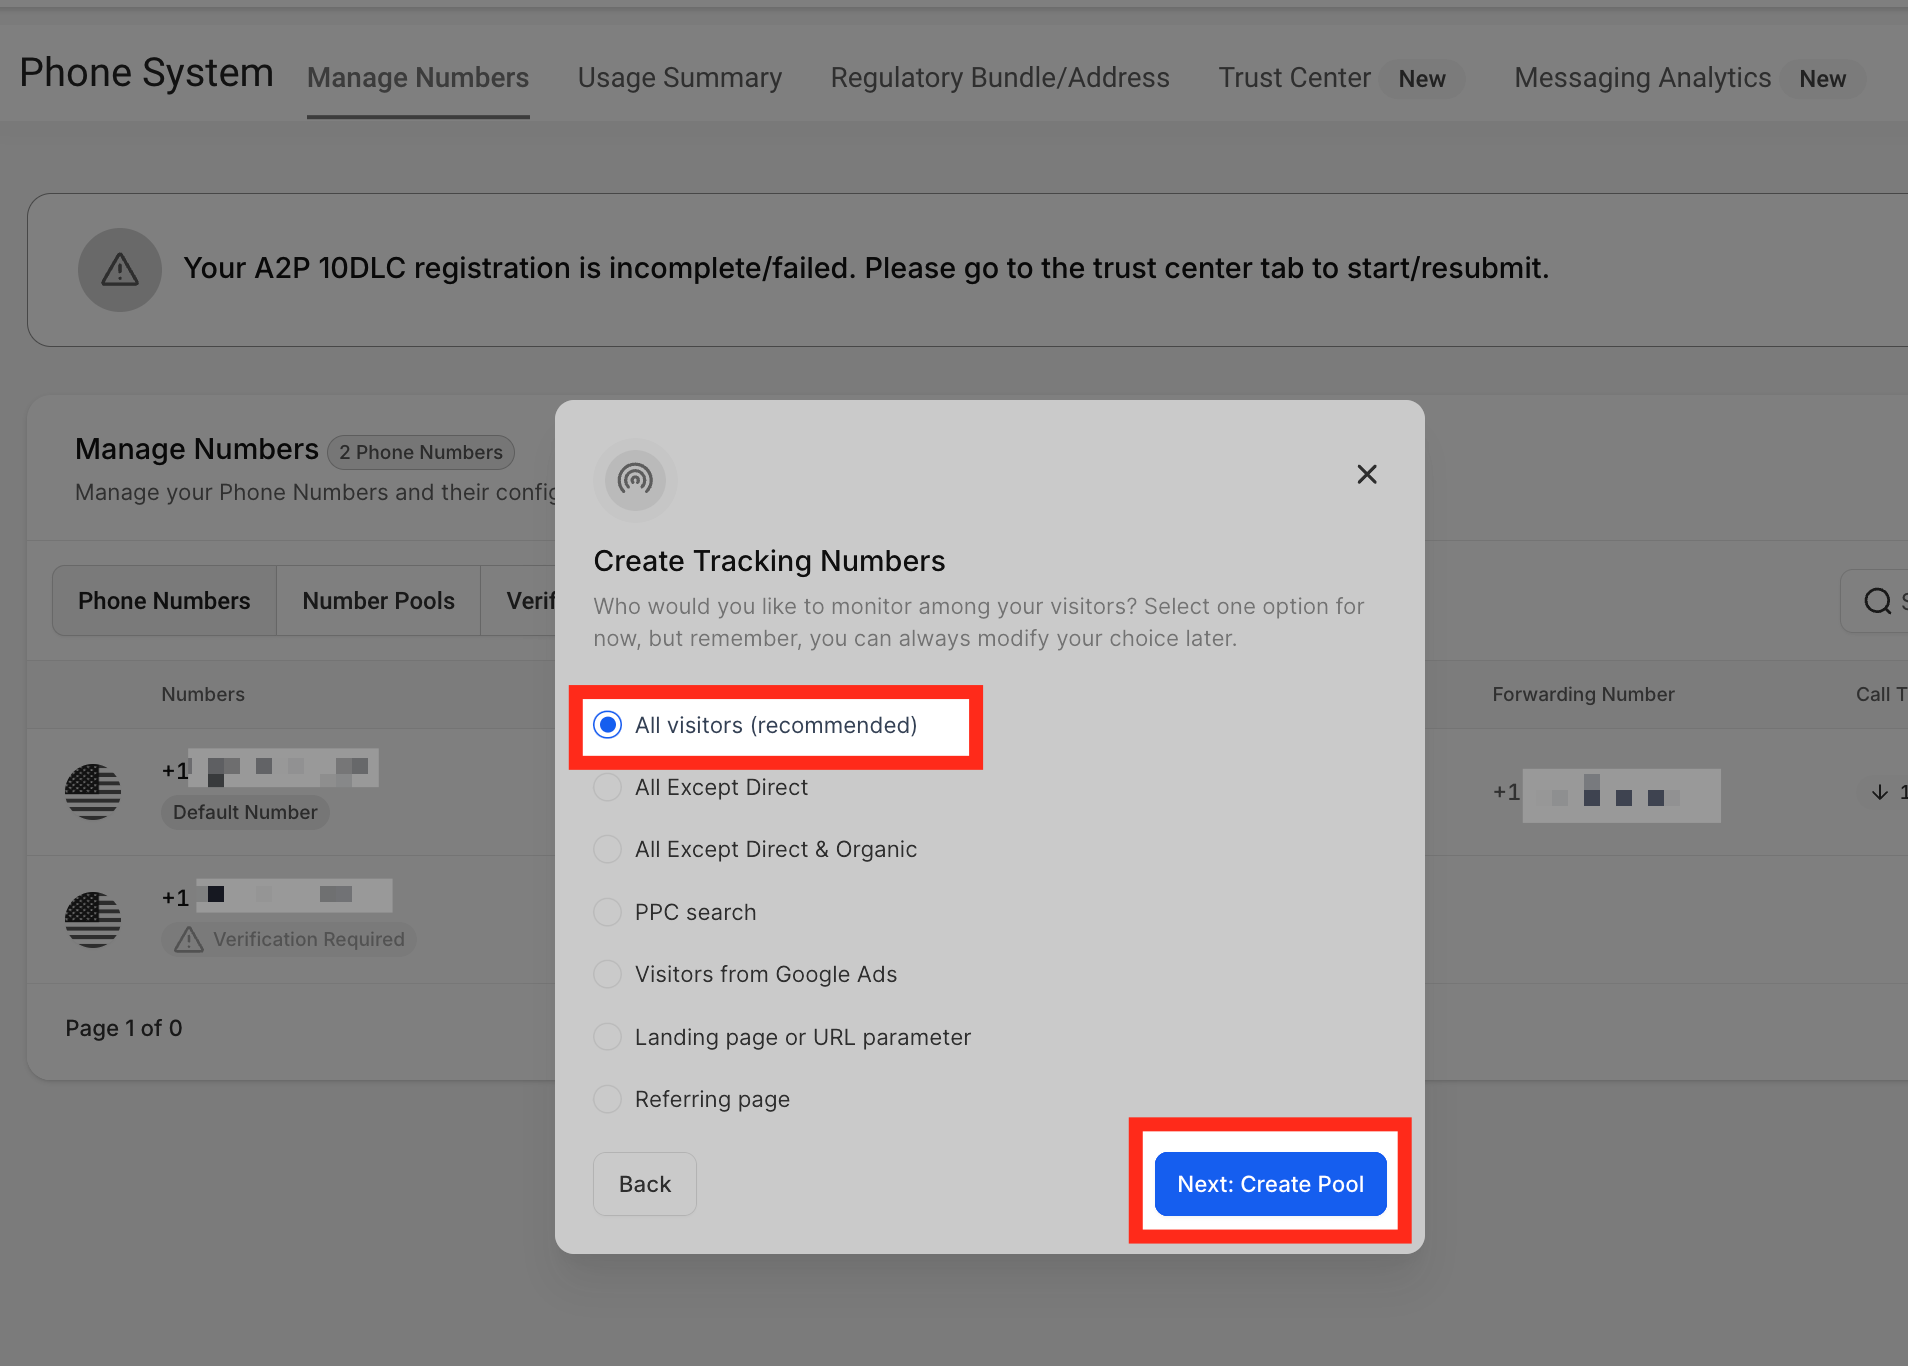
Step 4: Name the Pool and Set the Pool Size
Assign a name to your number pool and choose how many tracking numbers it should contain.
- Number Name: Enter a name for your tracking number or number pool.
- Pool Size: Select the number of tracking numbers to include. Each pool requires a minimum of four tracking numbers.
The appropriate pool size depends on the volume of calls you expect to receive. Higher call volumes may require more tracking numbers.
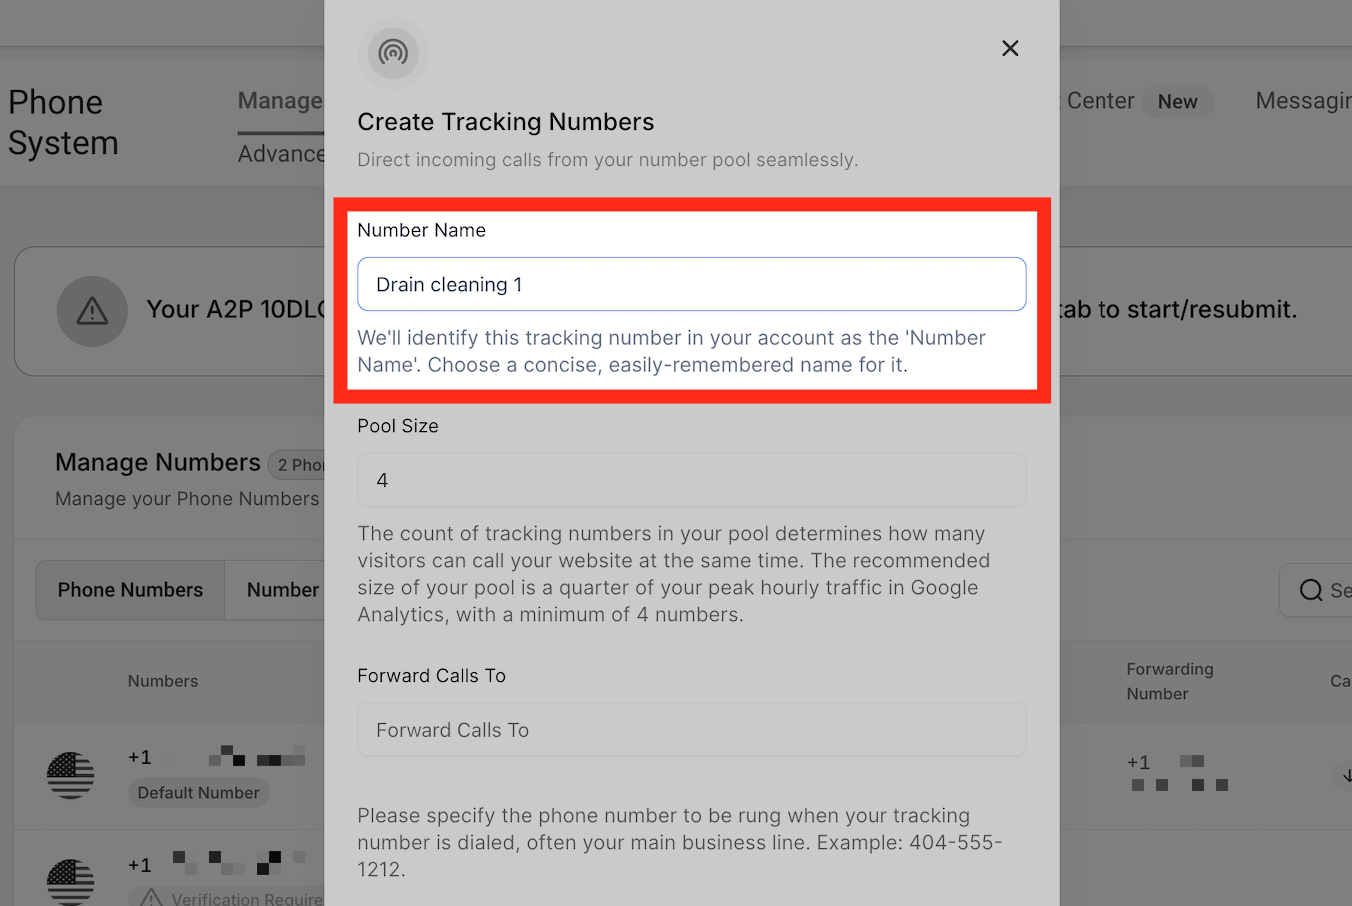
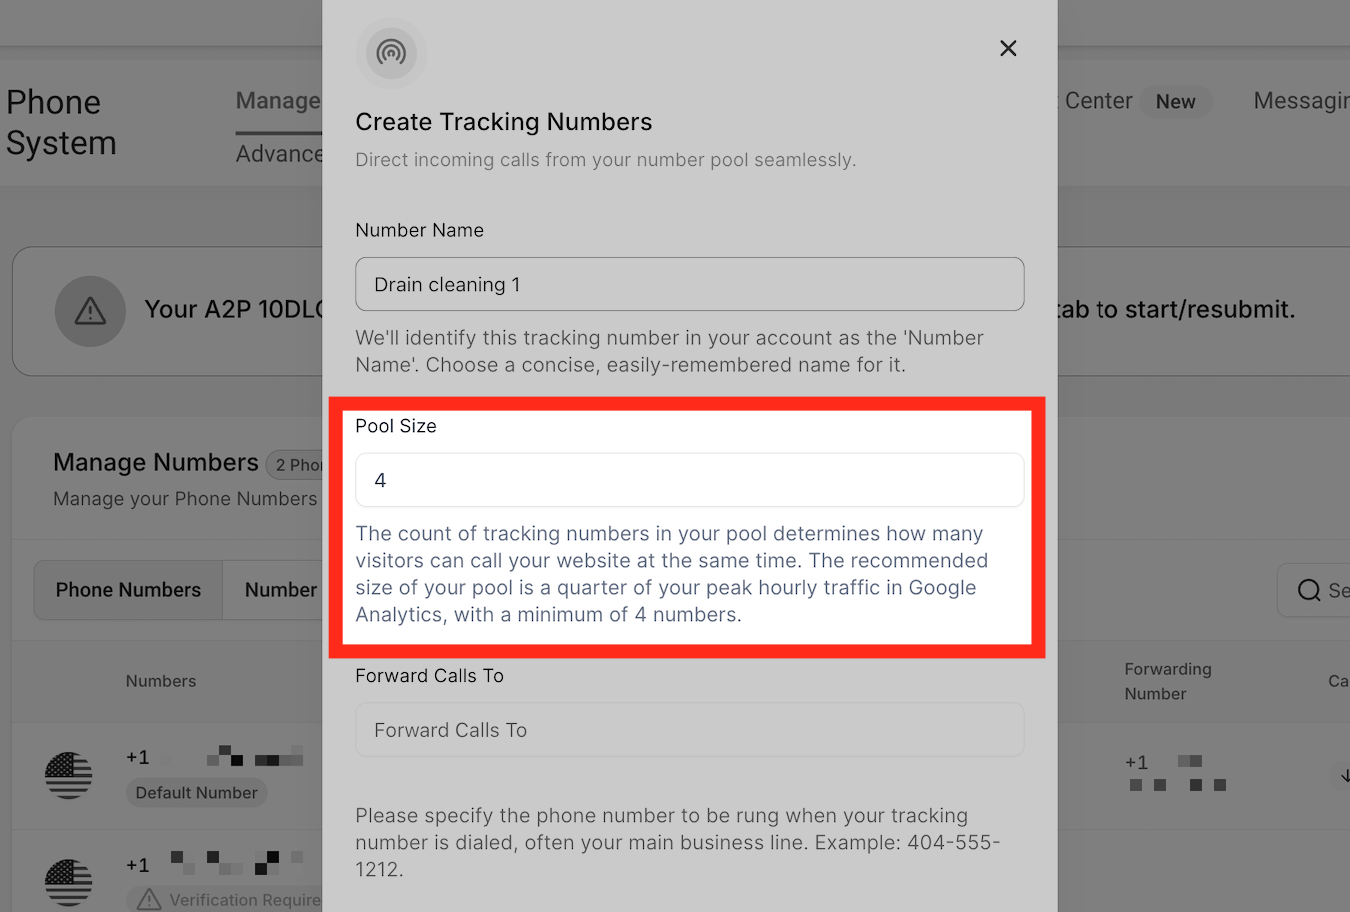
Step 5: Set the Forwarding and Swapping Numbers
Configure where incoming calls should be delivered and which phone number should be replaced on your website.
Forwarding Number: Enter your main business phone number or another external phone number where you want to receive calls made to the tracking number.
Important: Use an external forwarding number. Forwarding calls back into the connected calling system can create a routing loop.
Swapping Number: Enter the phone number you want the tracking script to replace on your website.
The swapping number can match the forwarding number. Alternatively, uncheck the option that uses the same number and enter a different swapping number.
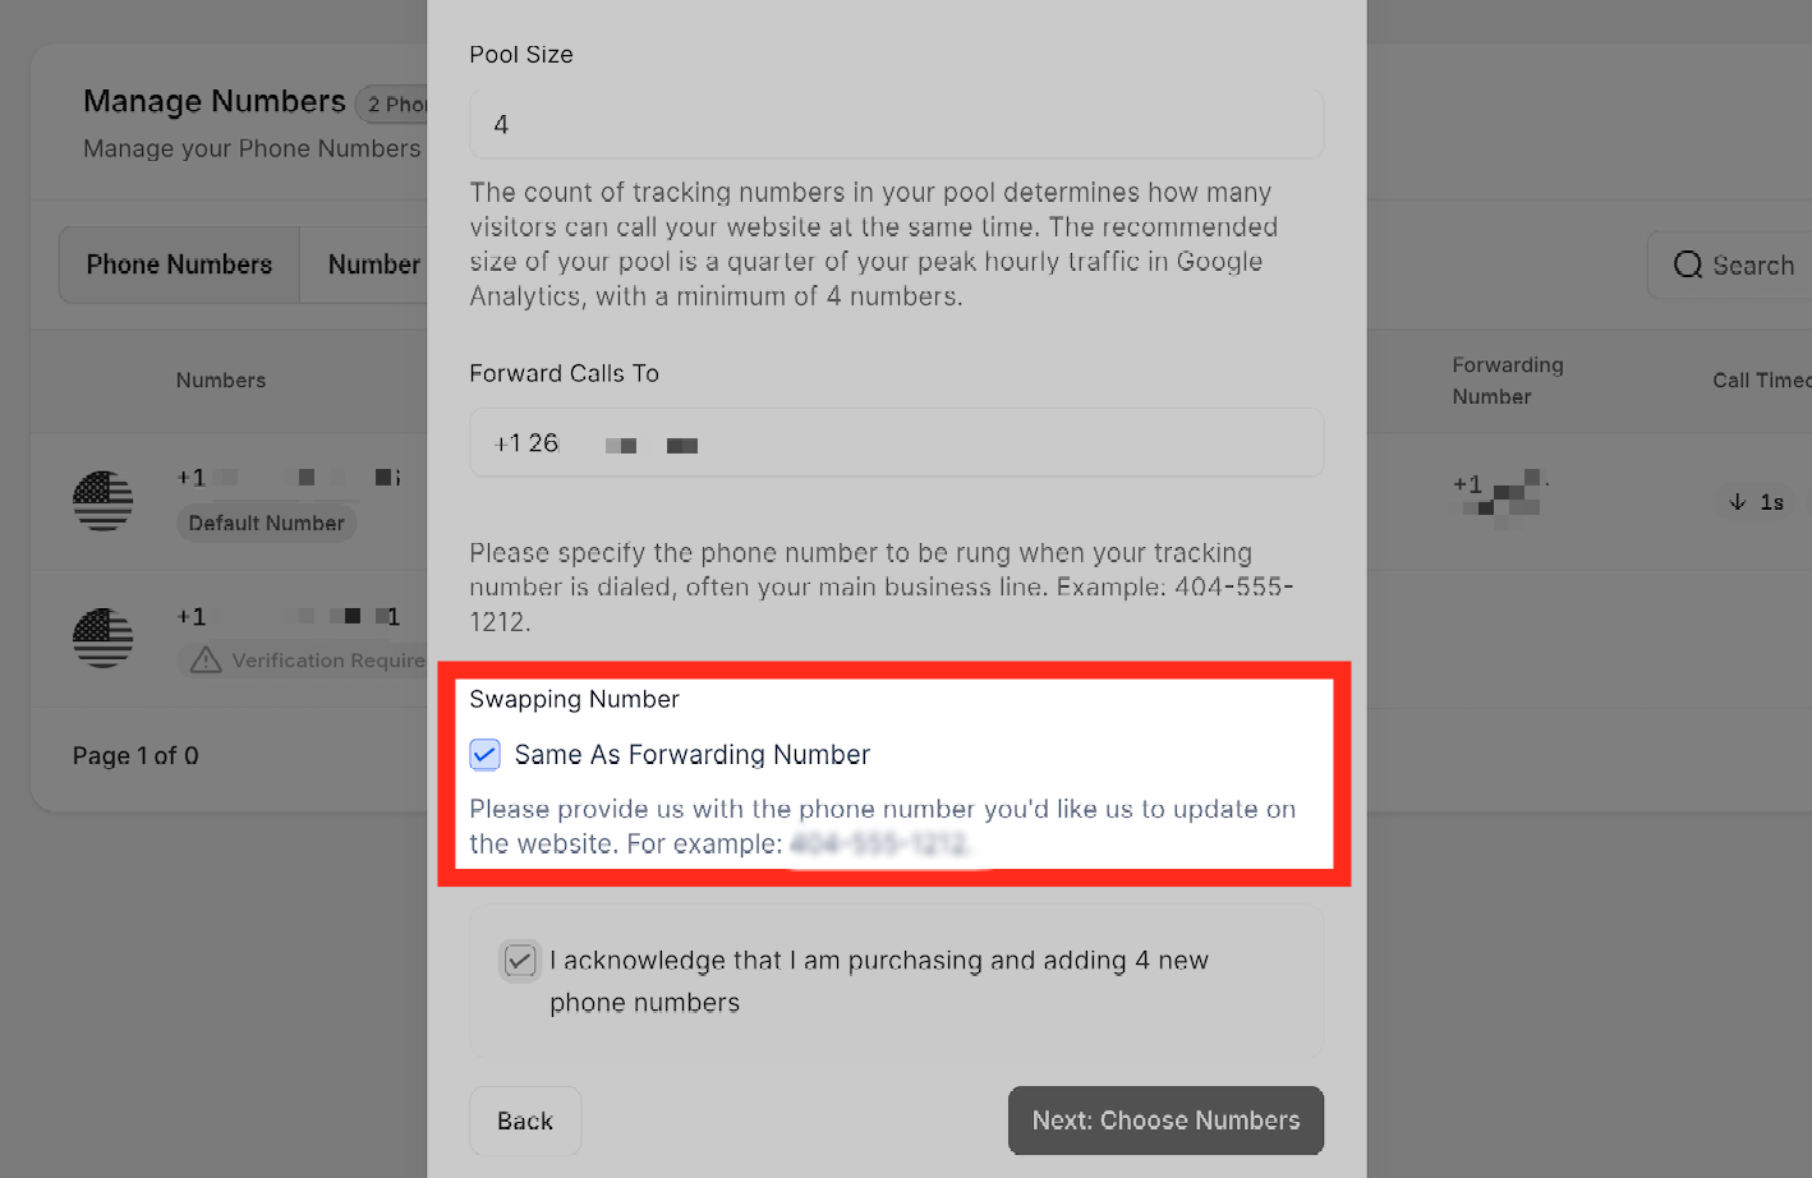
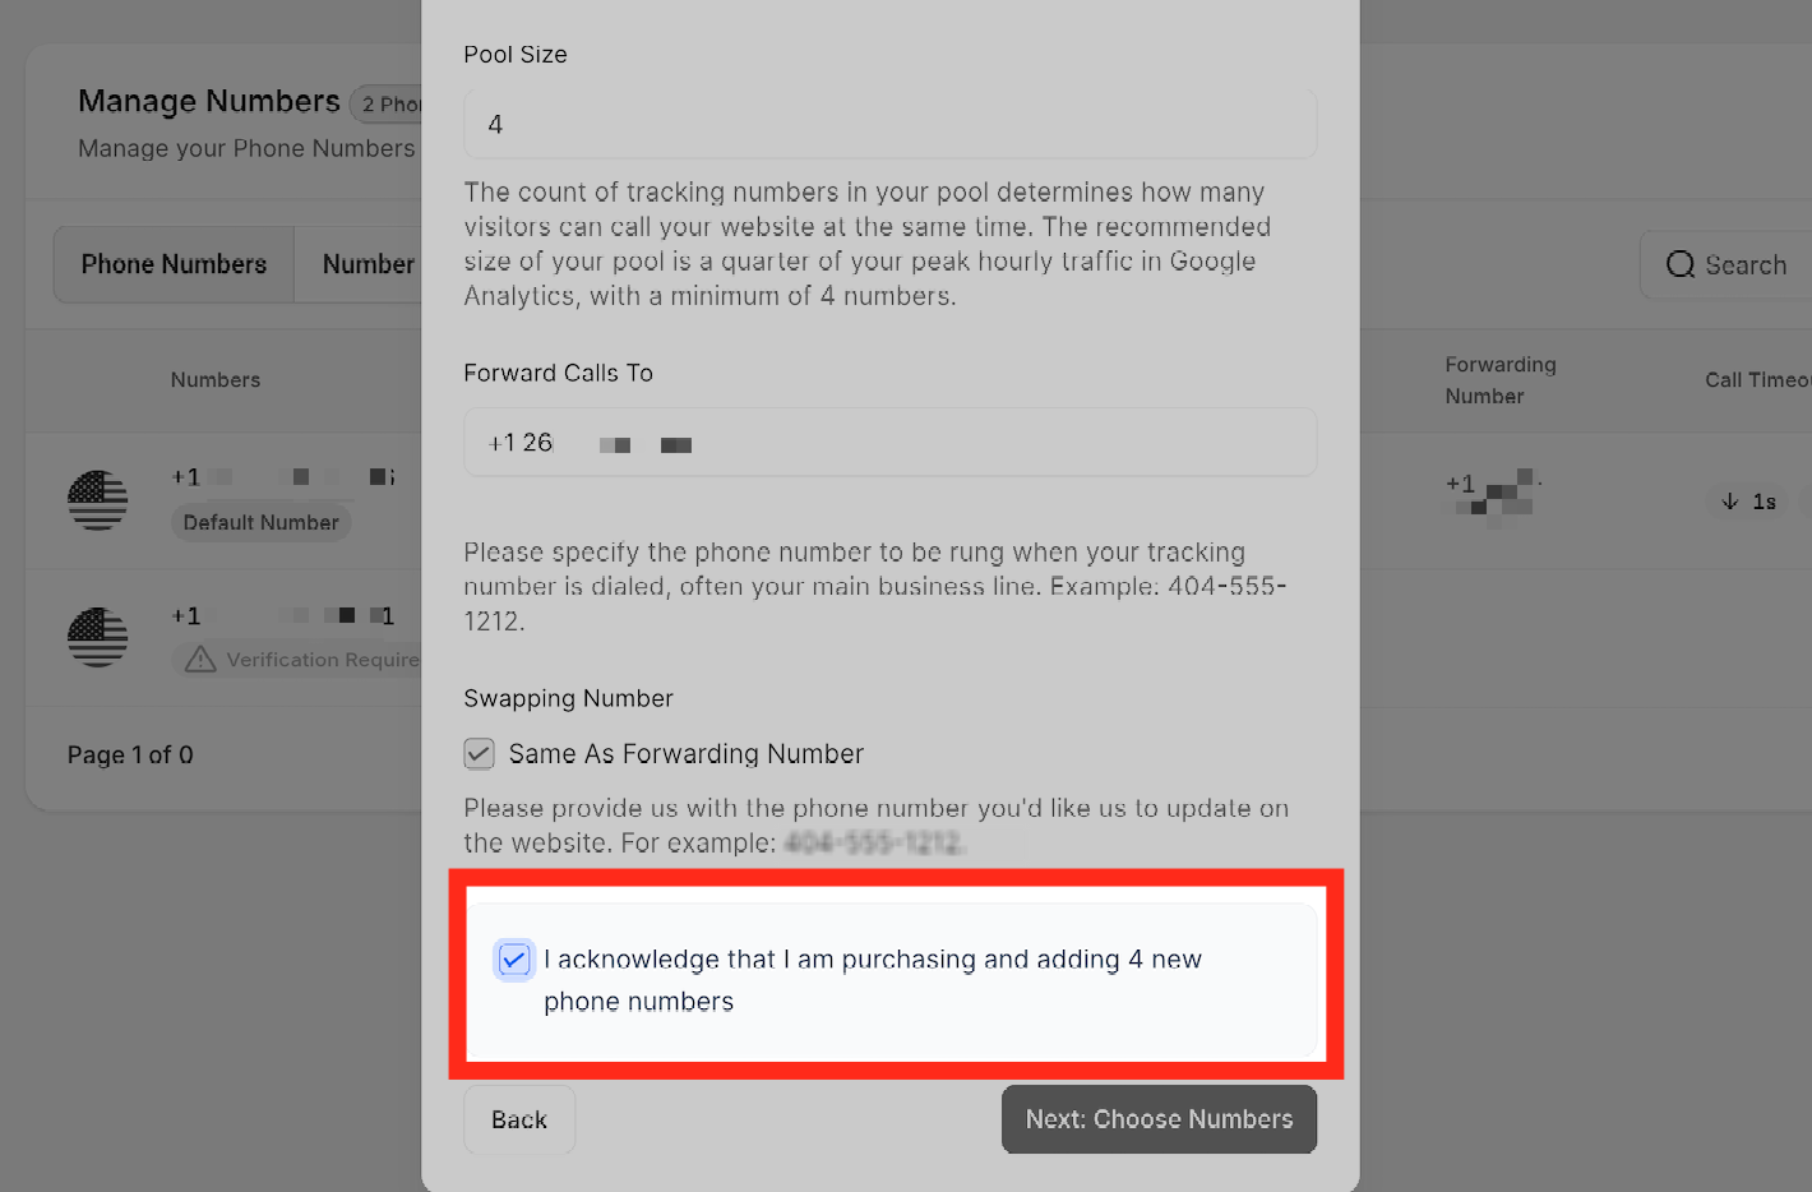
Complete the required configuration fields, then click Next: Choose Numbers.
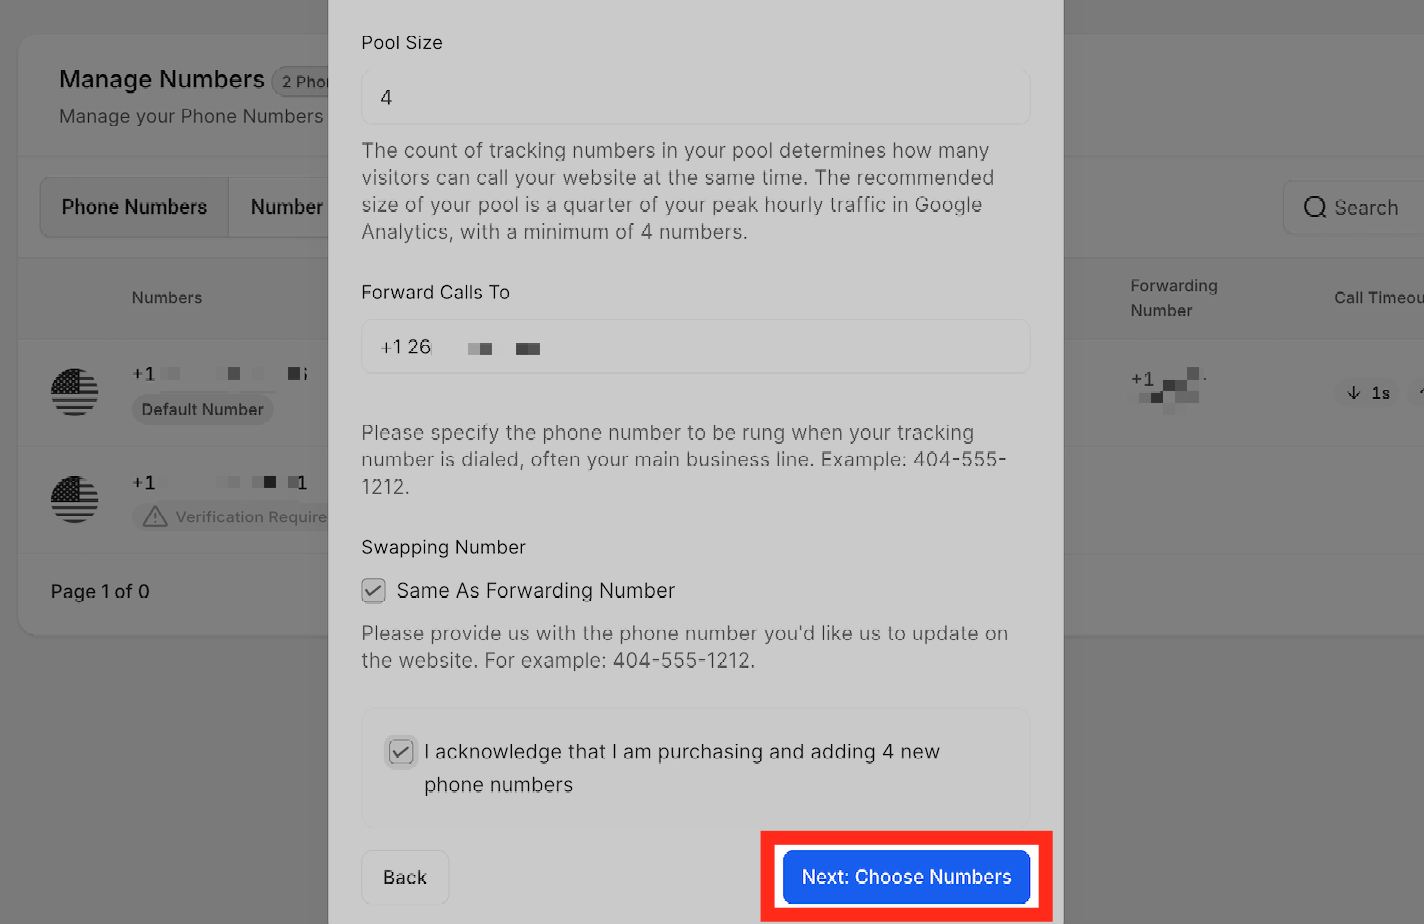
Step 6: Choose Your Tracking Numbers
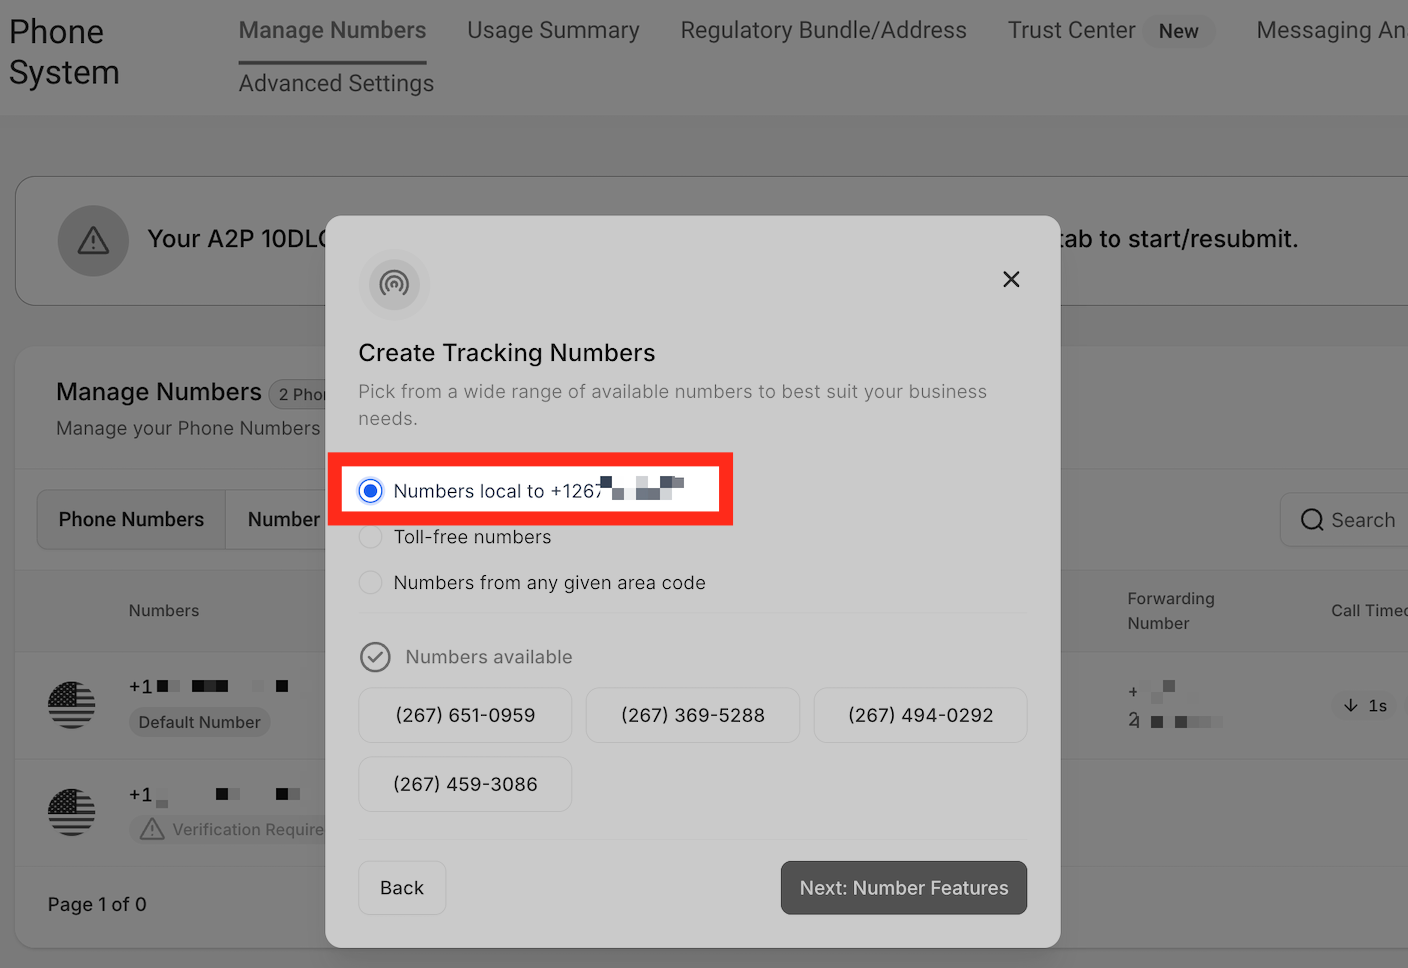
Choose the tracking numbers that will be included in the number pool. Available options include local numbers, toll-free numbers, and numbers from other area codes.
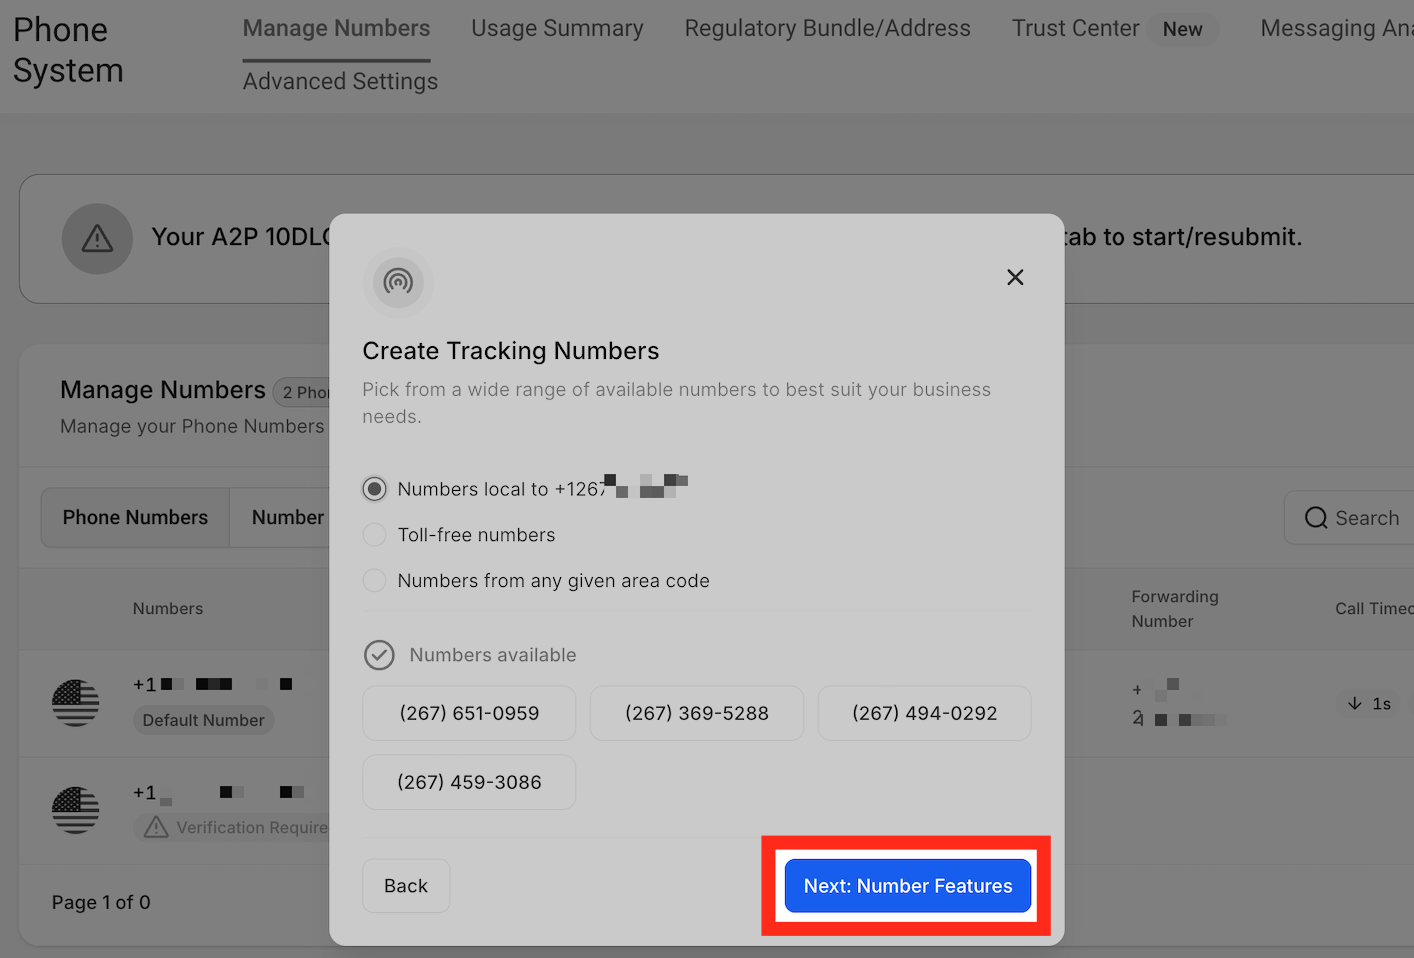
Local Number: Select local phone numbers based on the area code associated with your previously configured forwarding number.
The selection interface displays four available local phone numbers.
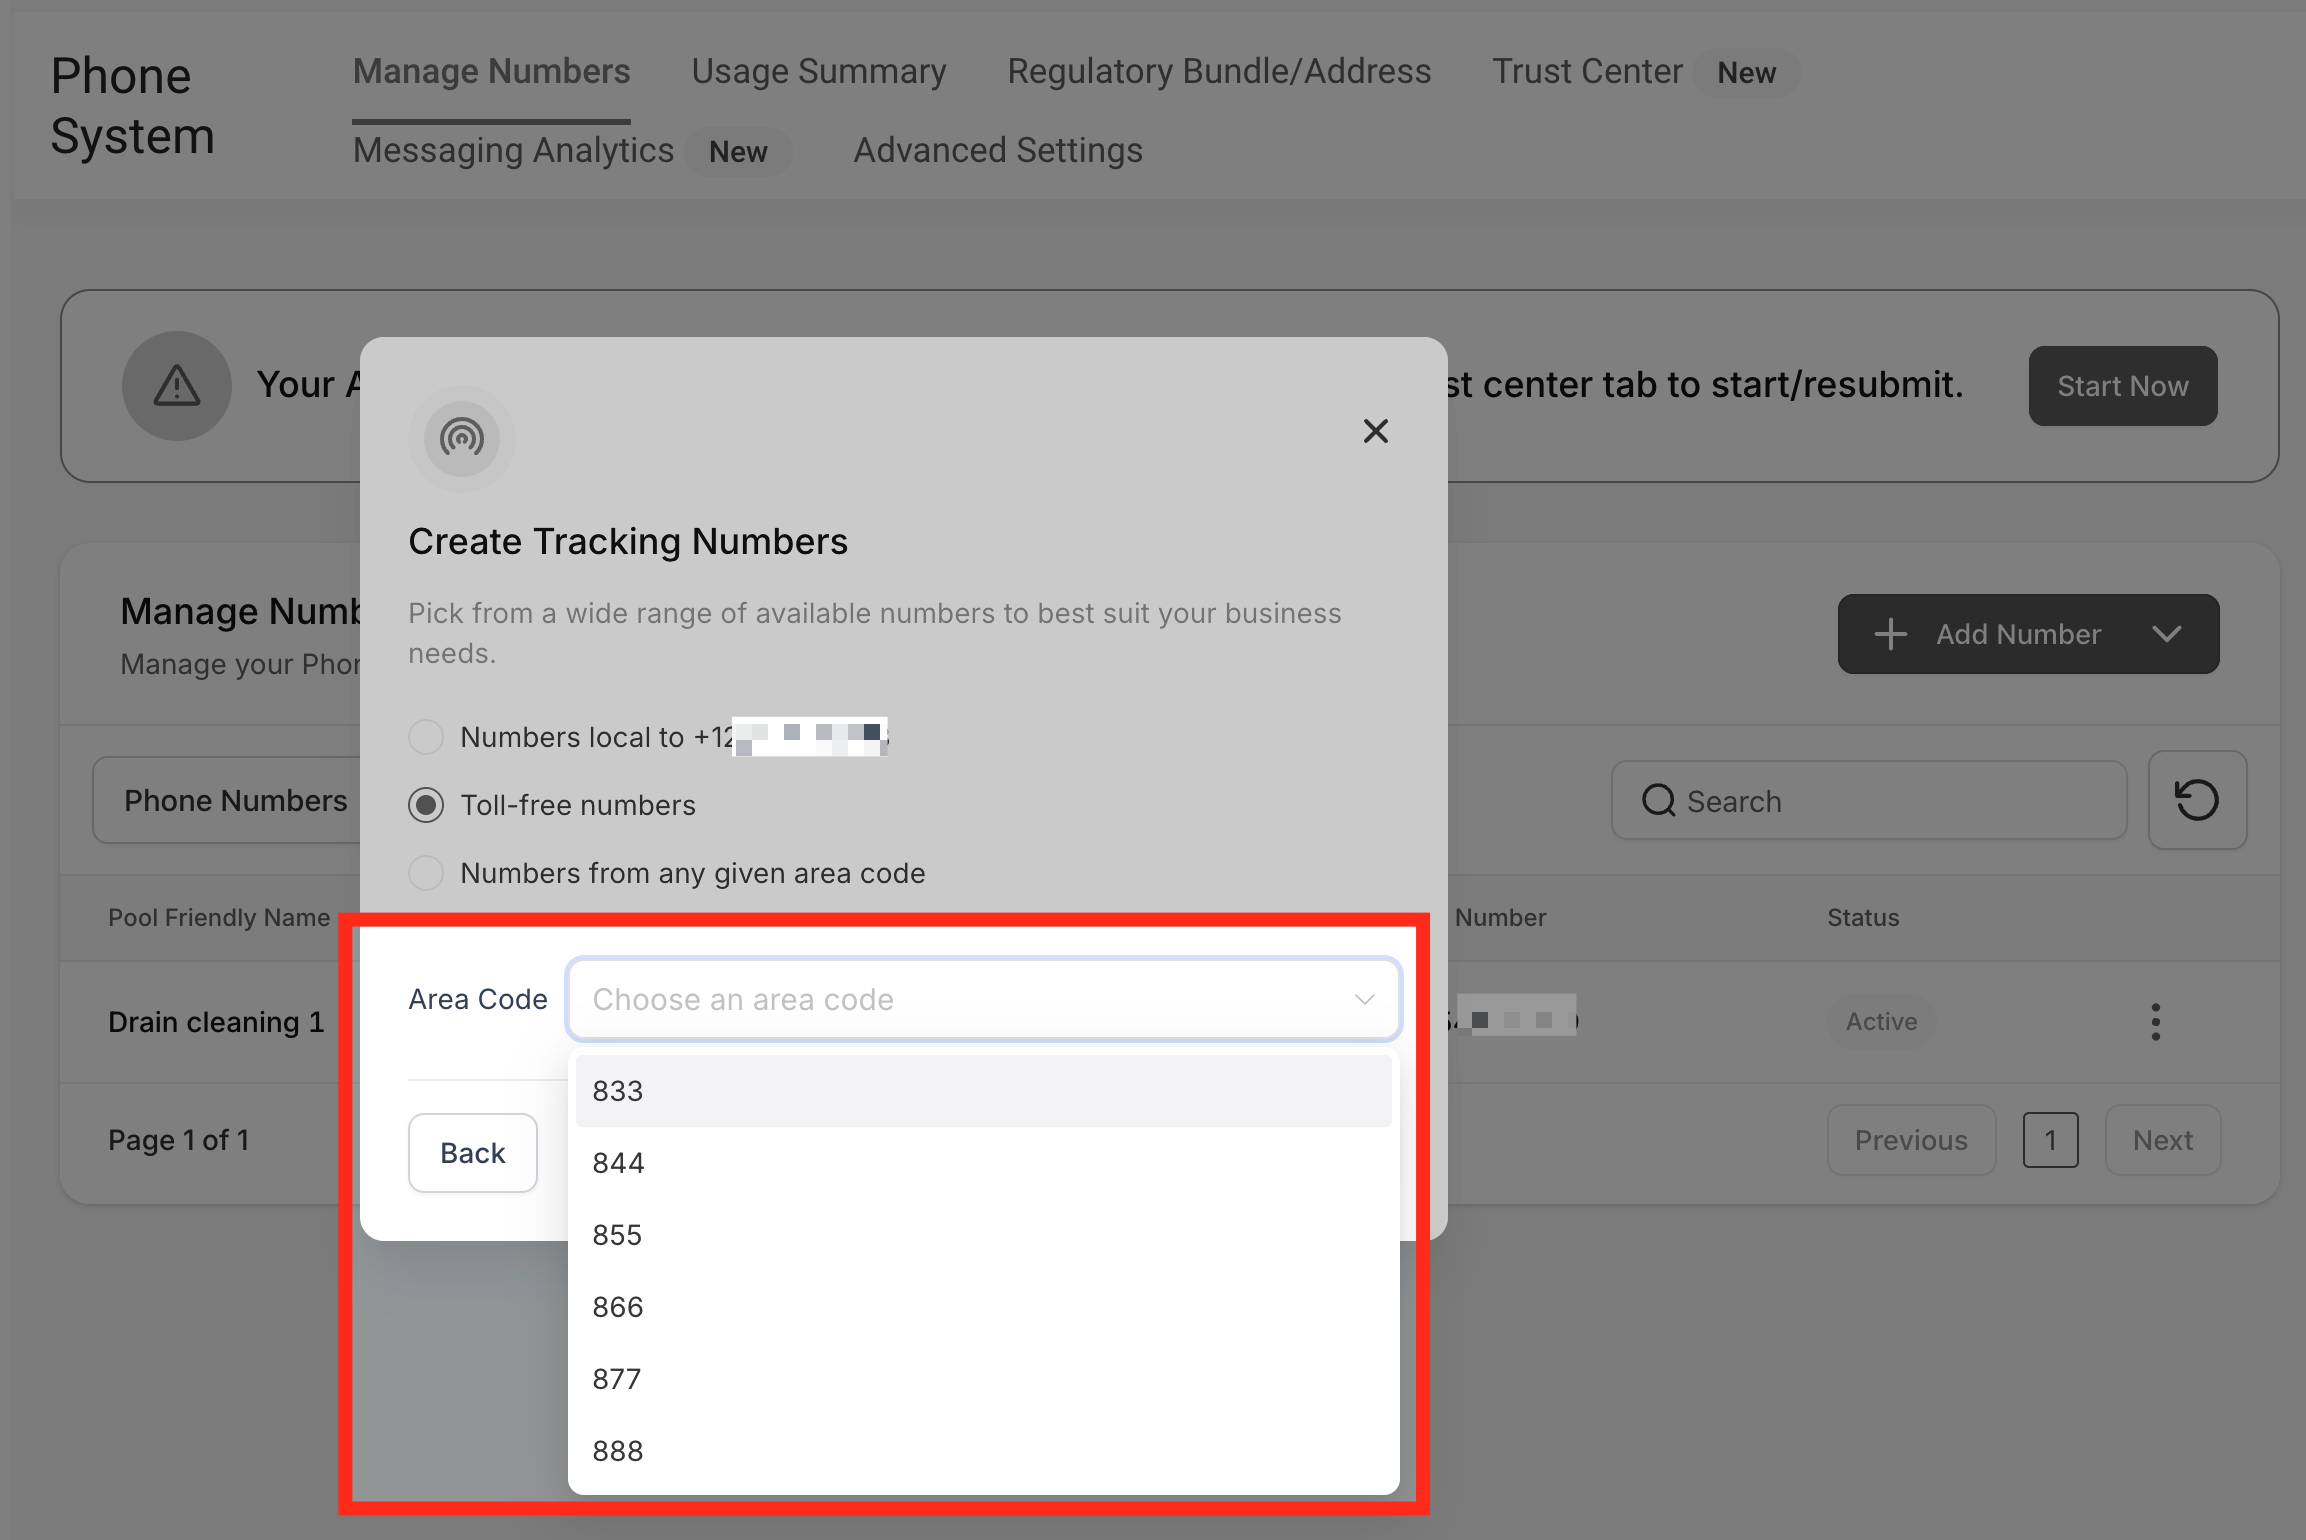
Toll-free numbers: Select toll-free numbers for your pool. This option can be useful when numbers are unavailable in your preferred area code.
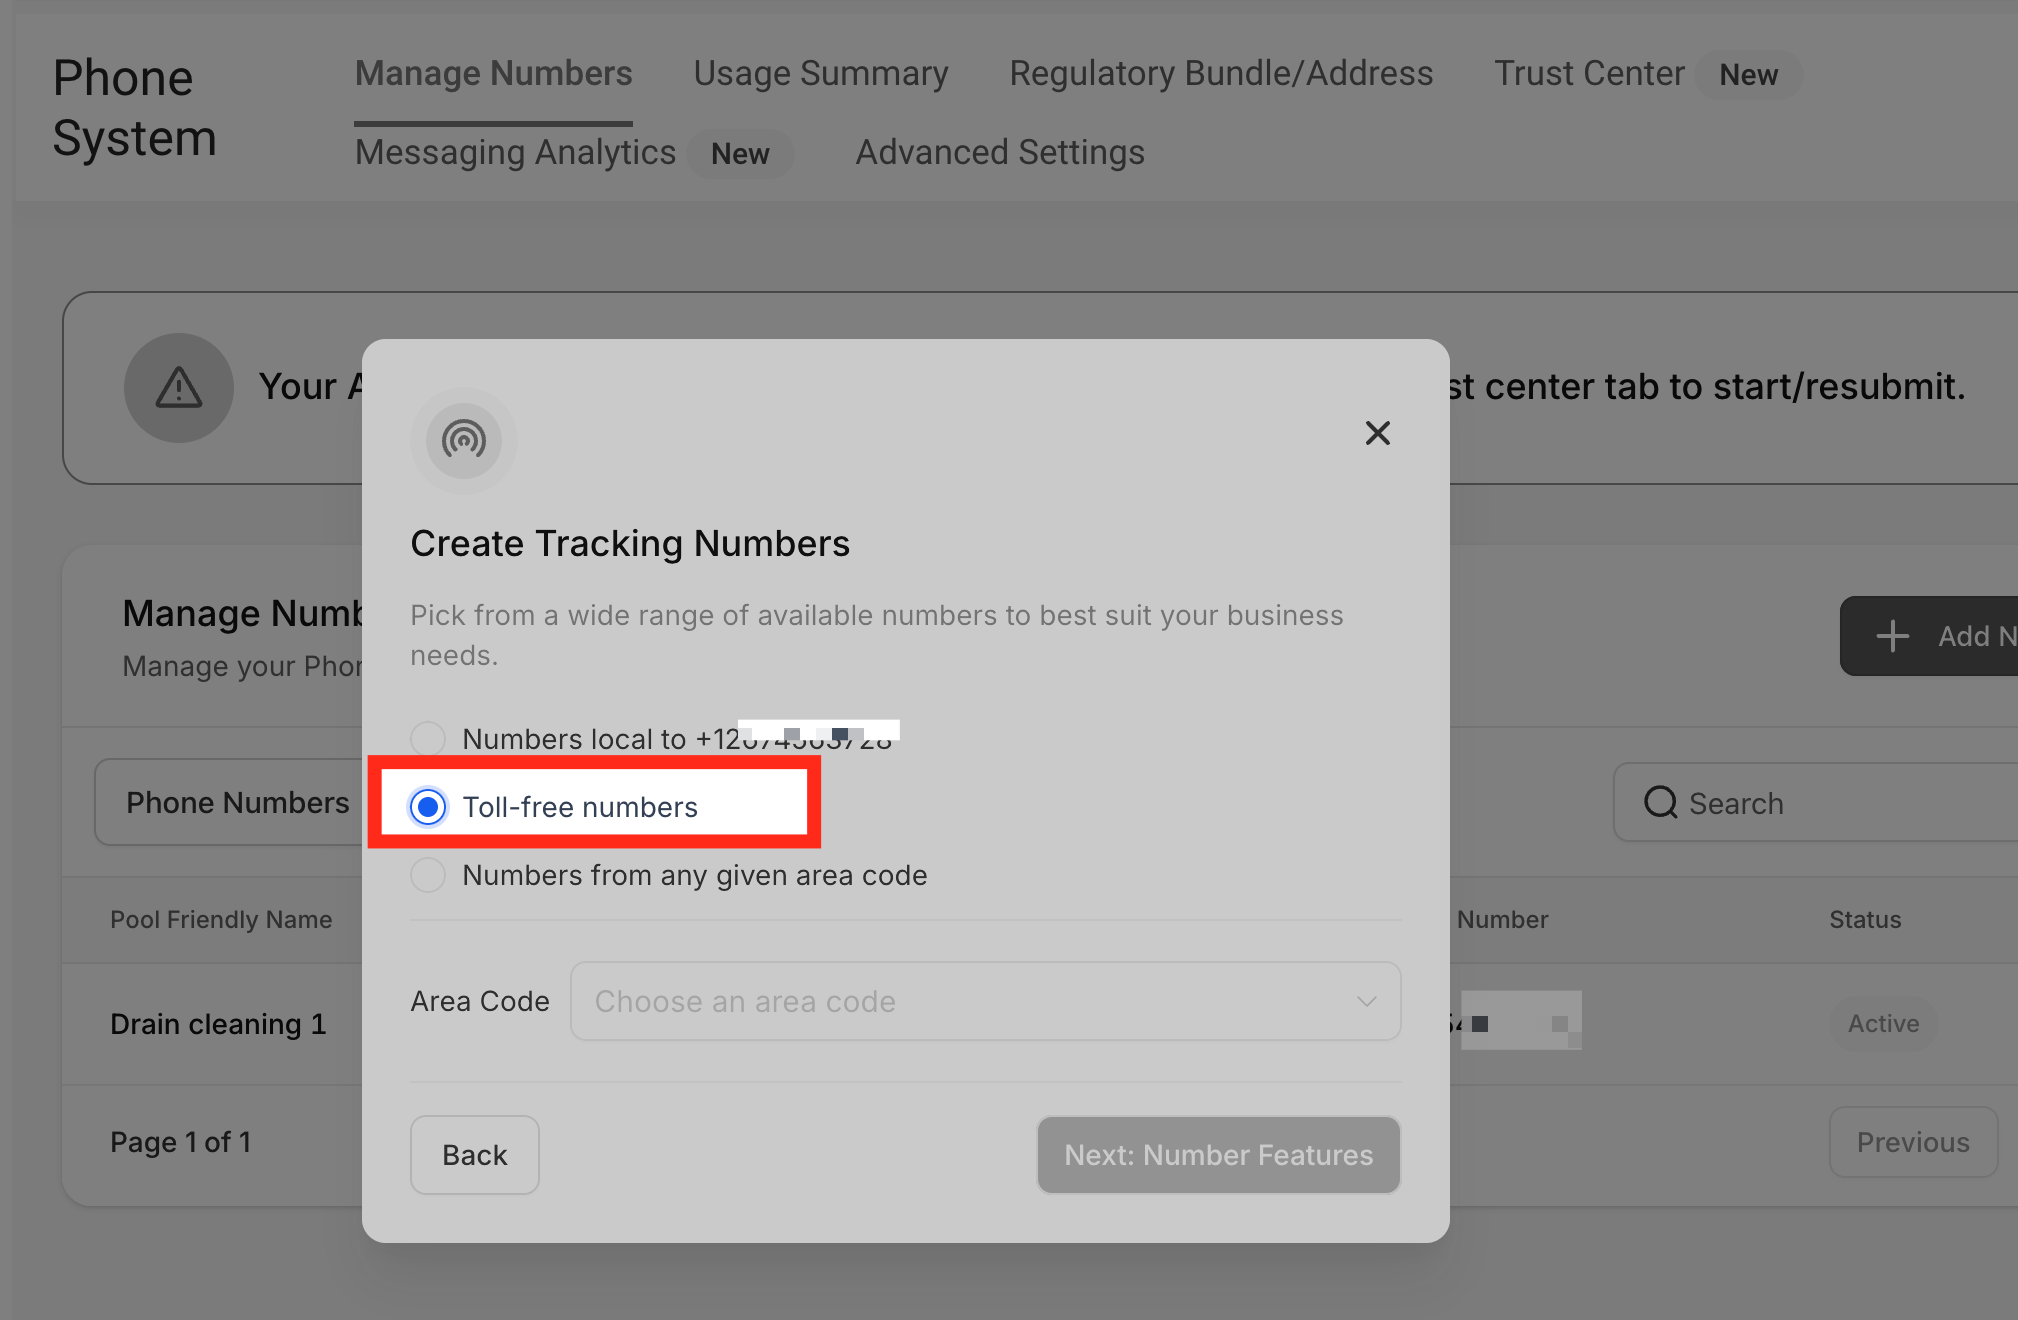
To see available toll-free numbers, select the area code from the dropdown menu.
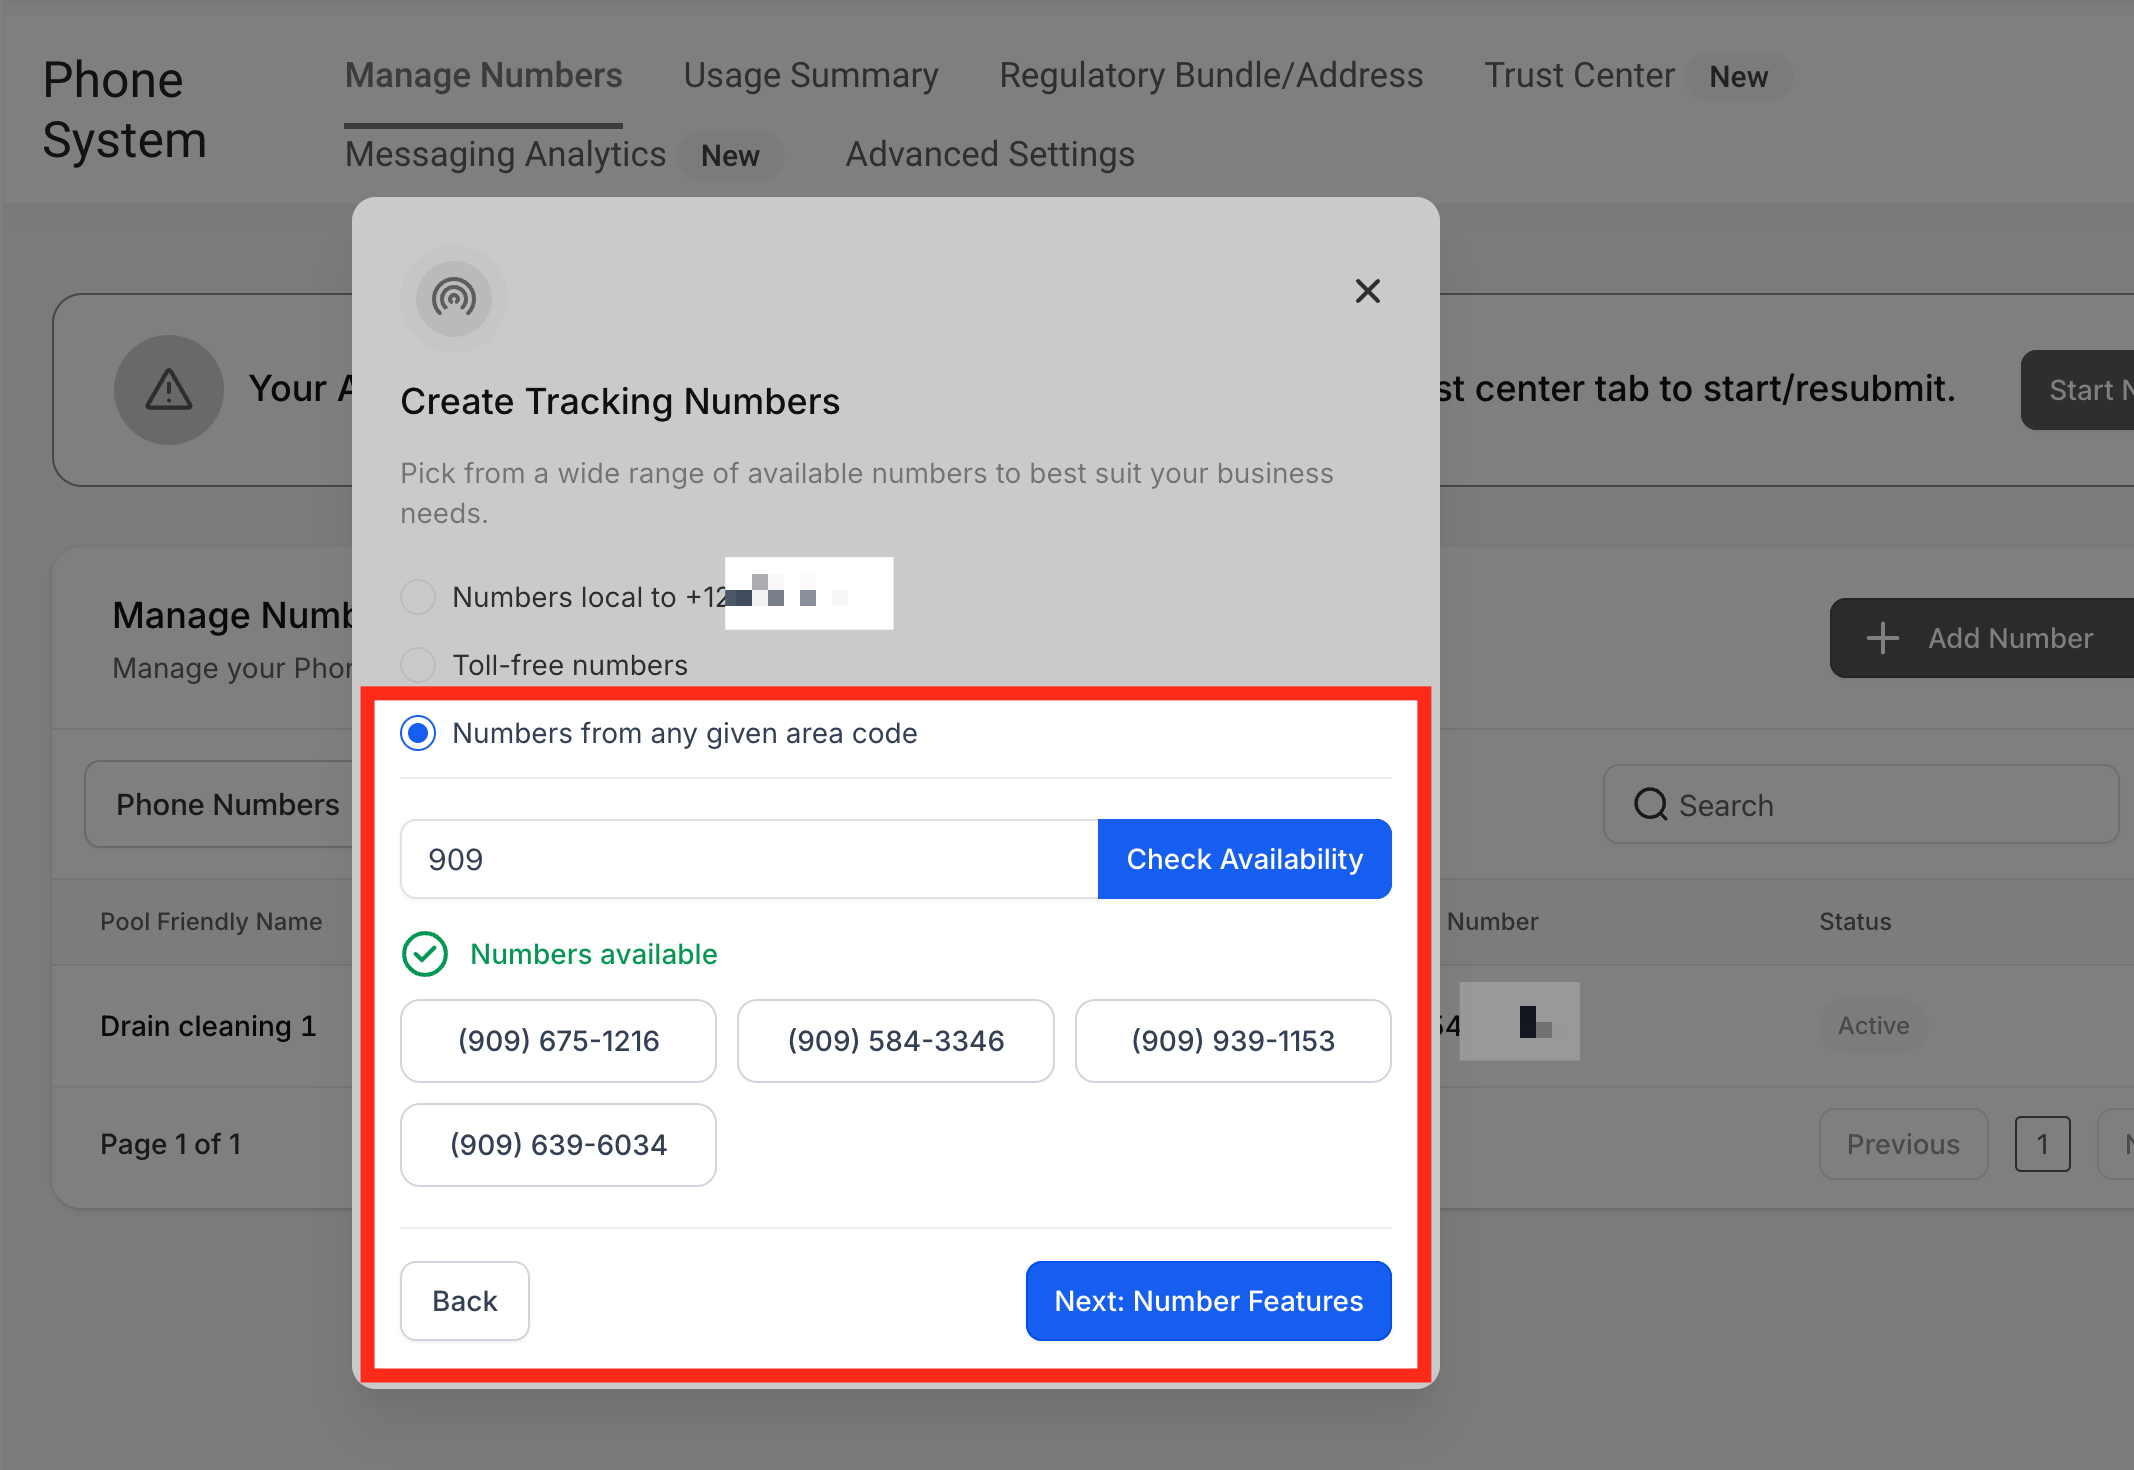
Numbers from another area code: Enter the area code you want to search and click Check Availability to display available phone numbers.
After choosing tracking numbers using one of these methods, click Next: Number Features.
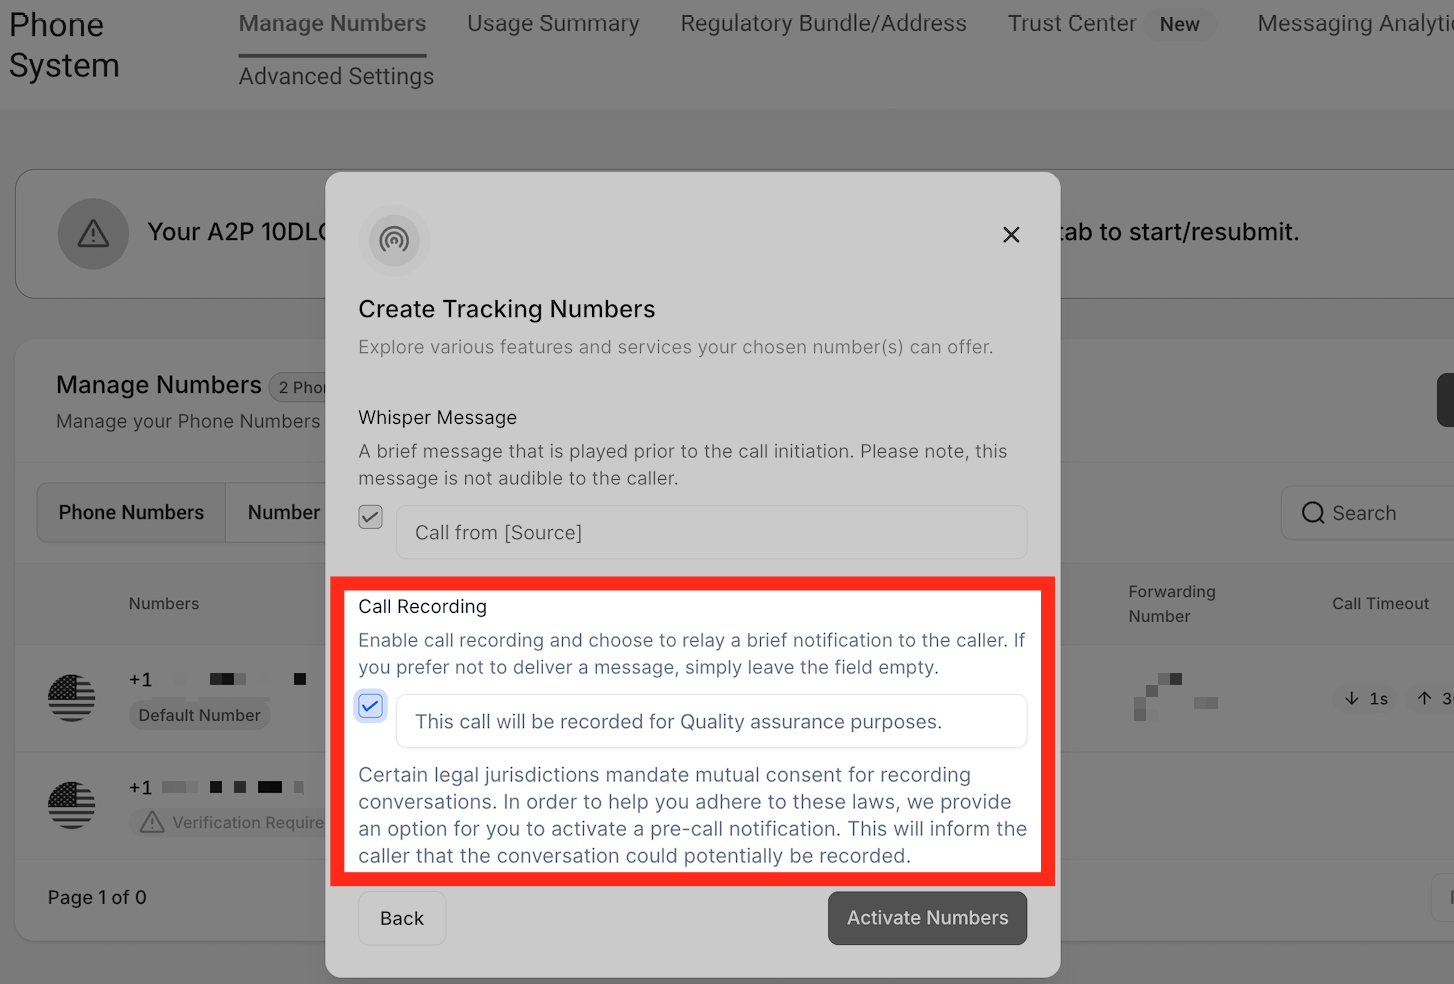
Step 7: Configure Whisper Message and Call Recording
Use number features to control what you hear when answering tracked calls and whether calls are recorded.
Whisper Message: Configure a message that plays to the person answering the call. The caller does not hear the message.
For example, a whisper message such as "Call from [Source]" can indicate that the call originated from an advertising campaign.
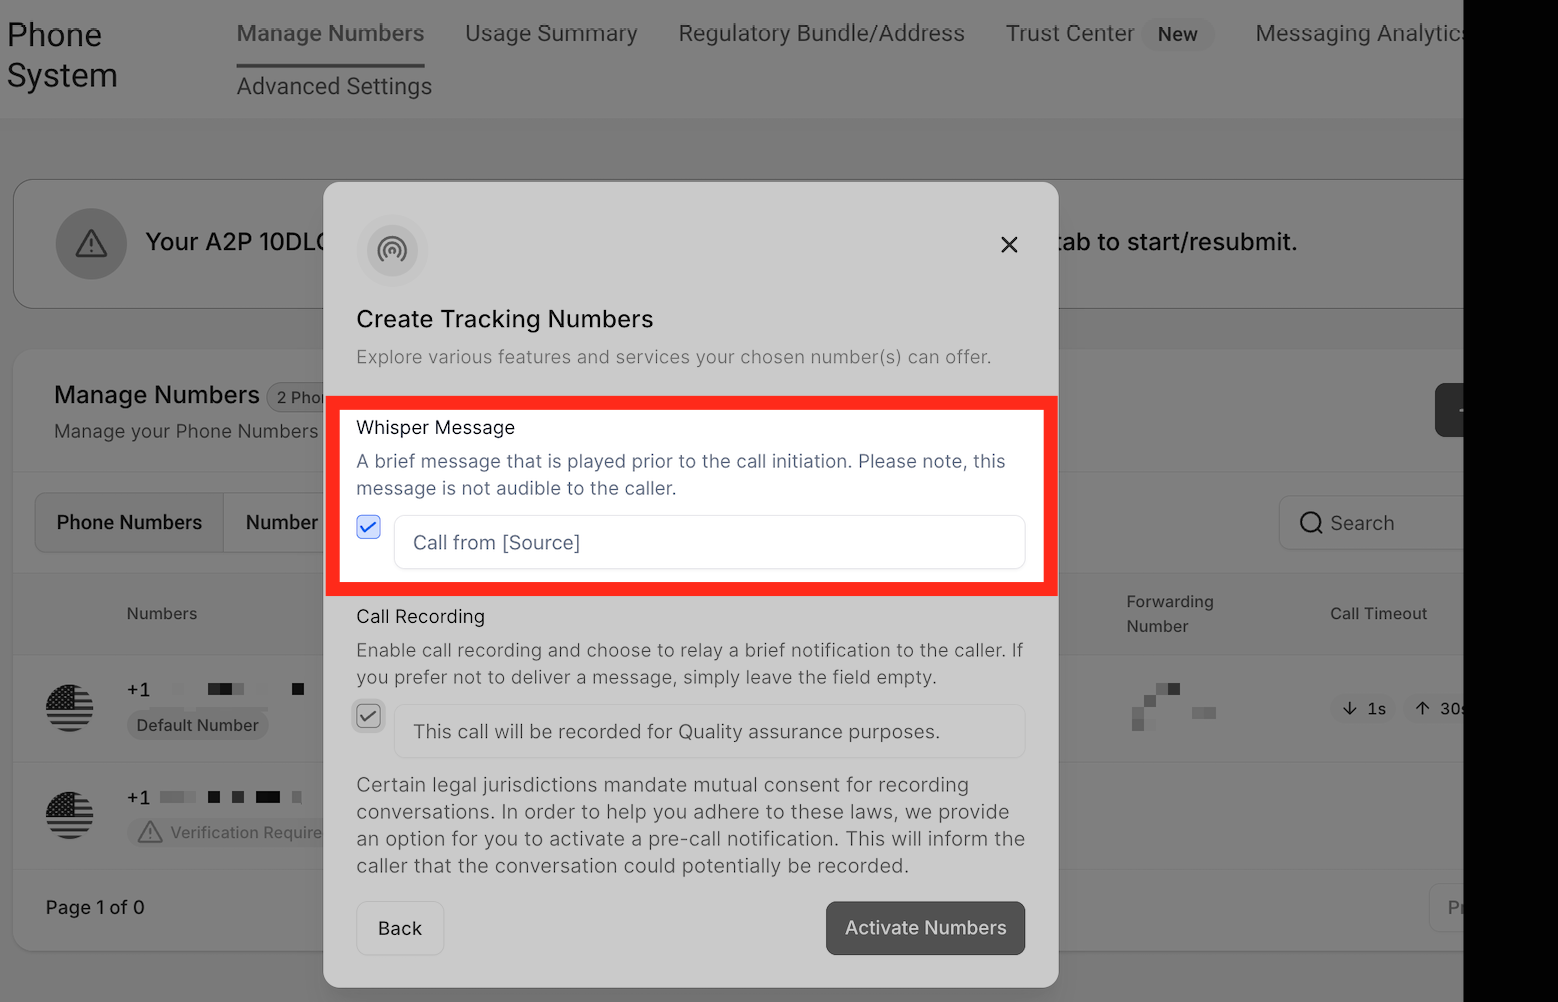
Call Recording: Use the checkbox to enable call recording. You can also customize the message callers hear, such as "This call will be recorded for quality assurance purposes."
Step 8: Activate the Number Pool
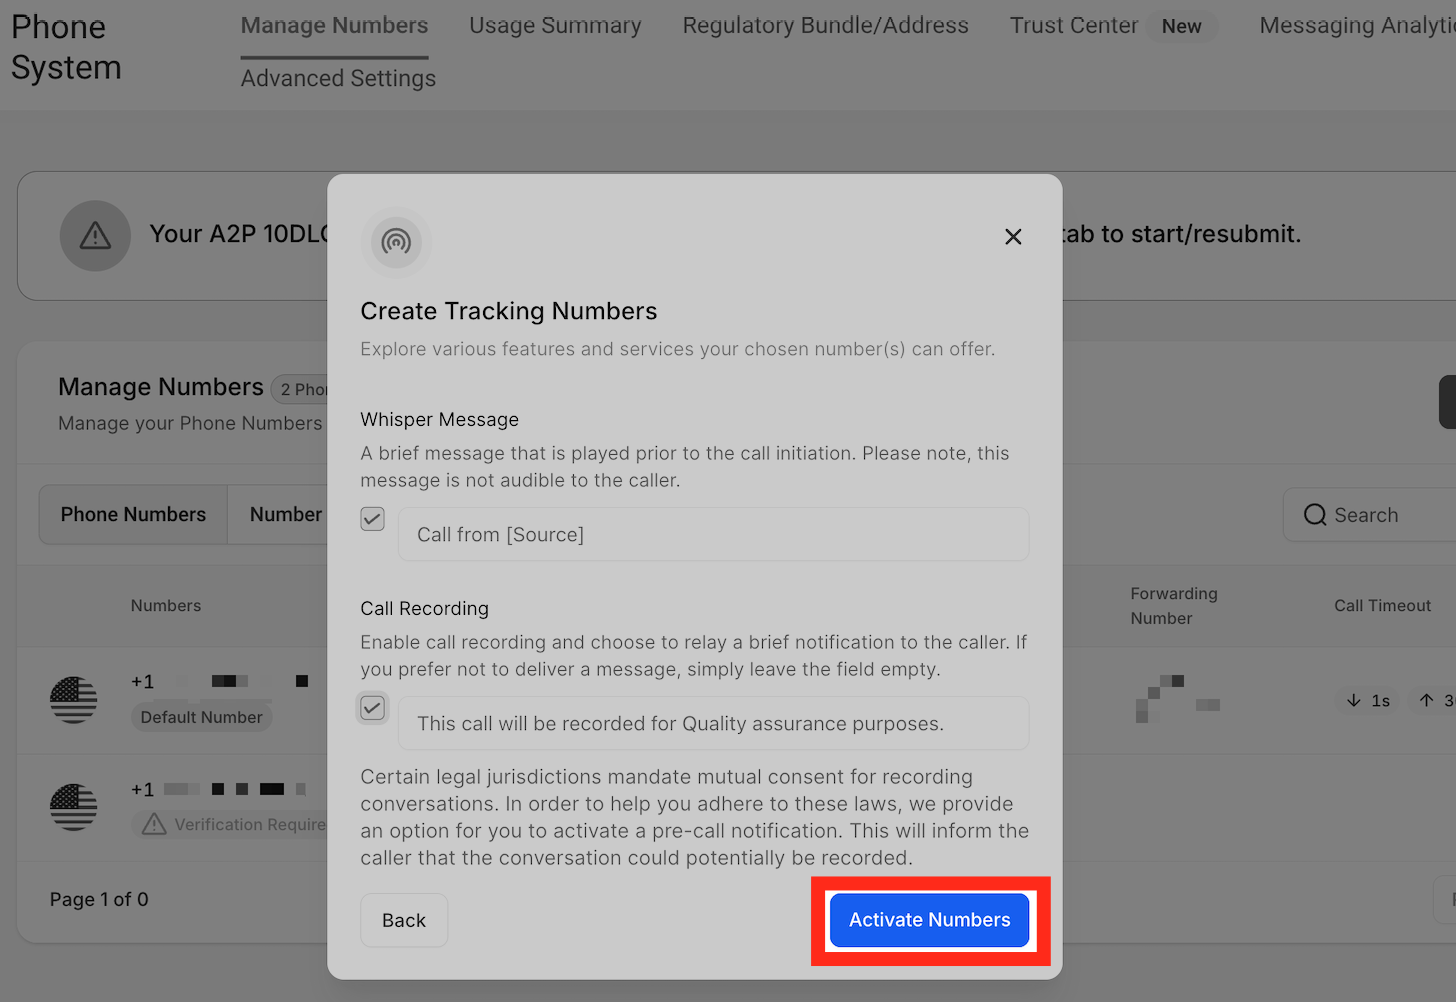
After completing the number and call-feature settings, activate the number pool to finish its configuration.
- Review the configured number pool.
- Click Activate Number.
Ring Number Pool Calls to Multiple Users
Configure number-pool calls to ring up to six team members simultaneously. Each selected recipient receives incoming calls through their configured receiving channel, which can be the web app, mobile app, personal phone number, or SIP deskphone.
Choose Each User's Receiving Channel
Set each team member's preferred receiving channel before selecting them as a number-pool recipient. Different team members can receive the same incoming call through different channels.
- Click Settings.
- Select Users or My Staff, depending on the displayed menu label.
- Find the team member and click Edit.
- Open Call & voicemail or expand Call & Voicemail Settings, as labeled.
- Under Default Channel for Ring All, select one of the following:
- Web App
- Mobile App
- My Phone Number
- Deskphone (SIP)
- Web App
- Click Save.
- Repeat these steps for other team members who should receive number-pool calls.

Select the Number Pool's Recipients
Choose the team members who should receive incoming calls from a specific number pool. Recipient selection is configured within the pool's settings.
- Click Settings.
- Select Phone System.
- Open the Phone numbers tab.
- Under Manage Numbers, select Number Pools.
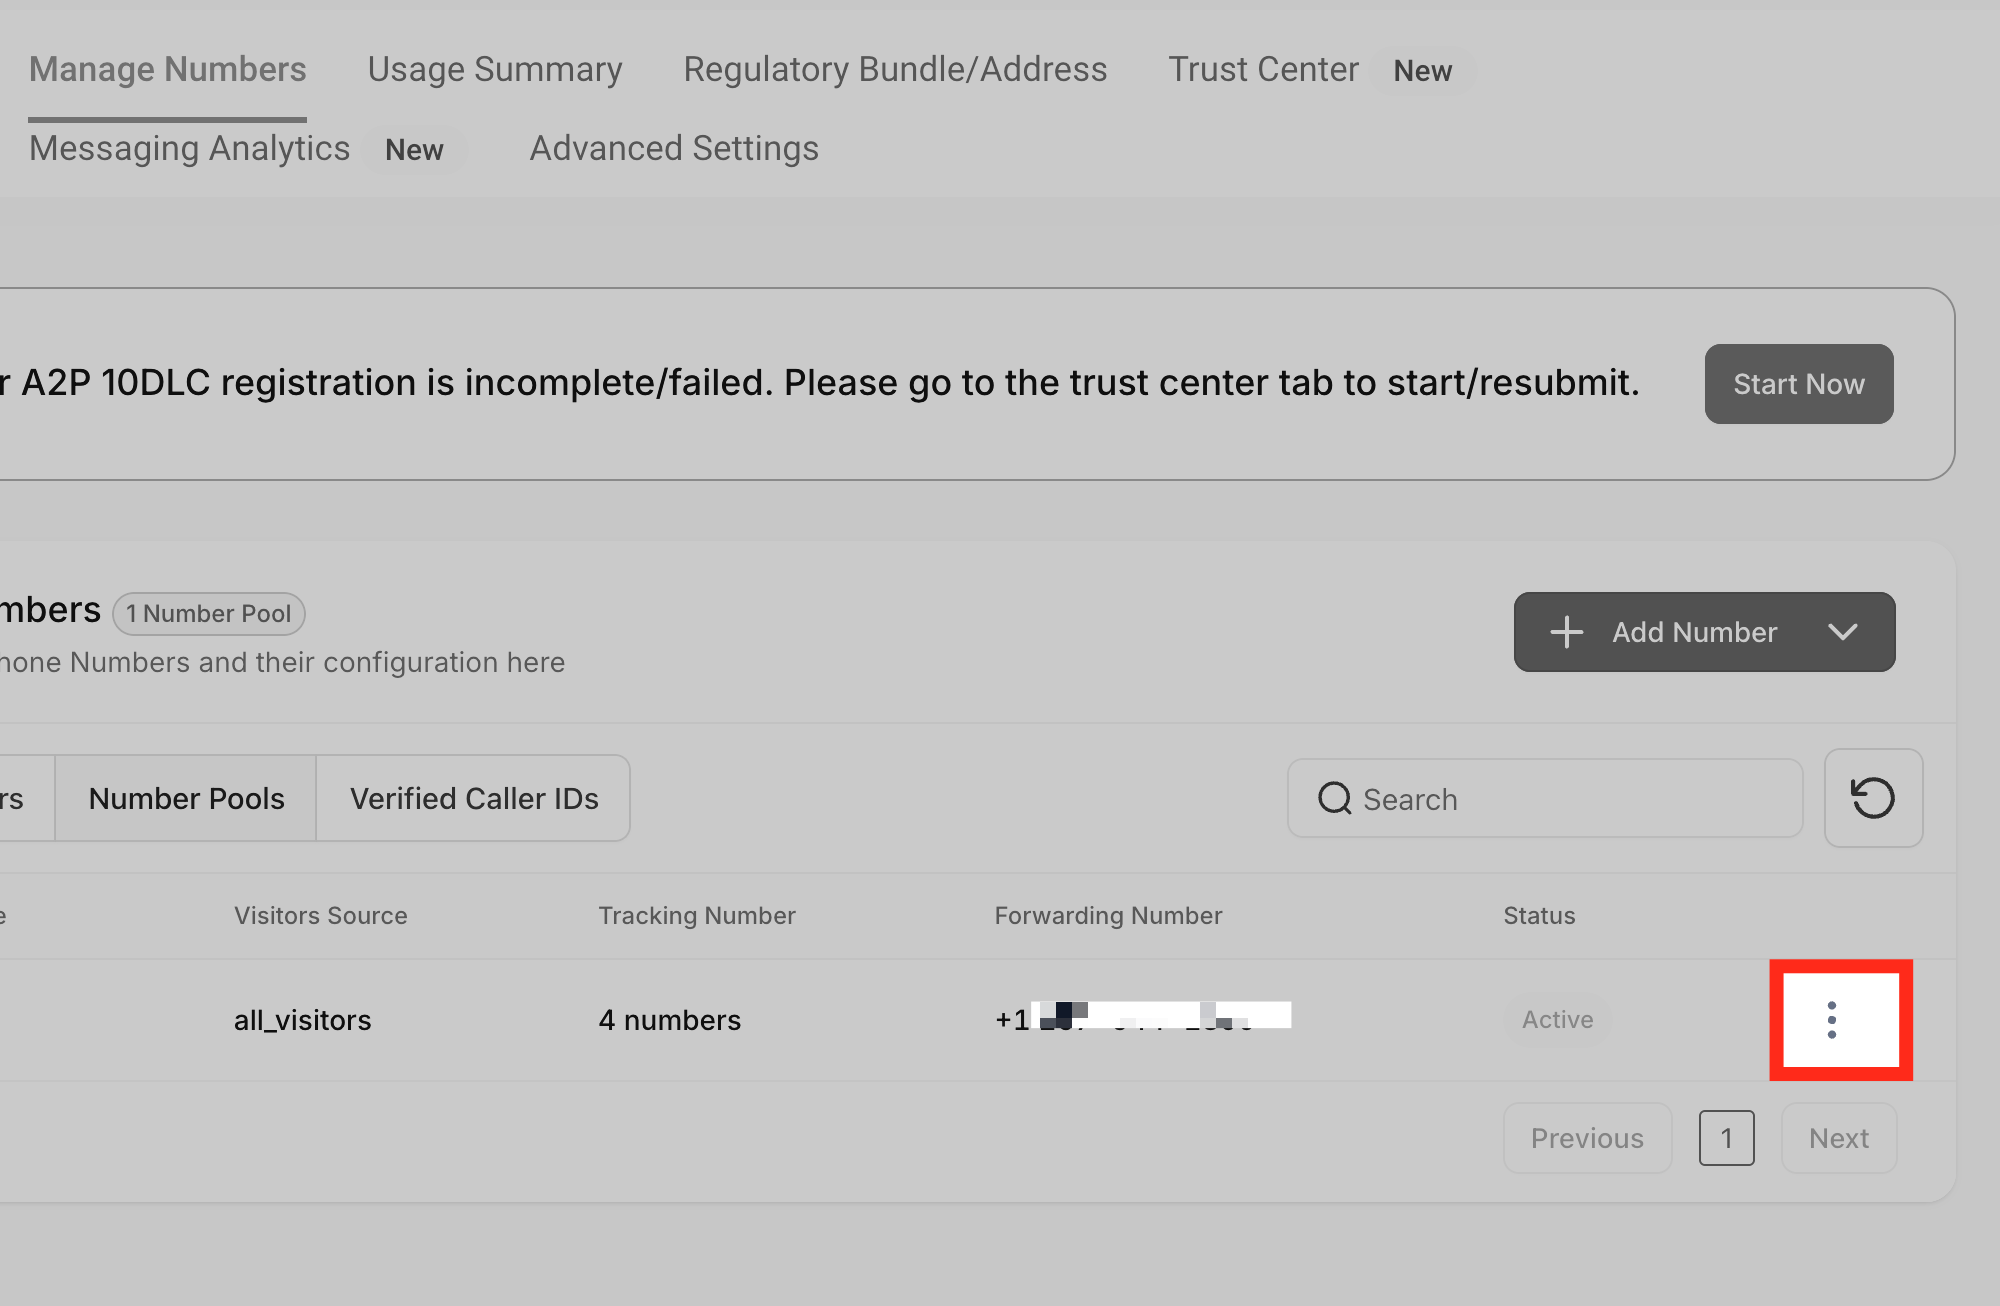
- Locate the number pool and click its three-dot menu.
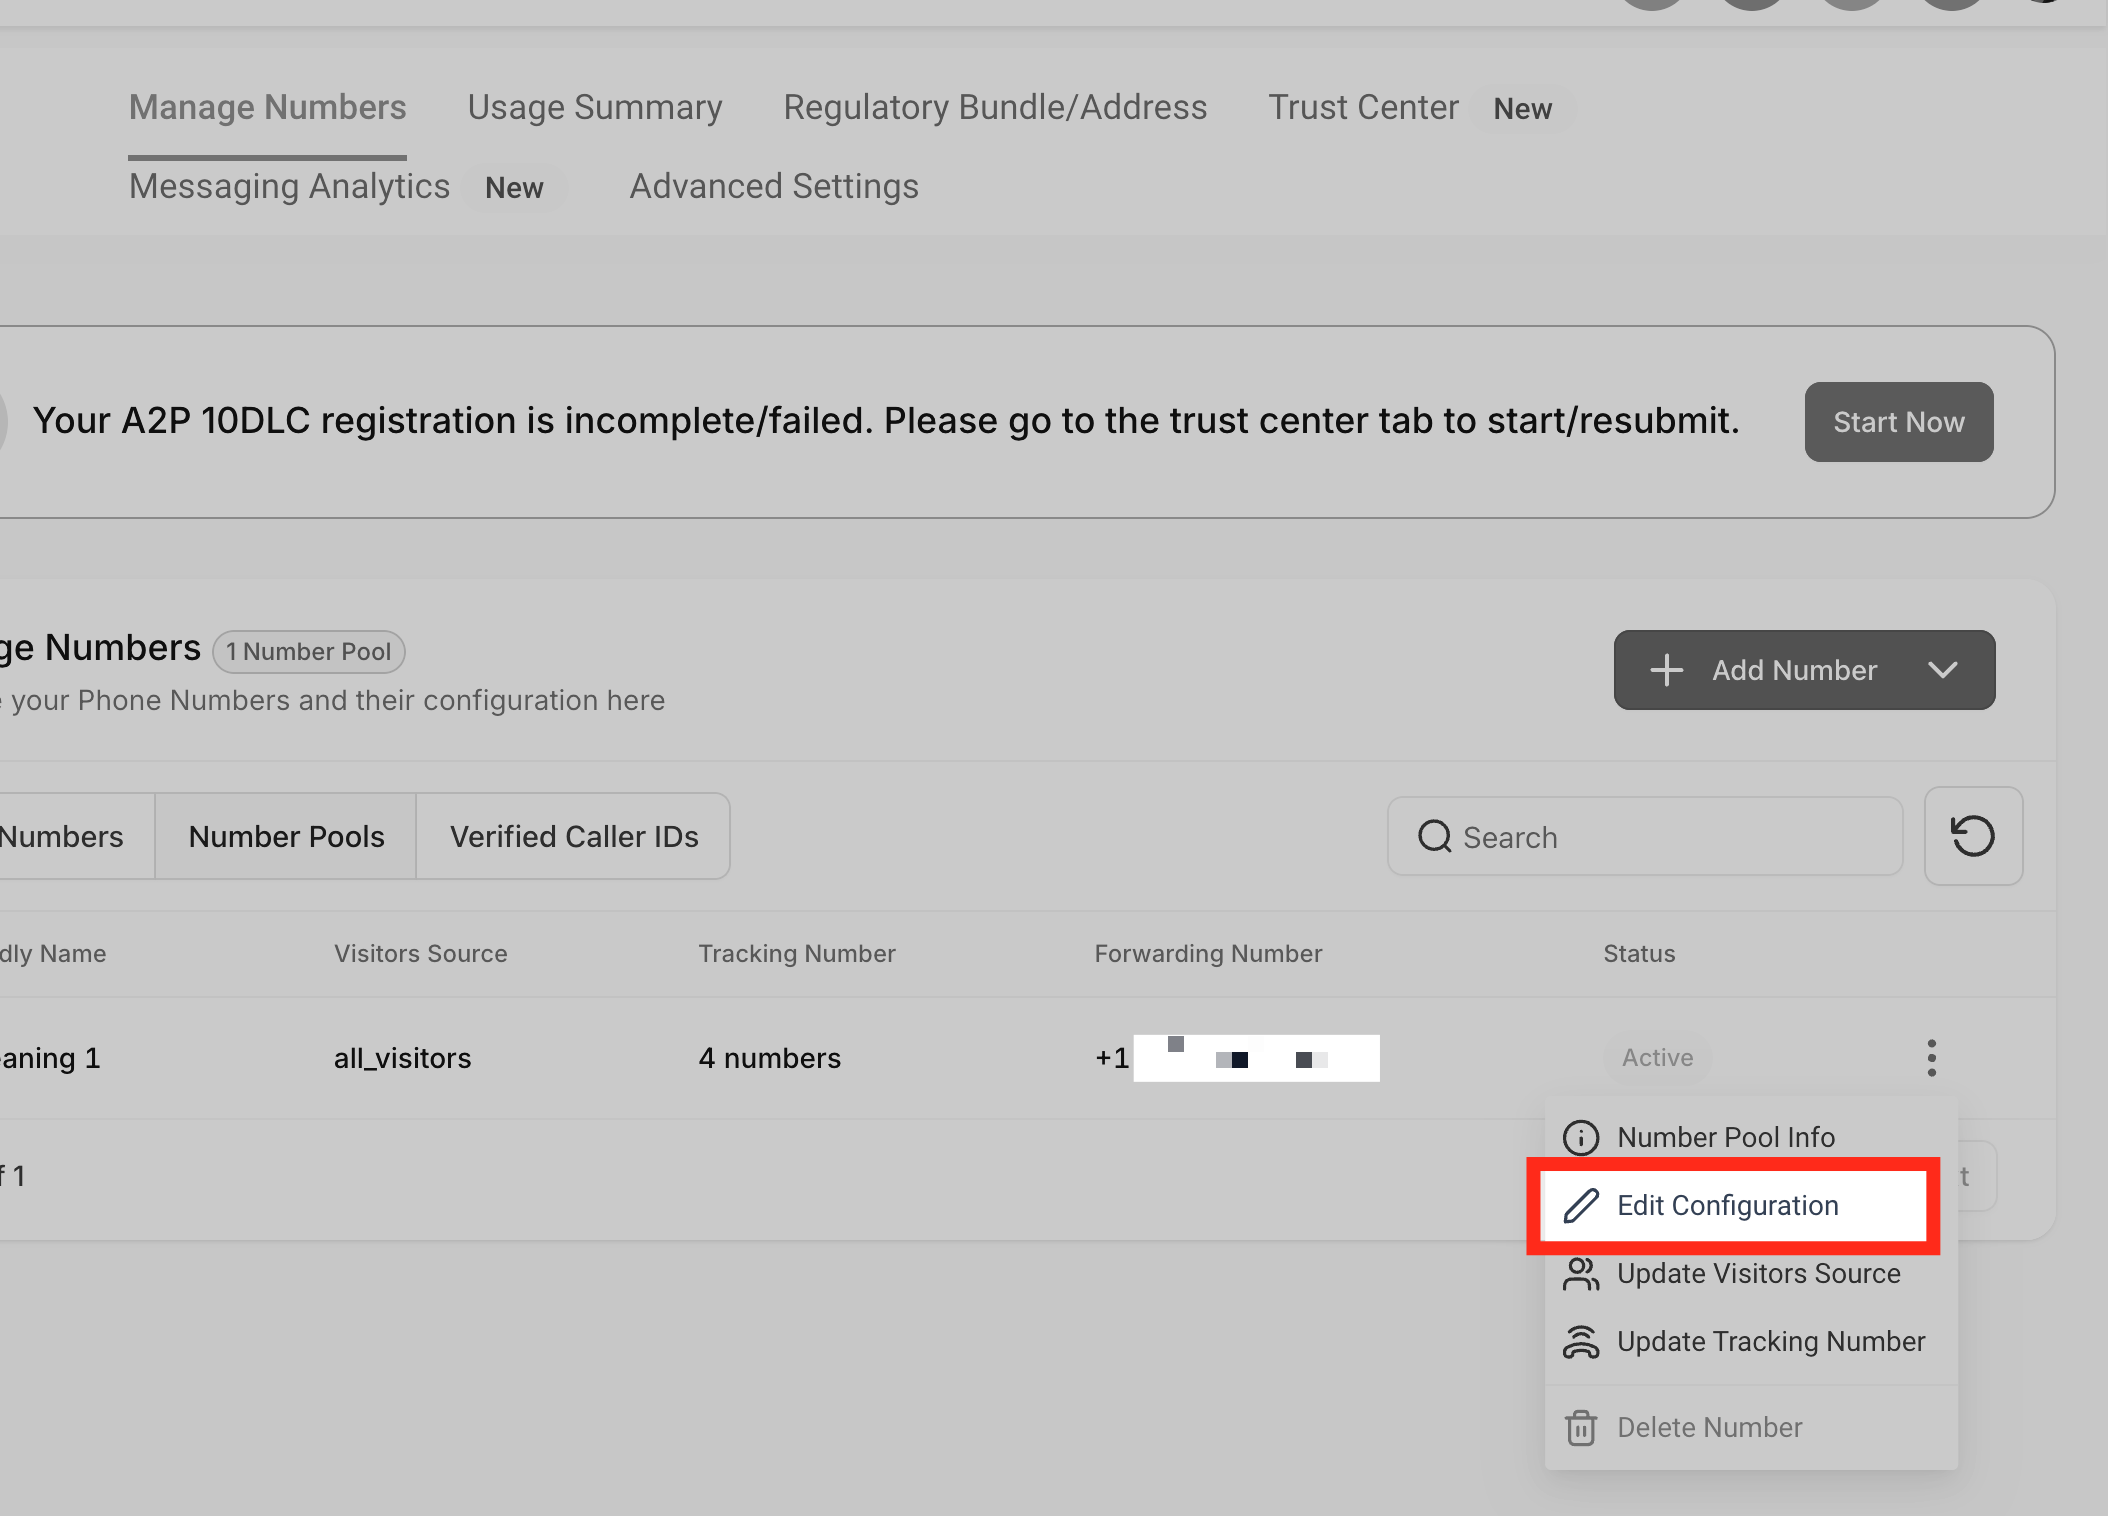
- Select Edit Configuration.
- In Configure Number Pool, enable Ring Incoming Call to selected Users.
- Open the user selector and choose up to six team members.
- Click Save.

The selected recipients remain saved when you reopen the pool. Each recipient receives calls through their configured Default Channel for Ring All.
Integrate the Tracking Snippet on Your Website
After creating a number pool, install its tracking snippet on the website or funnel where you want phone numbers to swap. The snippet connects visitor activity with the number-pool configuration.
Step 1: Copy the Snippet From the Number Pool
Open the pool's information panel to retrieve the tracking code.
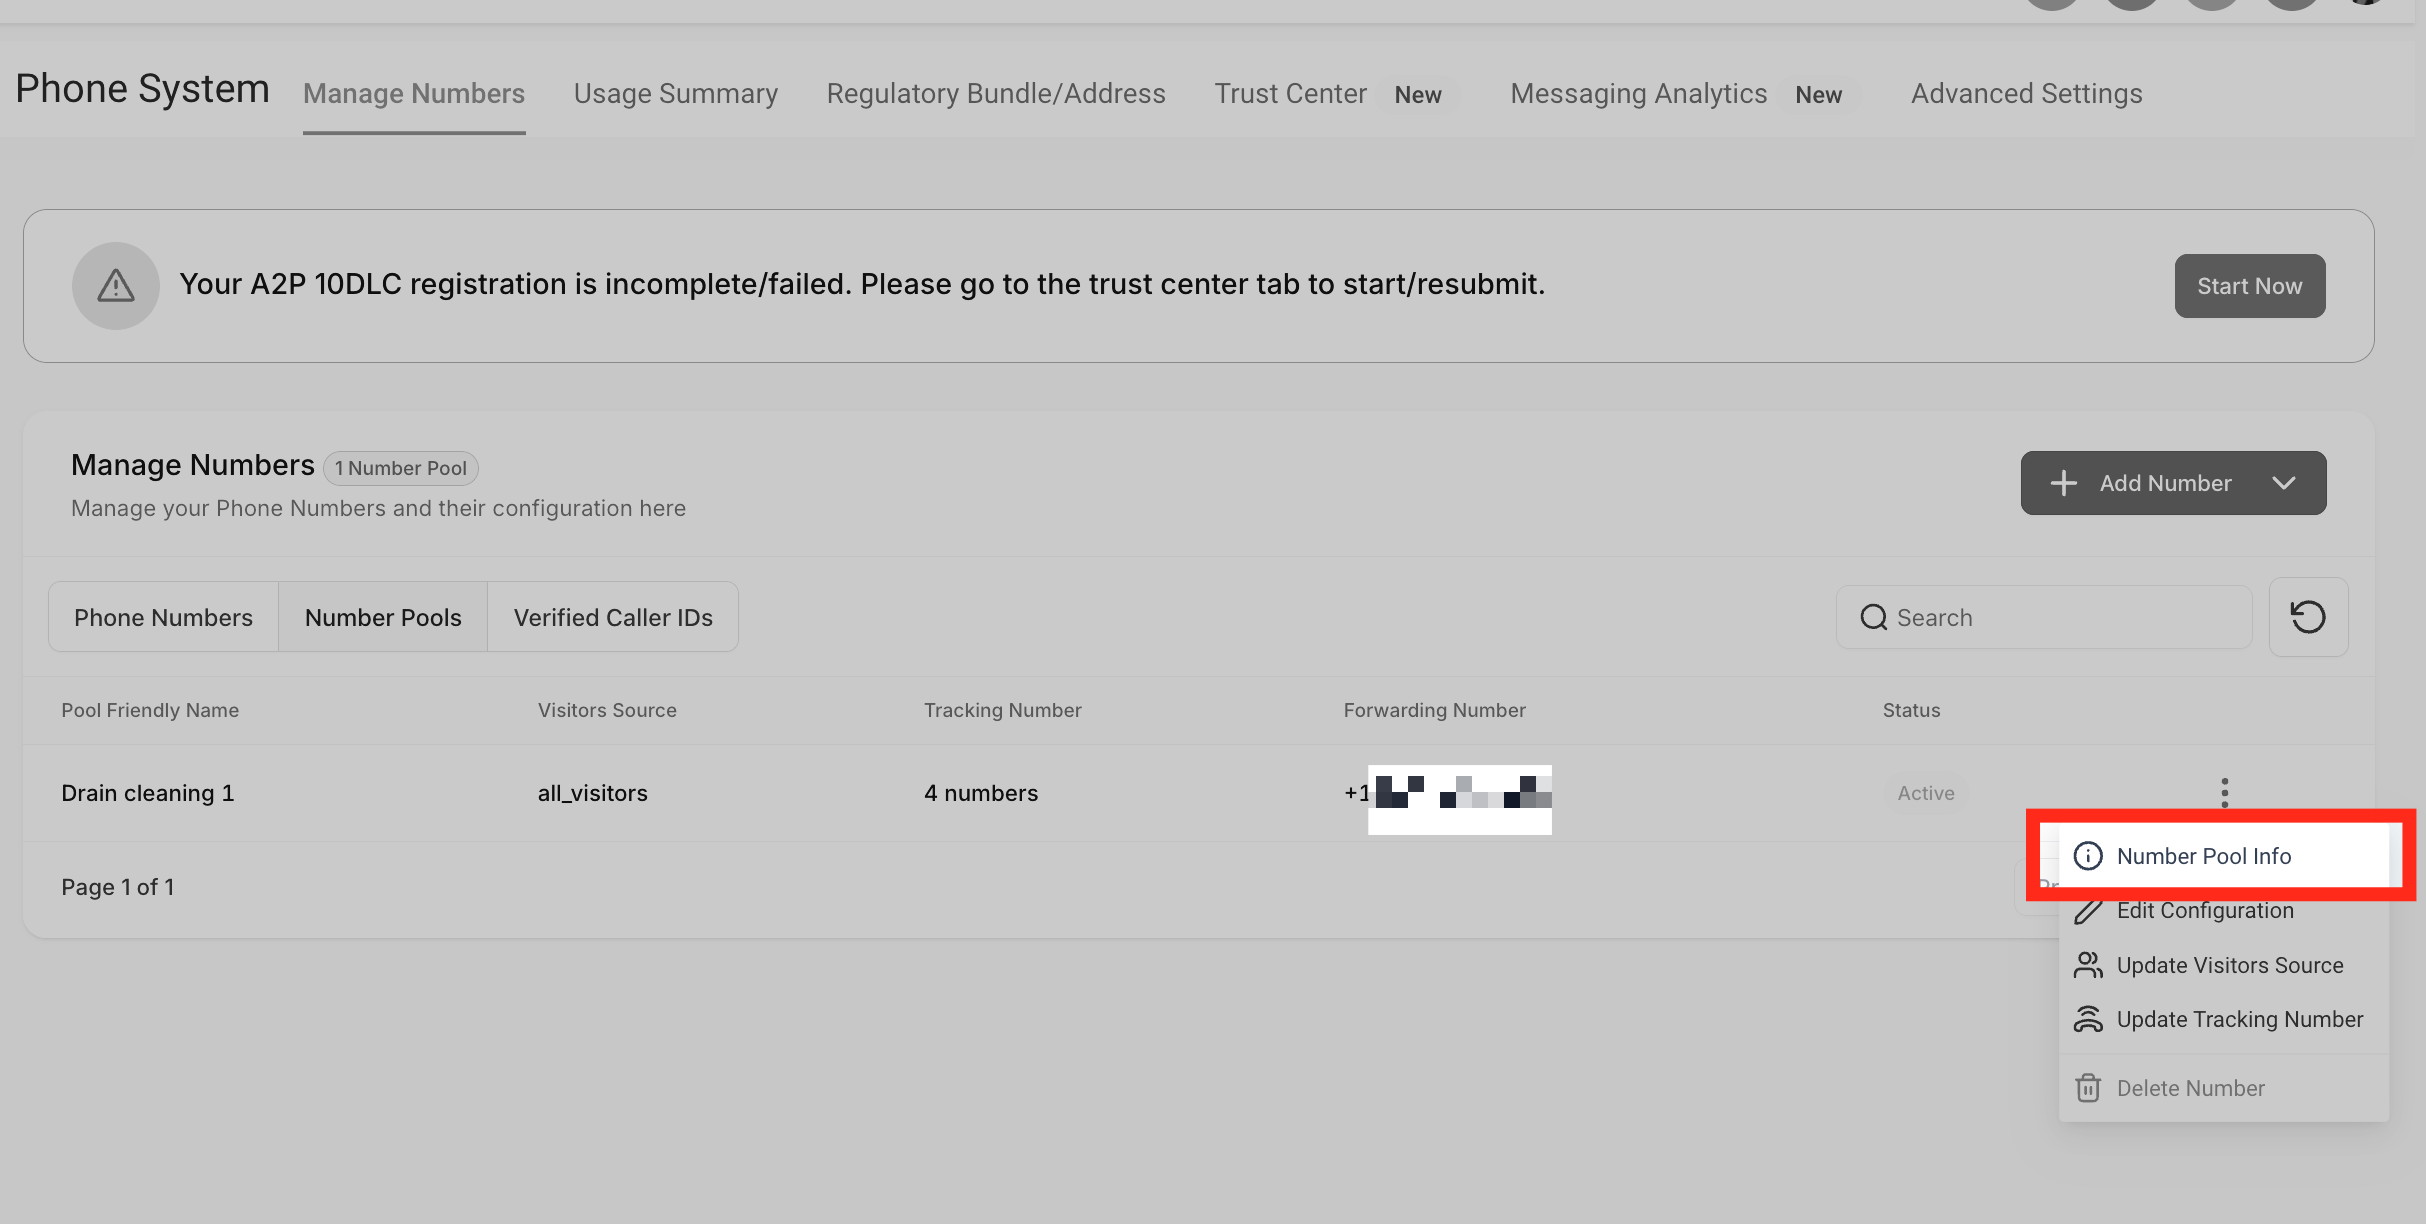
- Go to Settings > Phone System > Phone numbers.
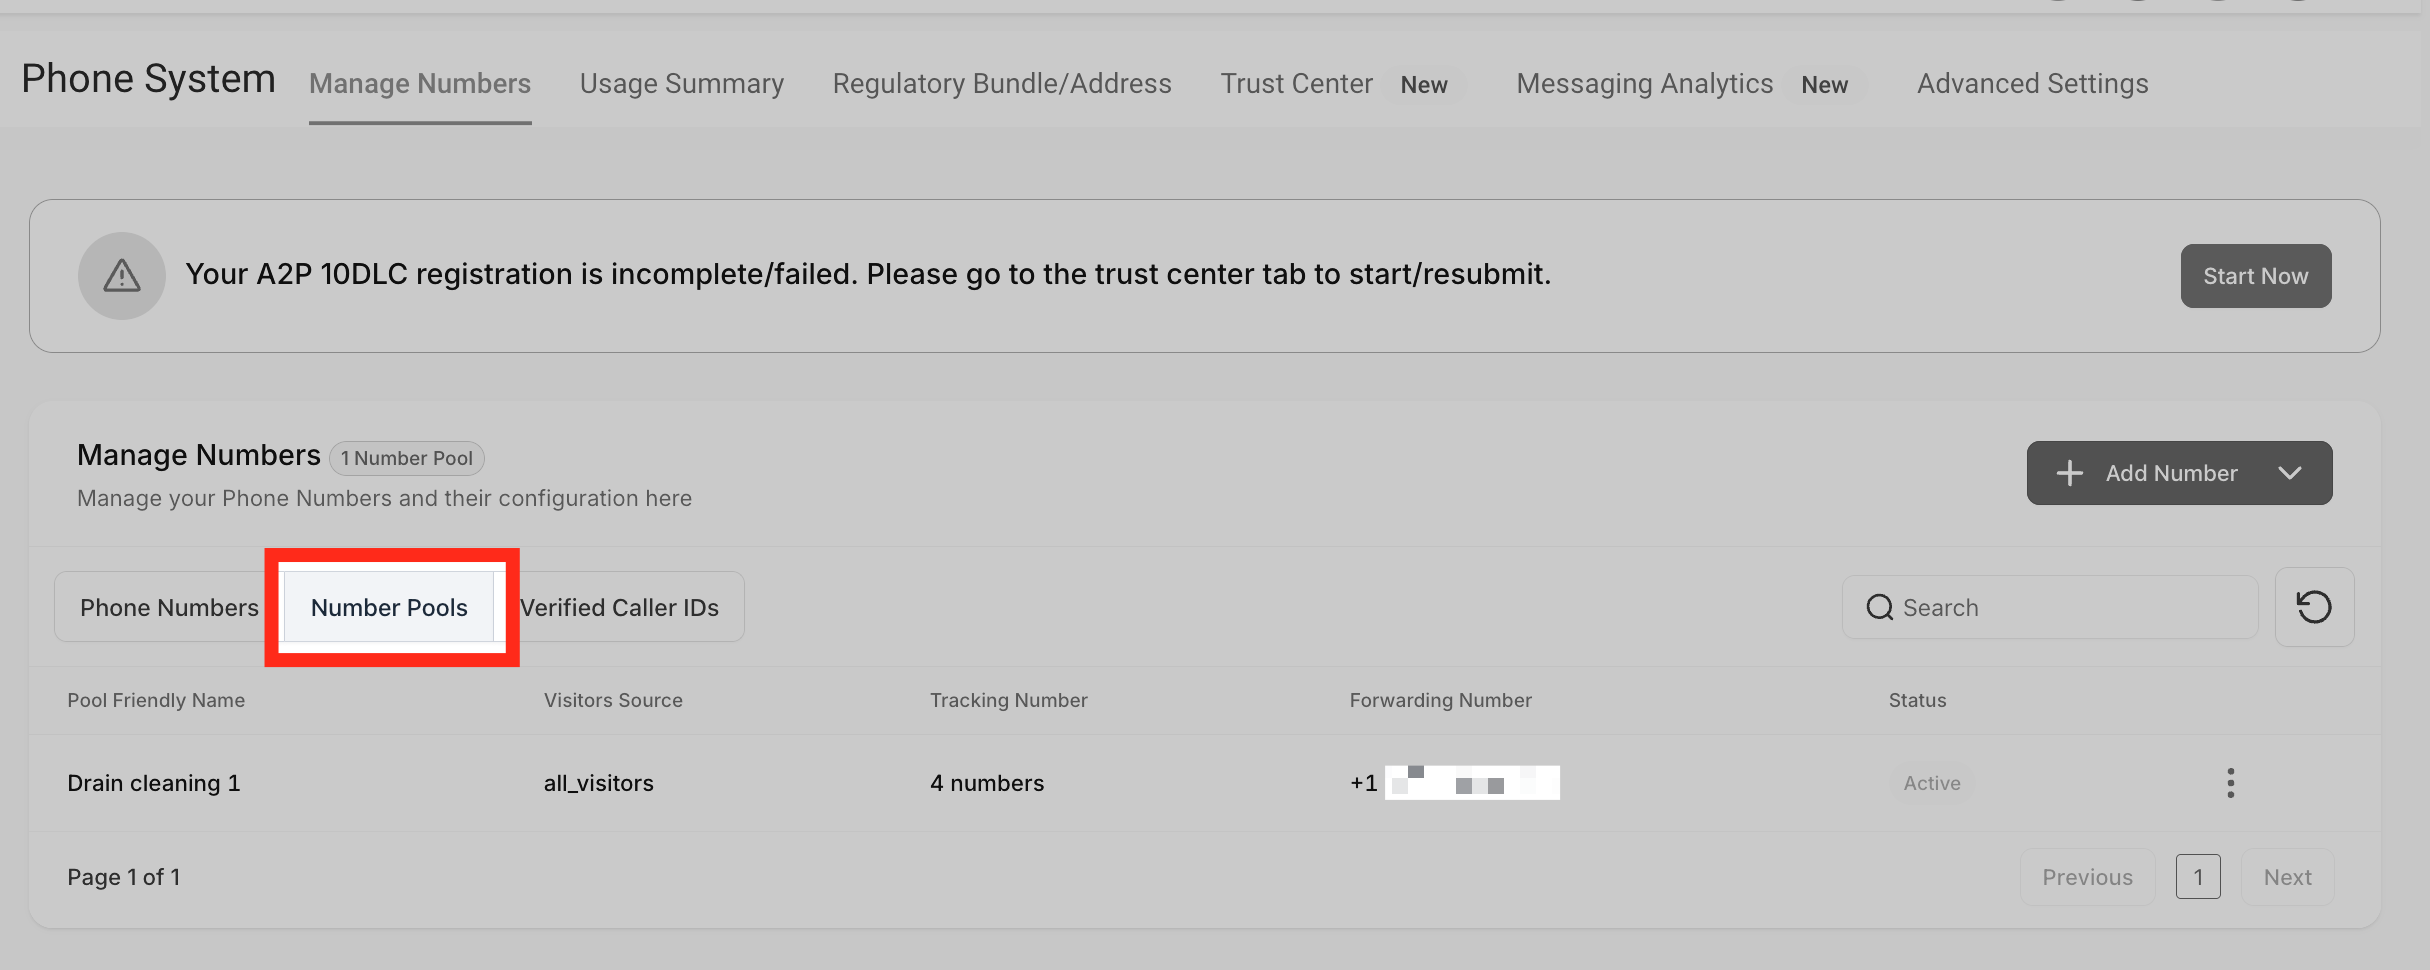
- Under Manage Numbers, select Number Pools.
- Find the number pool you want to use.
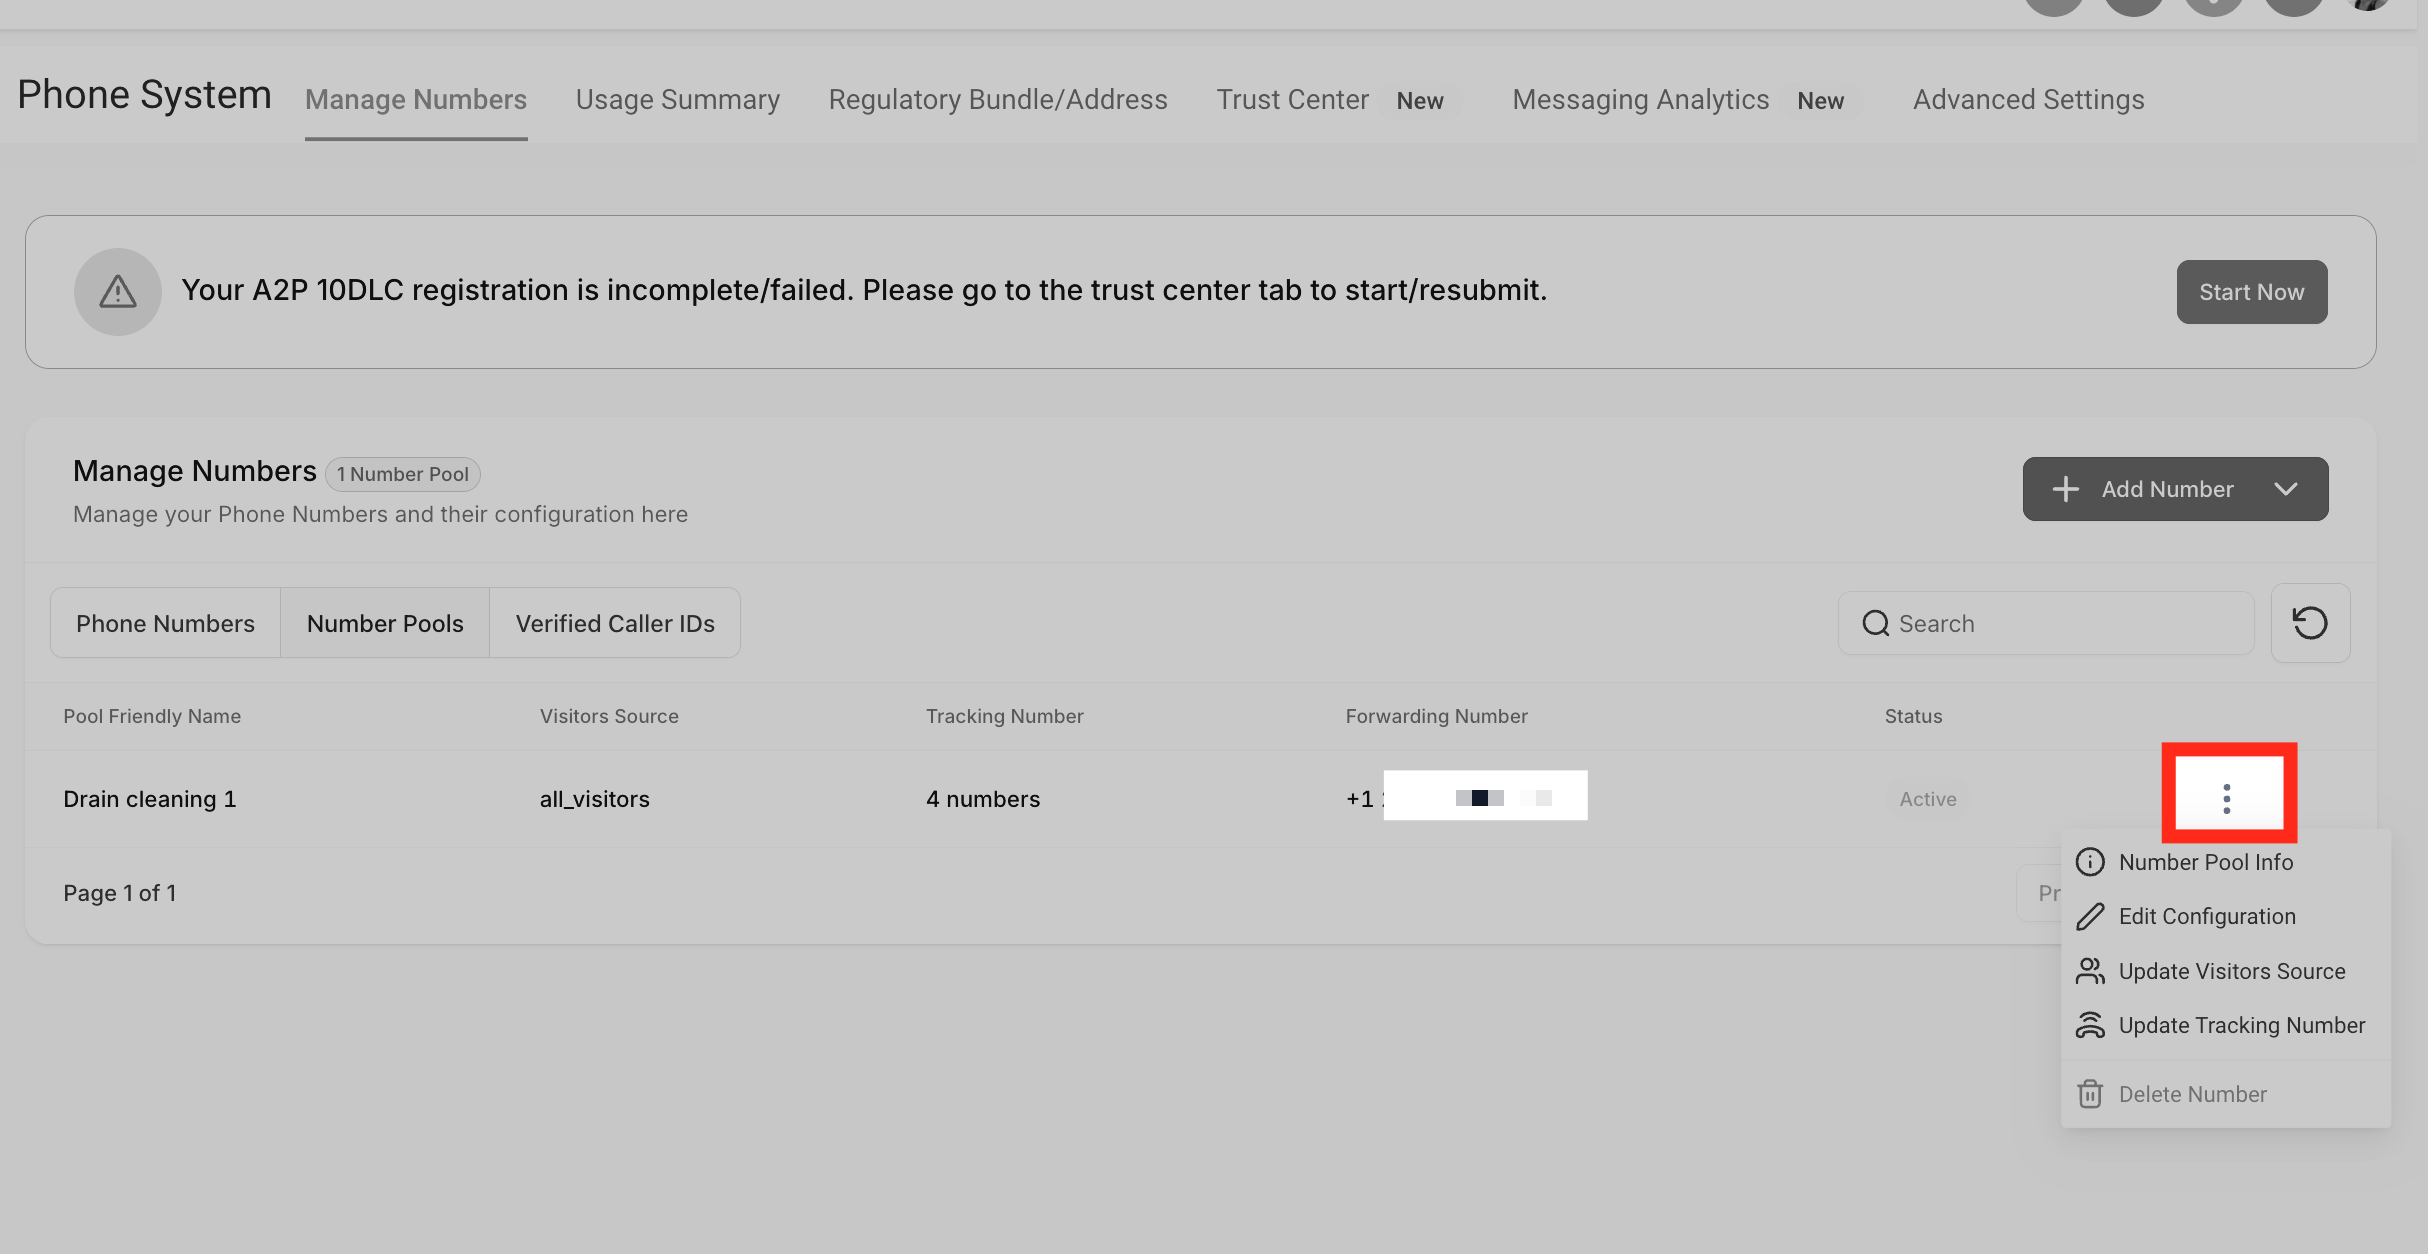
- Click its three-dot menu.
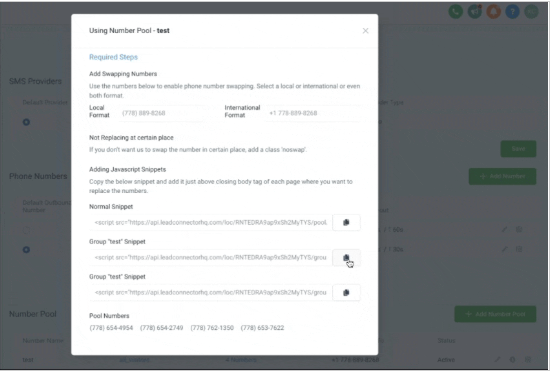
- Select Number Pool Info.
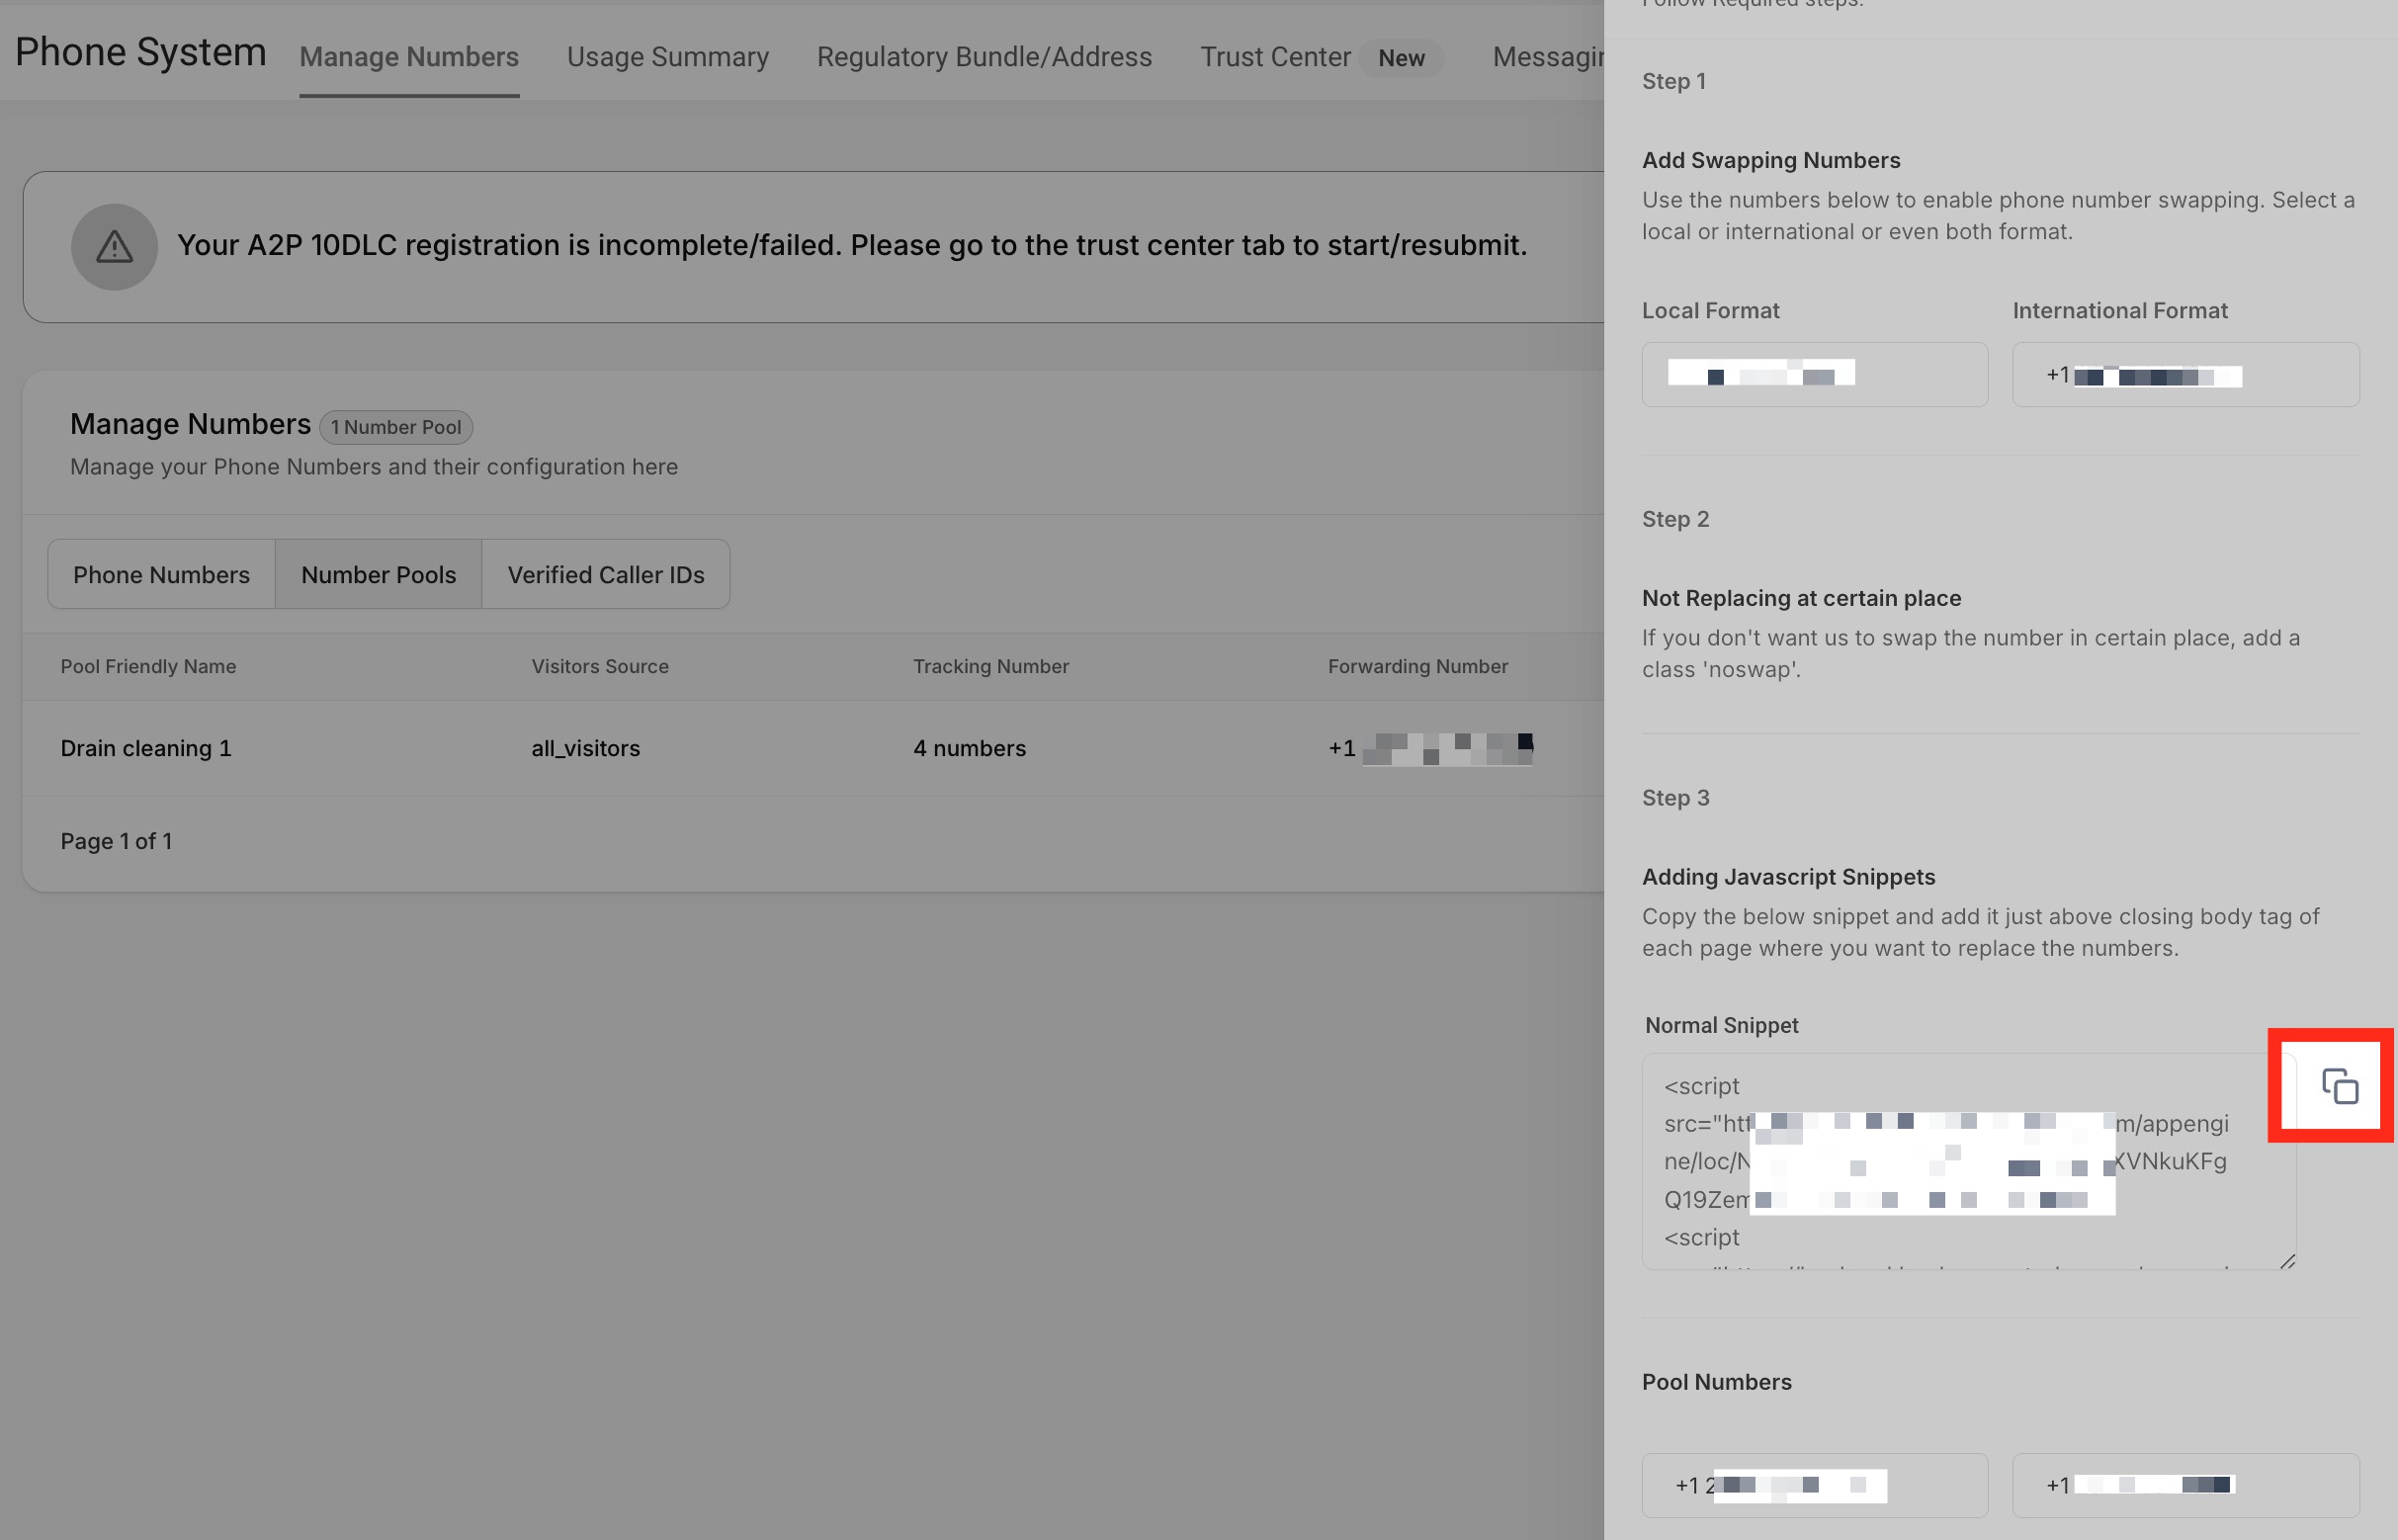
- Copy the Normal Snippet Code.
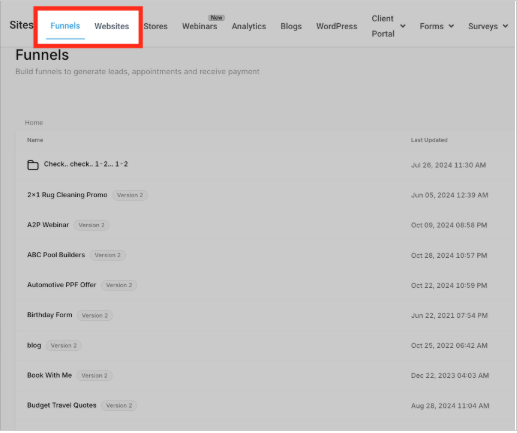
Next, open Sites and select Funnels or Websites.
Step 2: Paste the Snippet Into Your Site or Funnel
Add the copied snippet to the website or funnel where dynamic number swapping should occur.
- Go to Sites.
- Click Funnels or Websites.
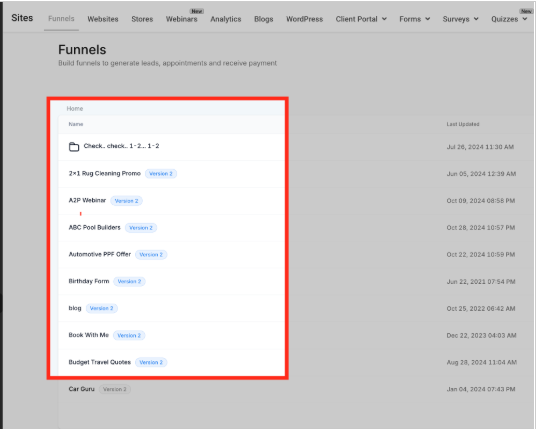
- Open the funnel or website where you want to use the number pool.
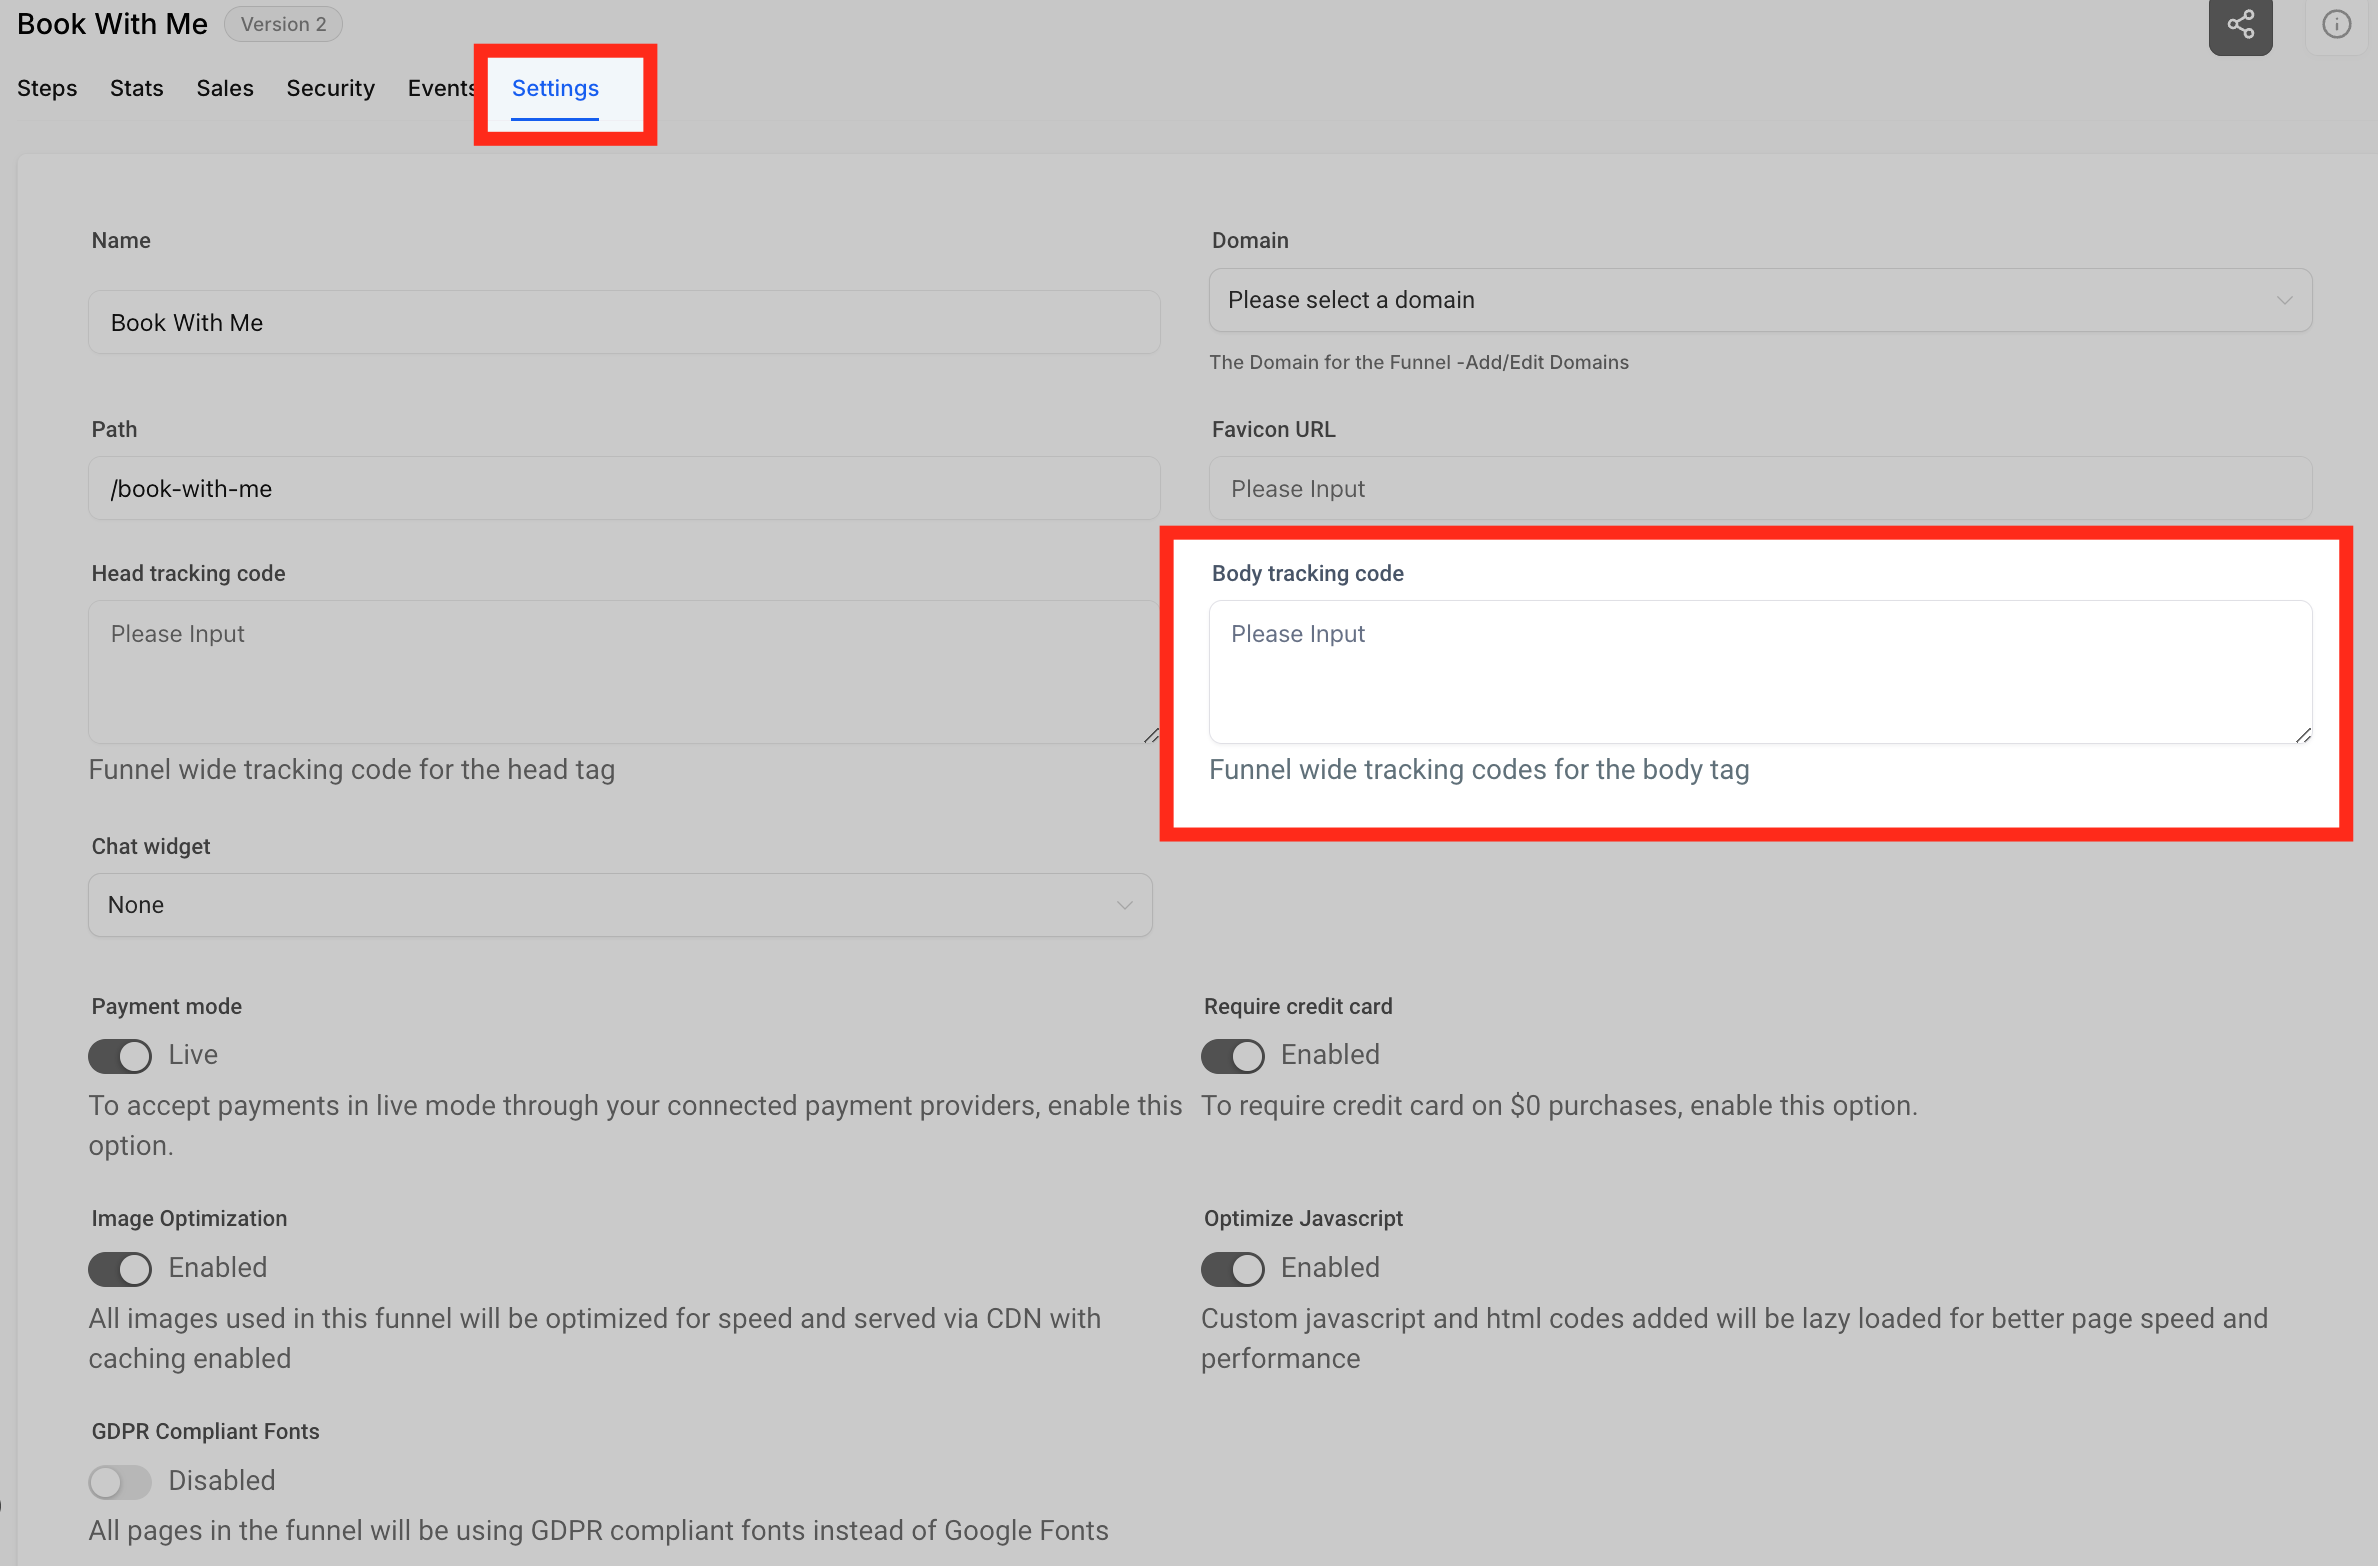
- Click the Settings tab.
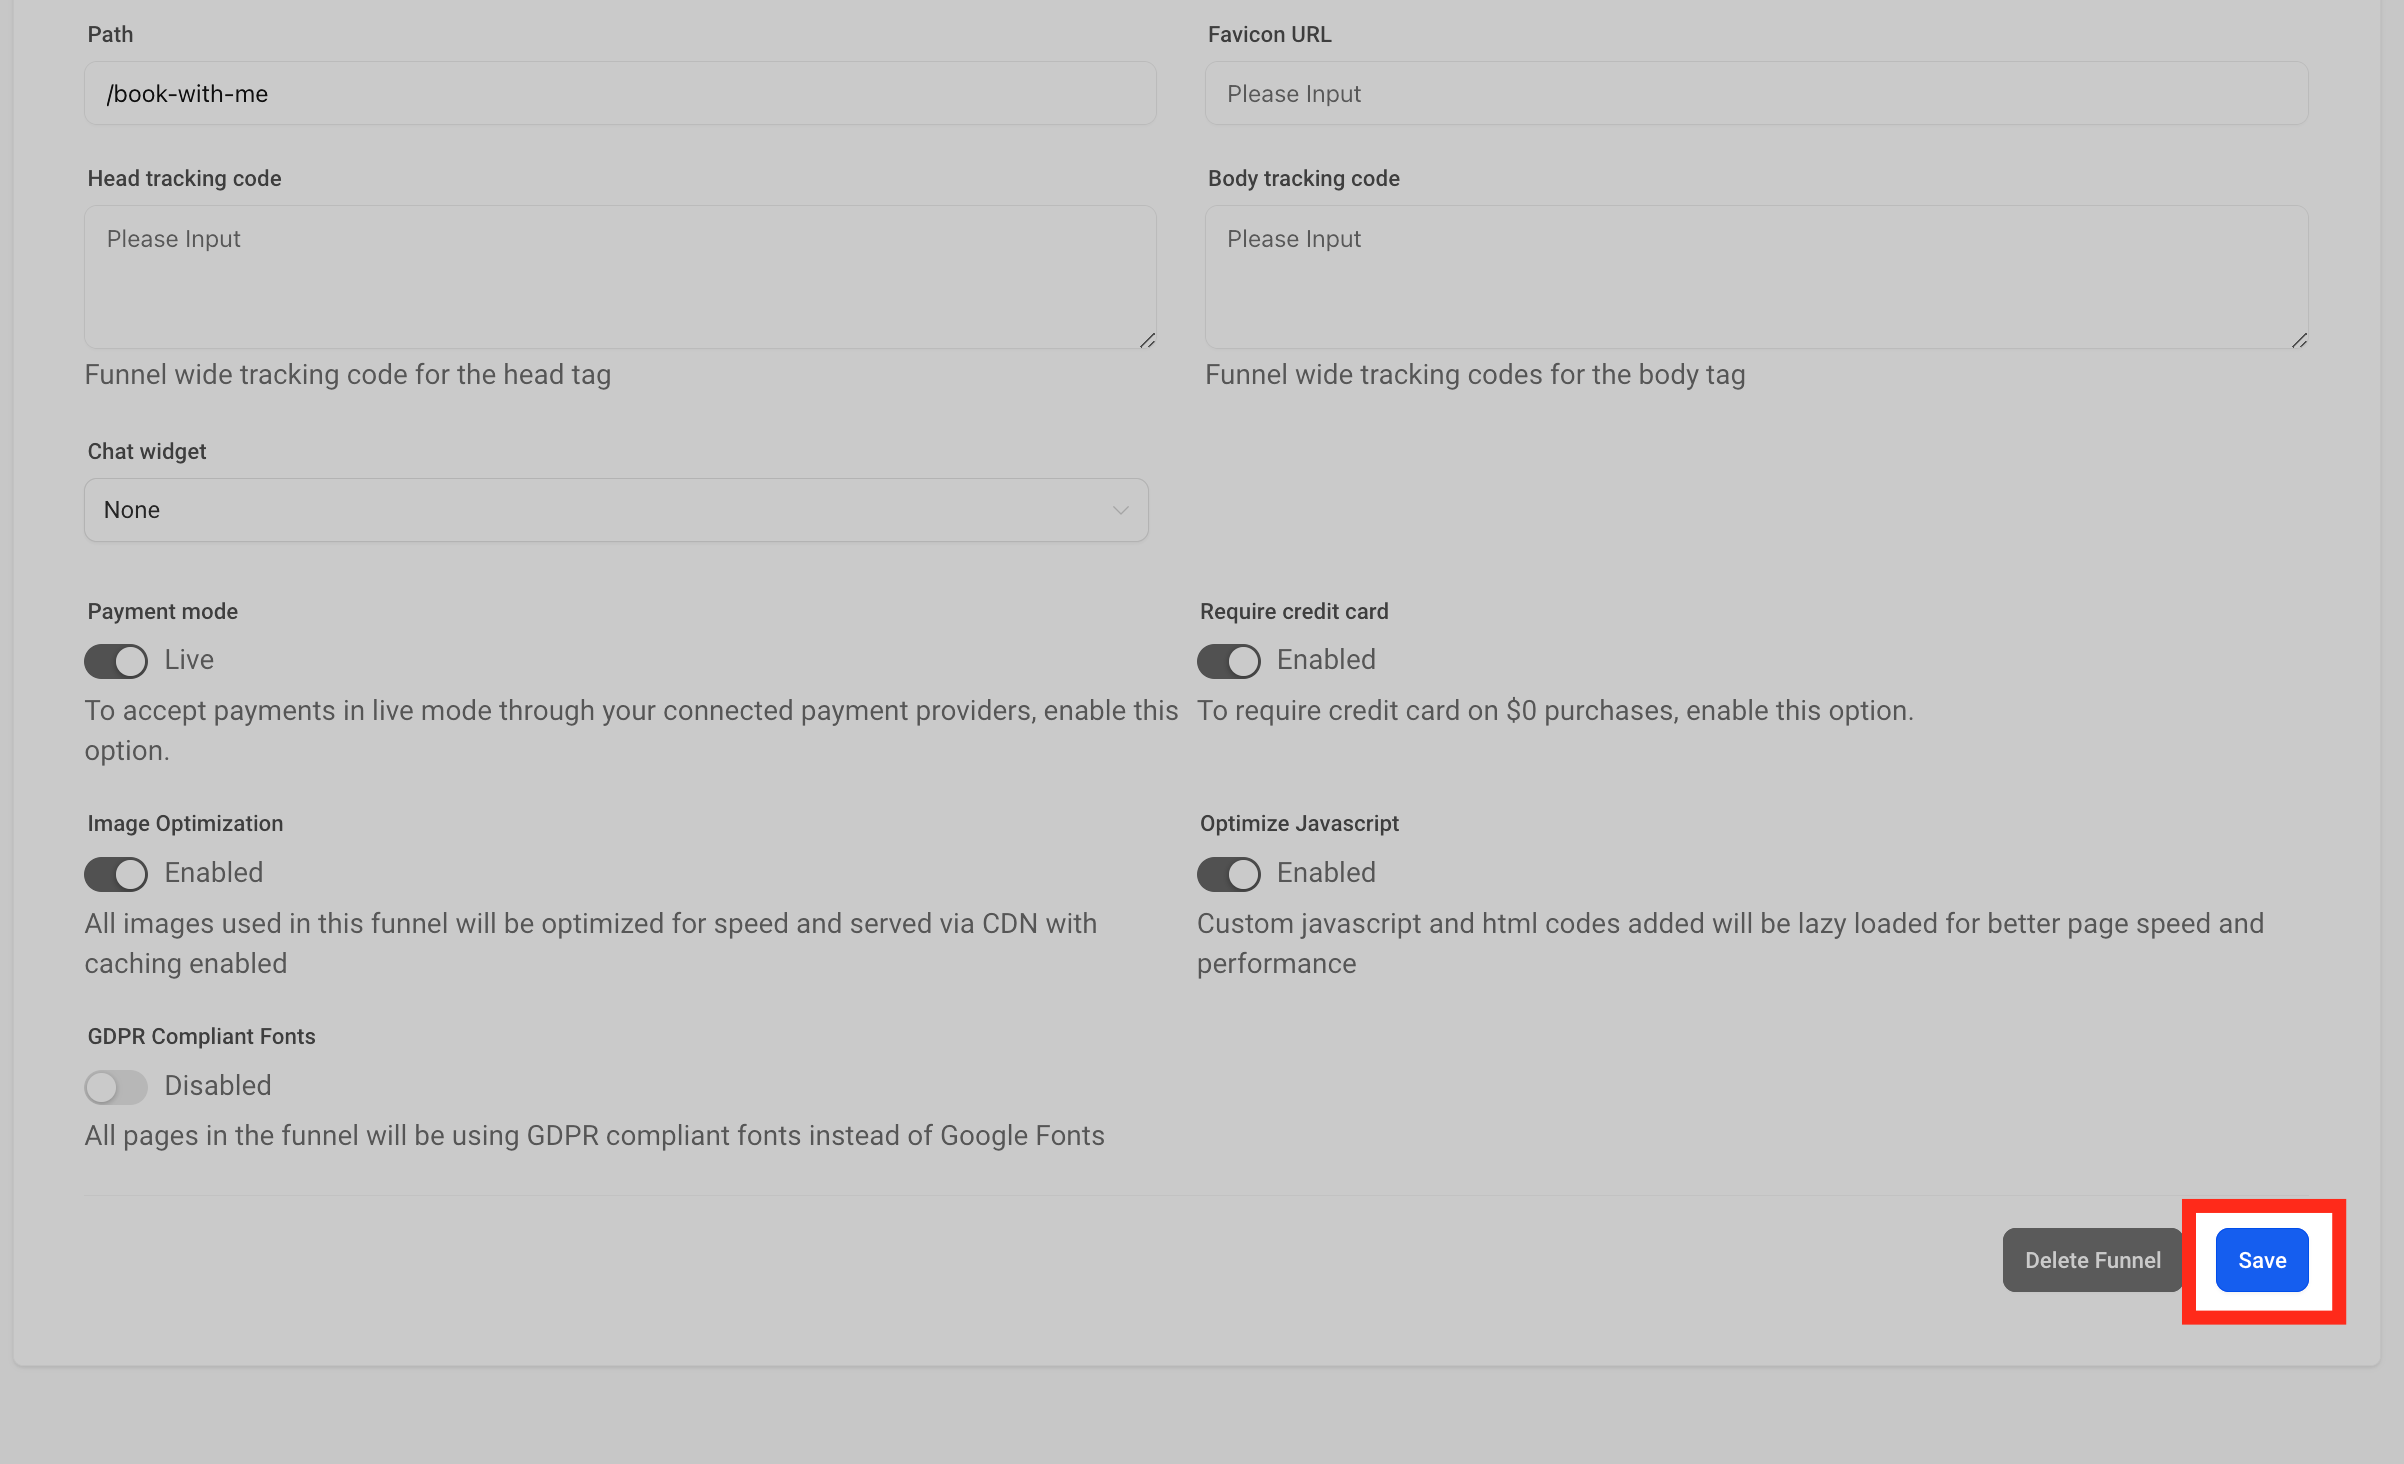
- Paste the copied Normal Snippet Code at the bottom of the Body Tracking code field.
- Click Save.
With the snippet applied at this level, the configured phone number swapping applies across the selected funnel or website.
Step 3: Apply Tracking to a Single Page (Optional)
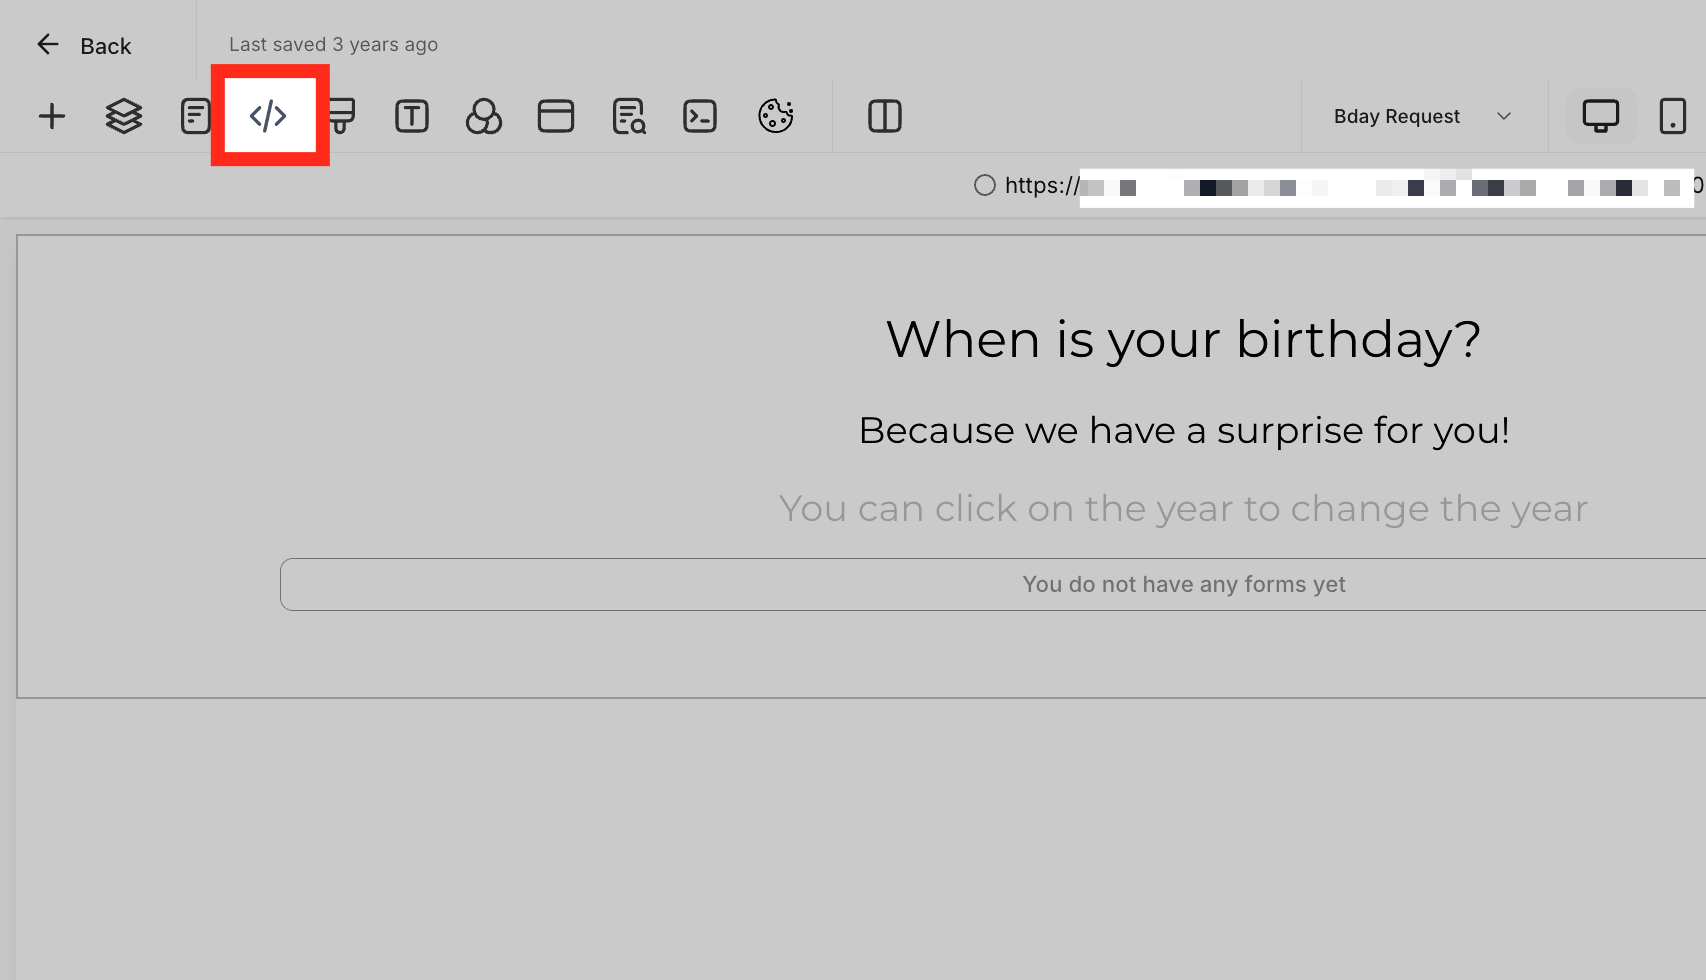
If you only want number swapping on one page, add the tracking code to that page rather than applying it to the entire website or funnel.
- Open the page in the website or funnel editor.
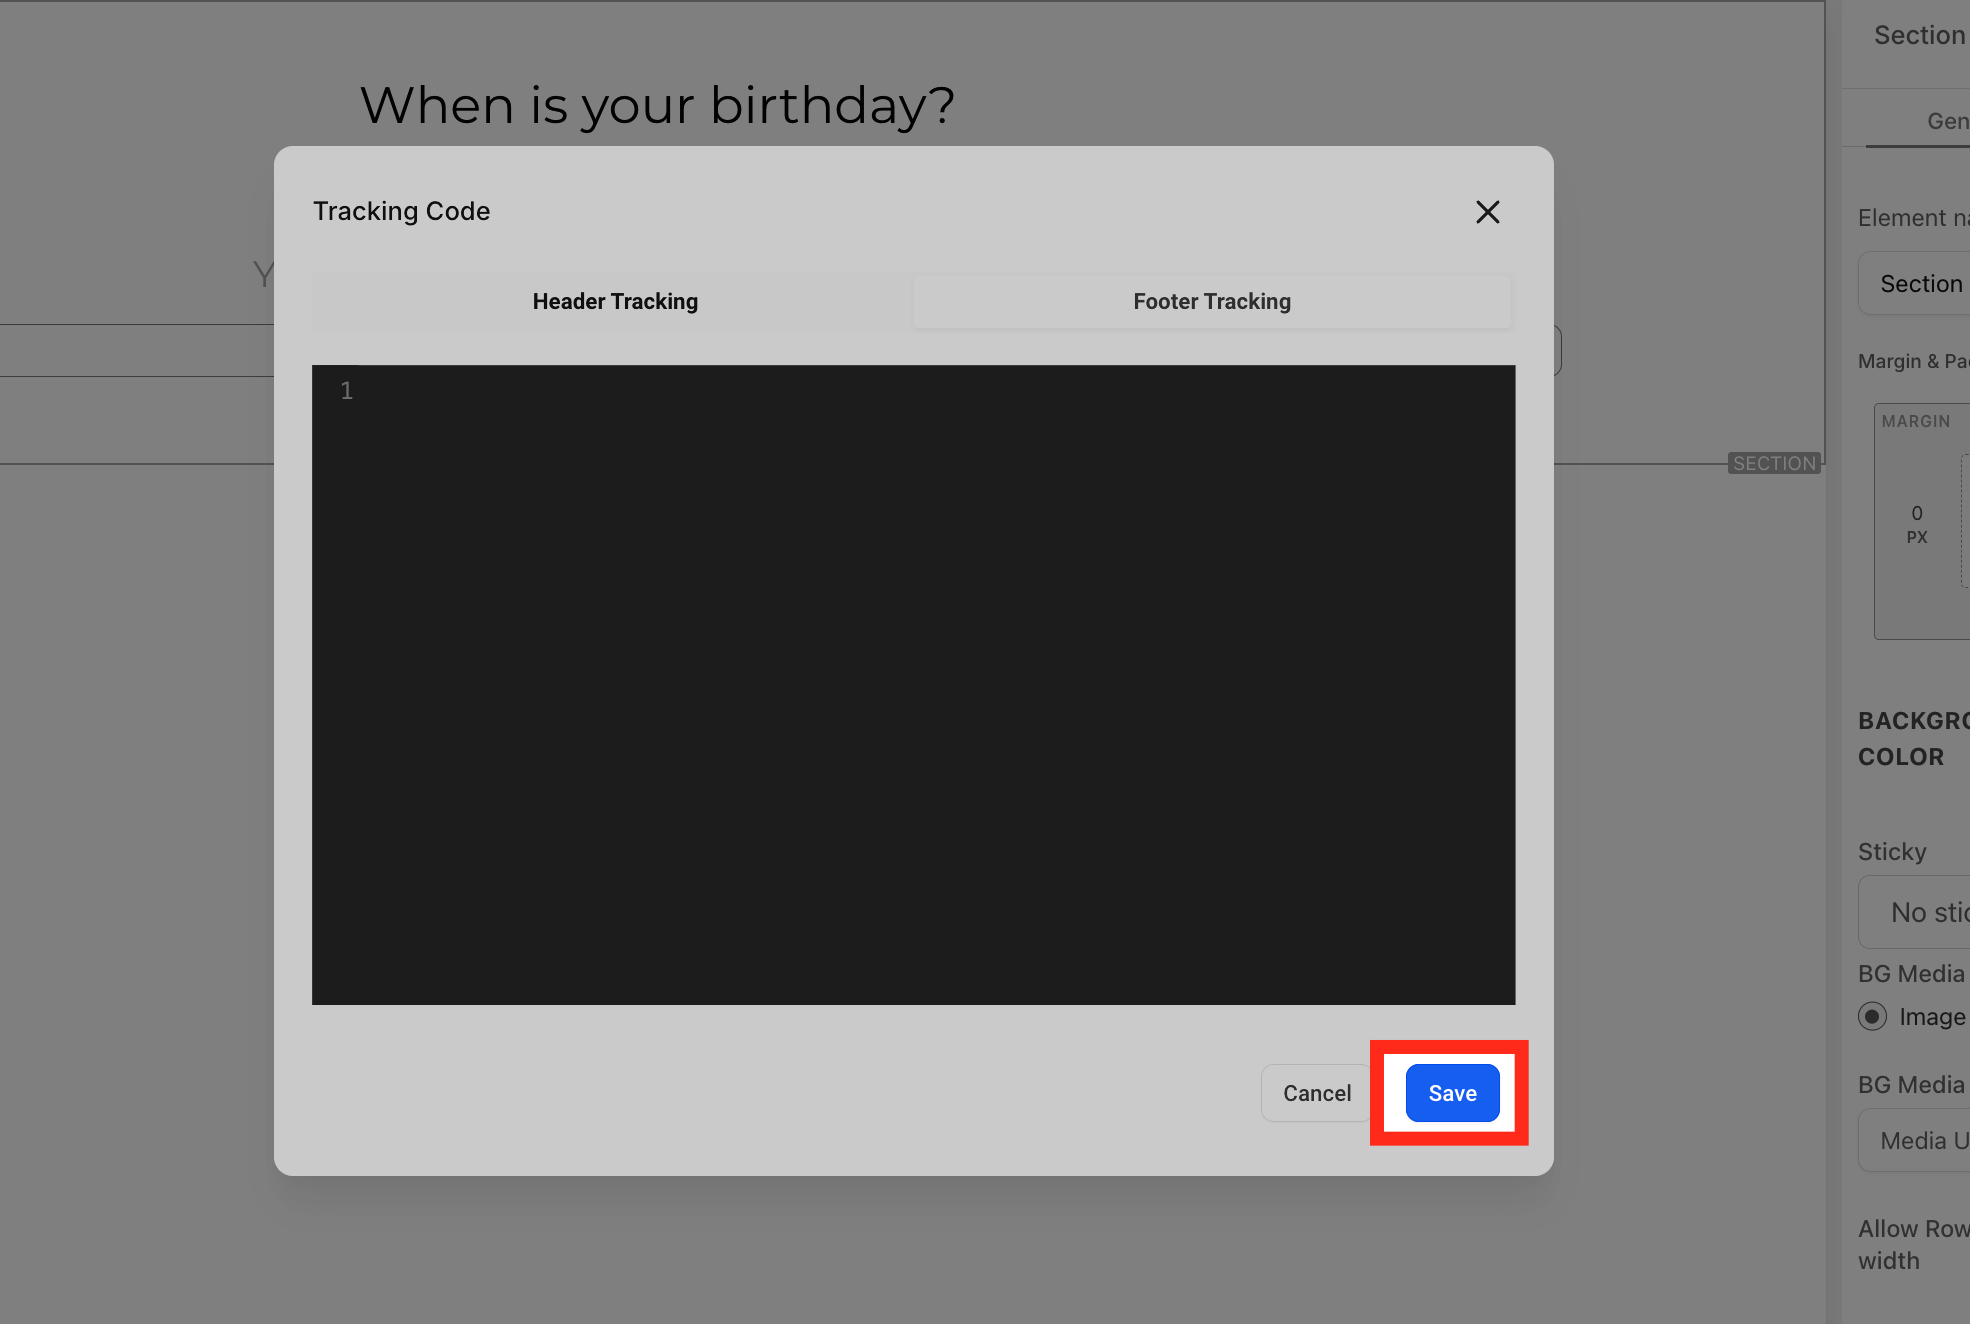
- Click the Tracking Code icon at the top left.
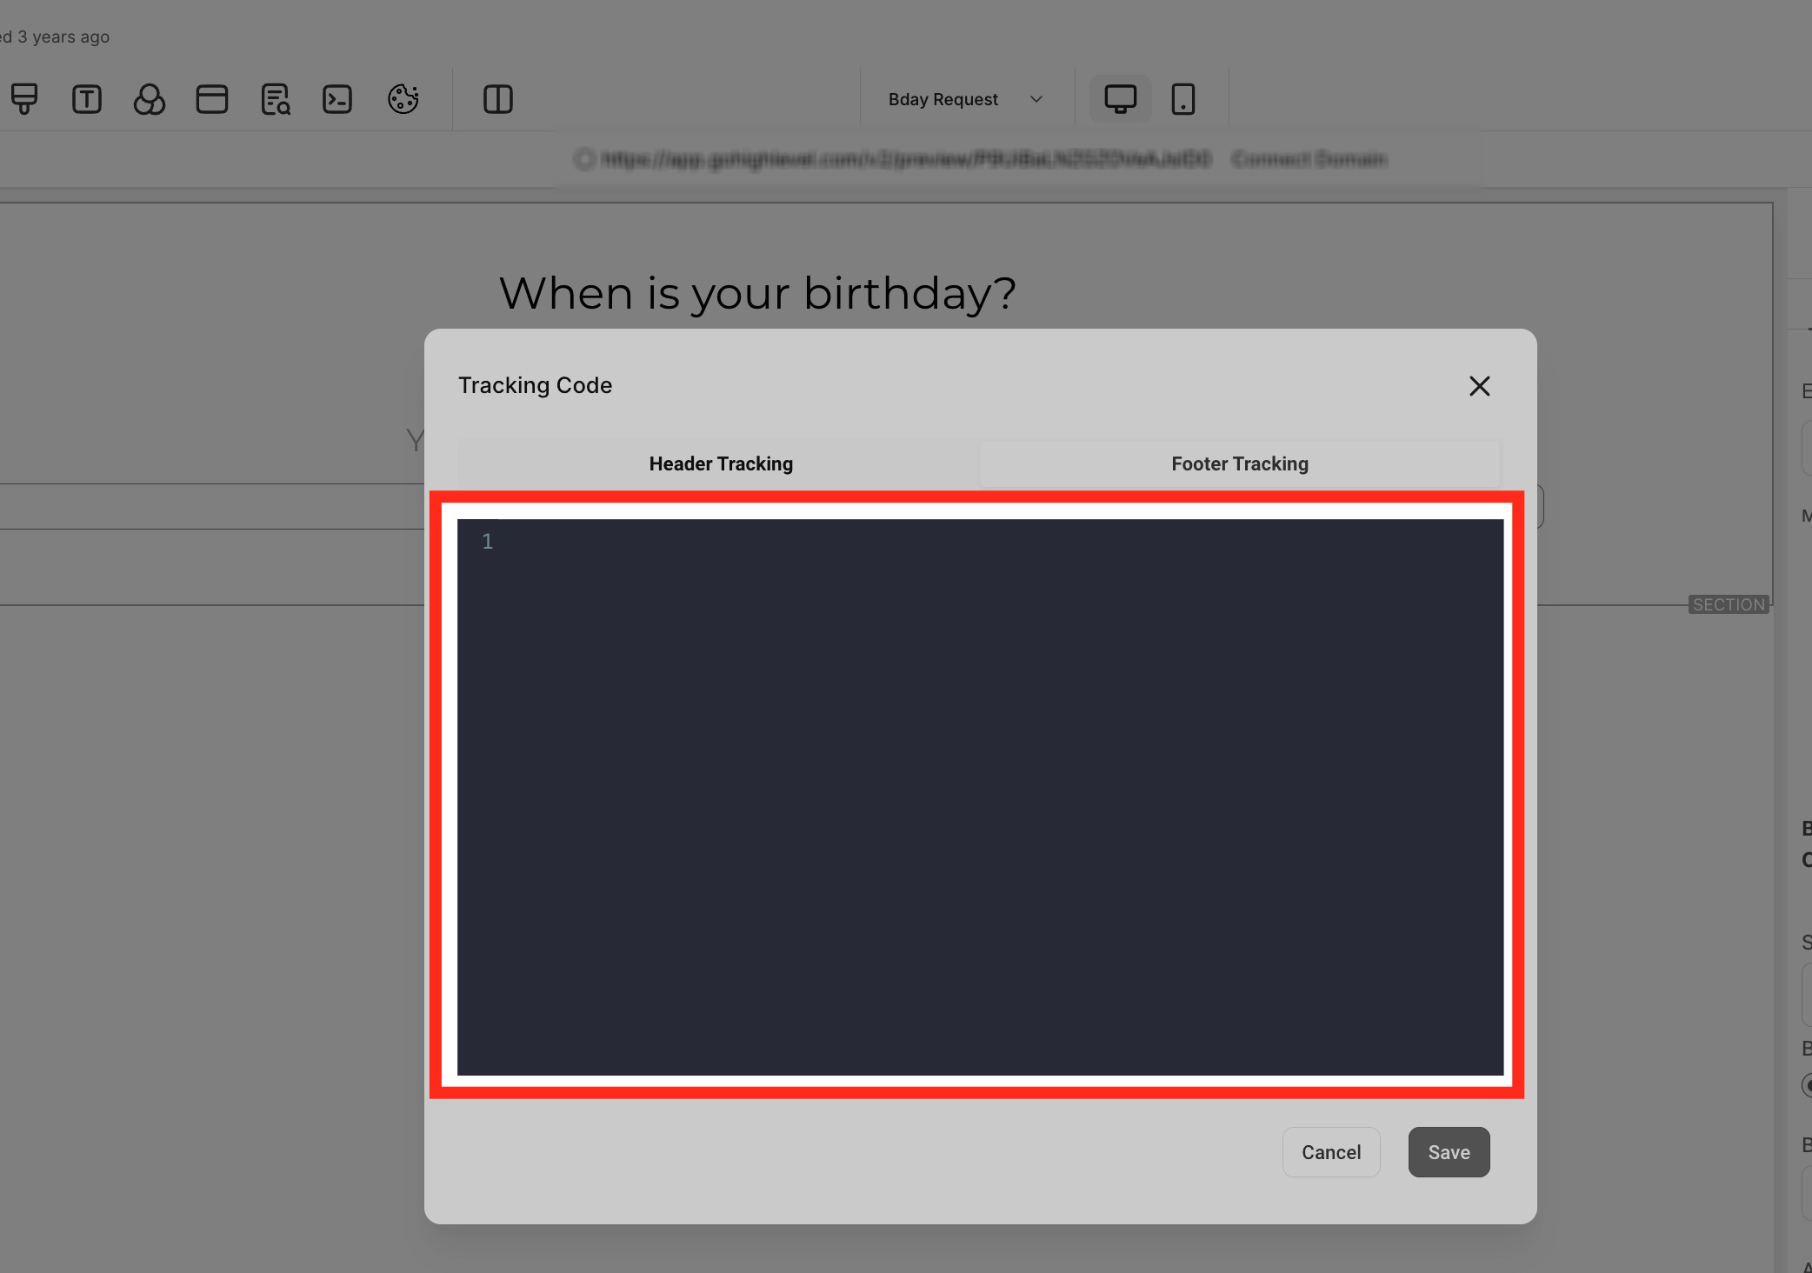
- Select Footer Tracking on the right.
- Paste the tracking code into the code editor.
- Click Save.

Step 4: Update the Swapping Number Later, If Needed
You can modify the number that appears on your website by editing the existing number-pool configuration.
- Go to Settings > Phone System > Phone numbers.
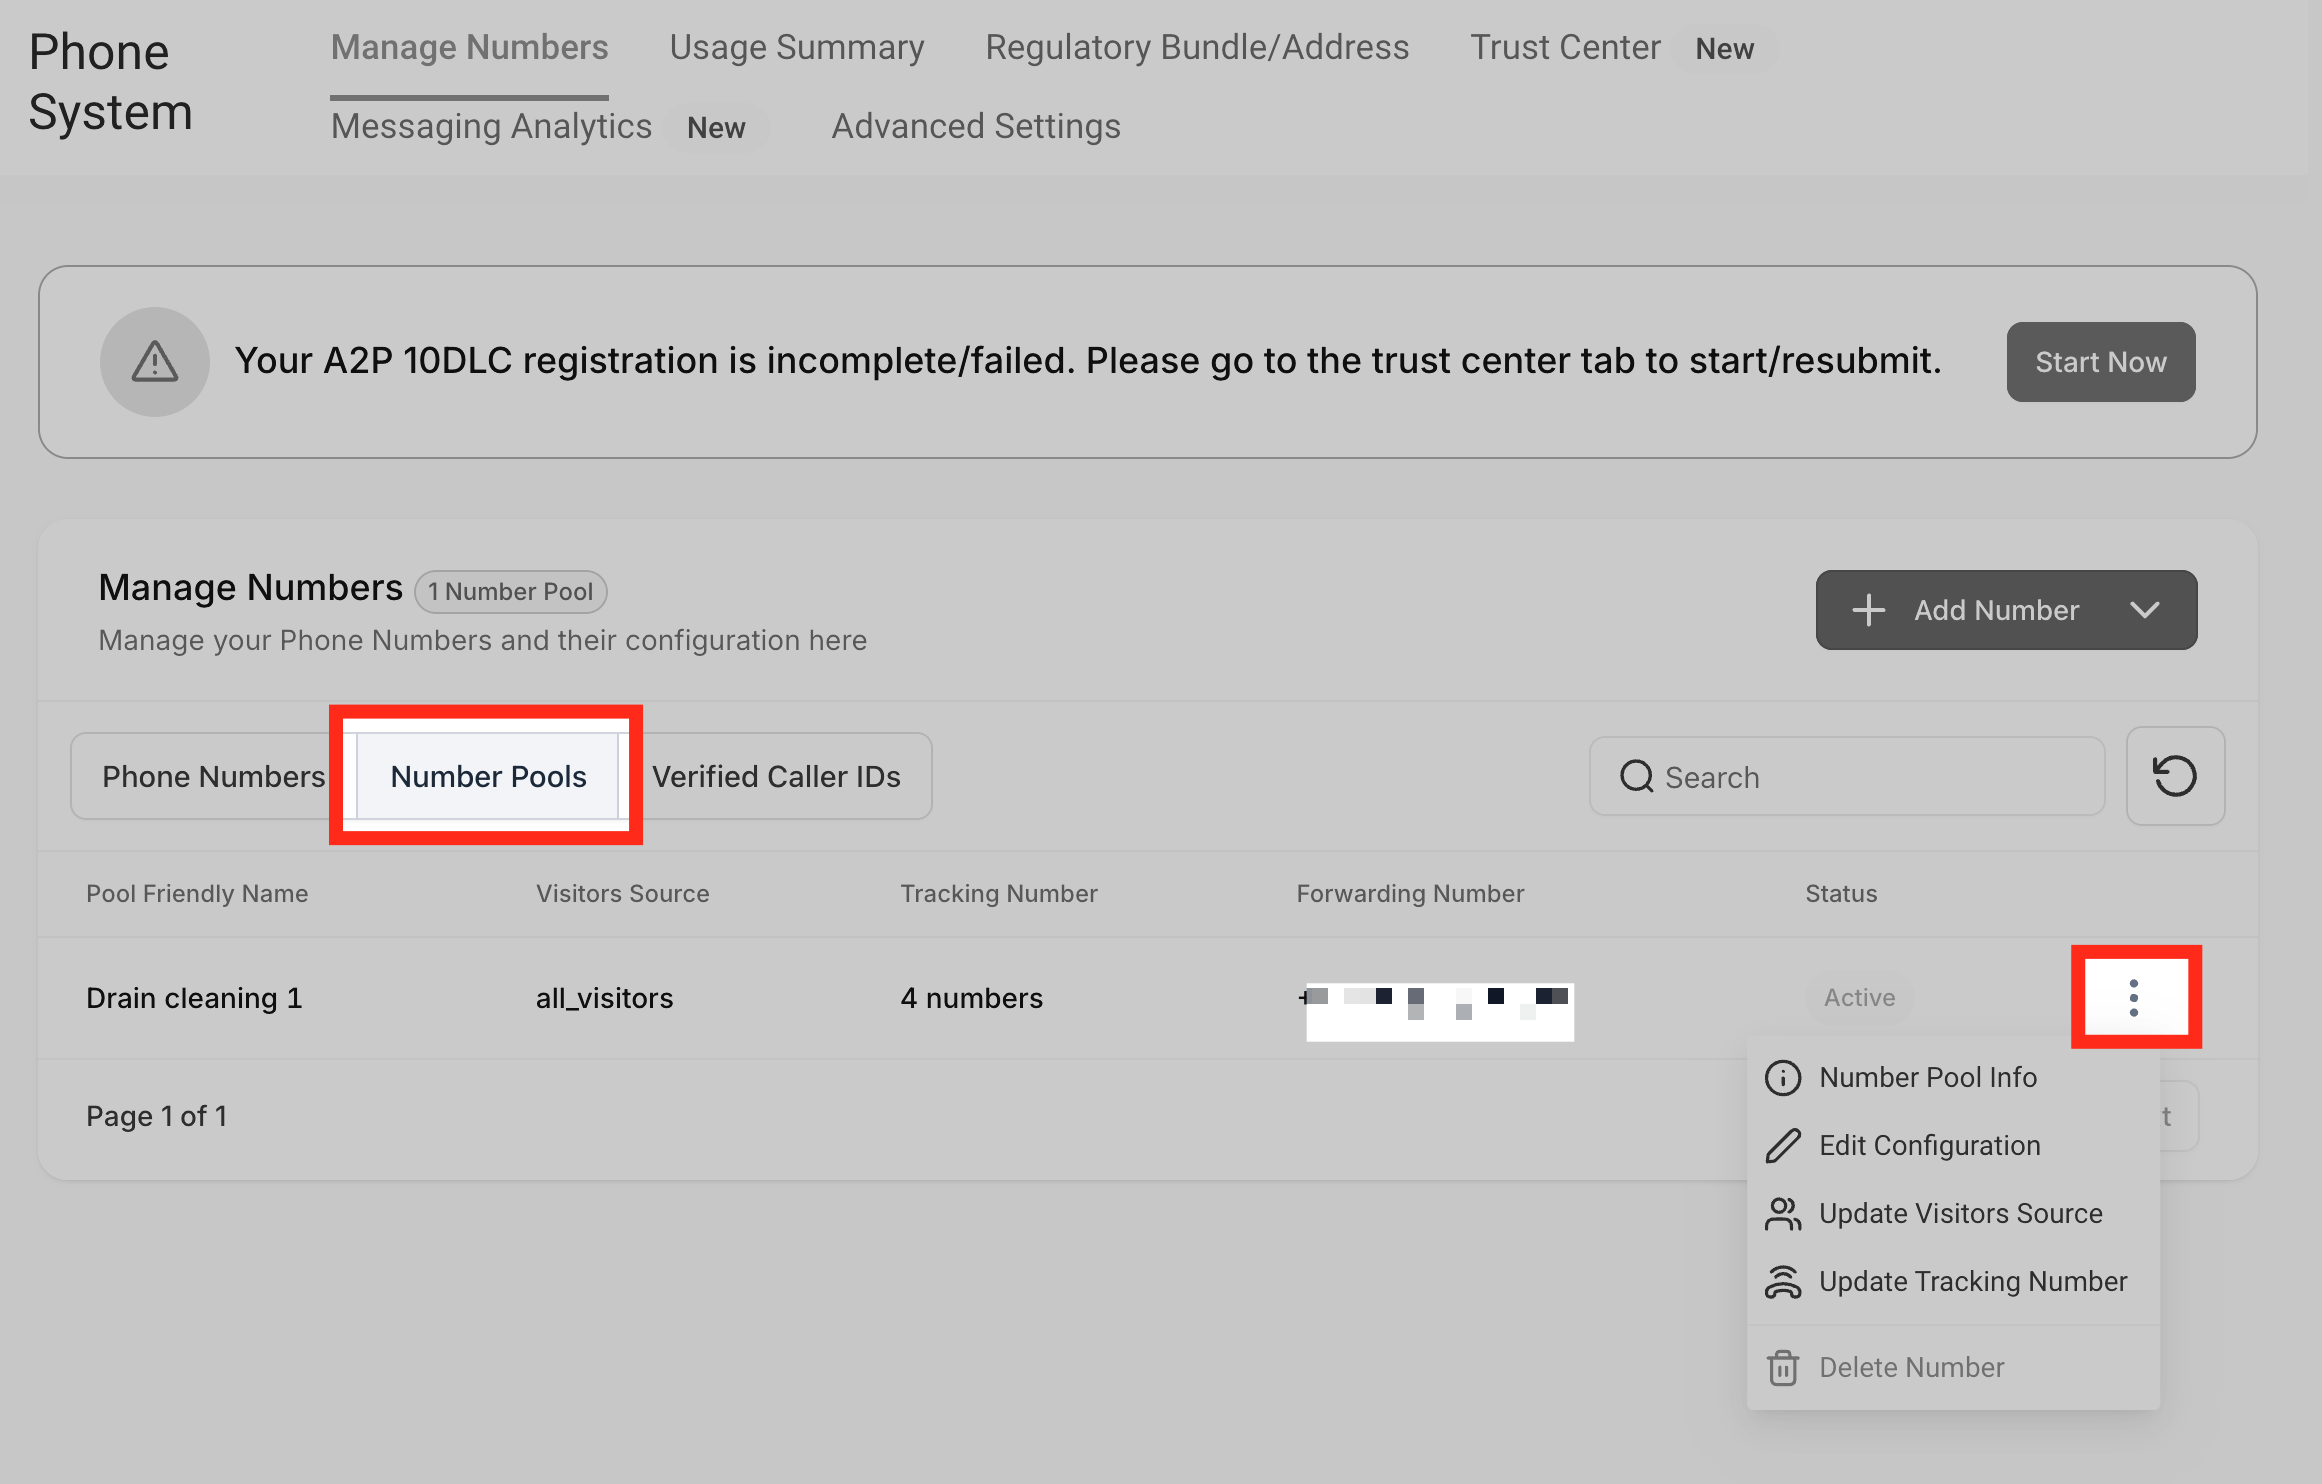
- Under Manage Numbers, select Number Pools.
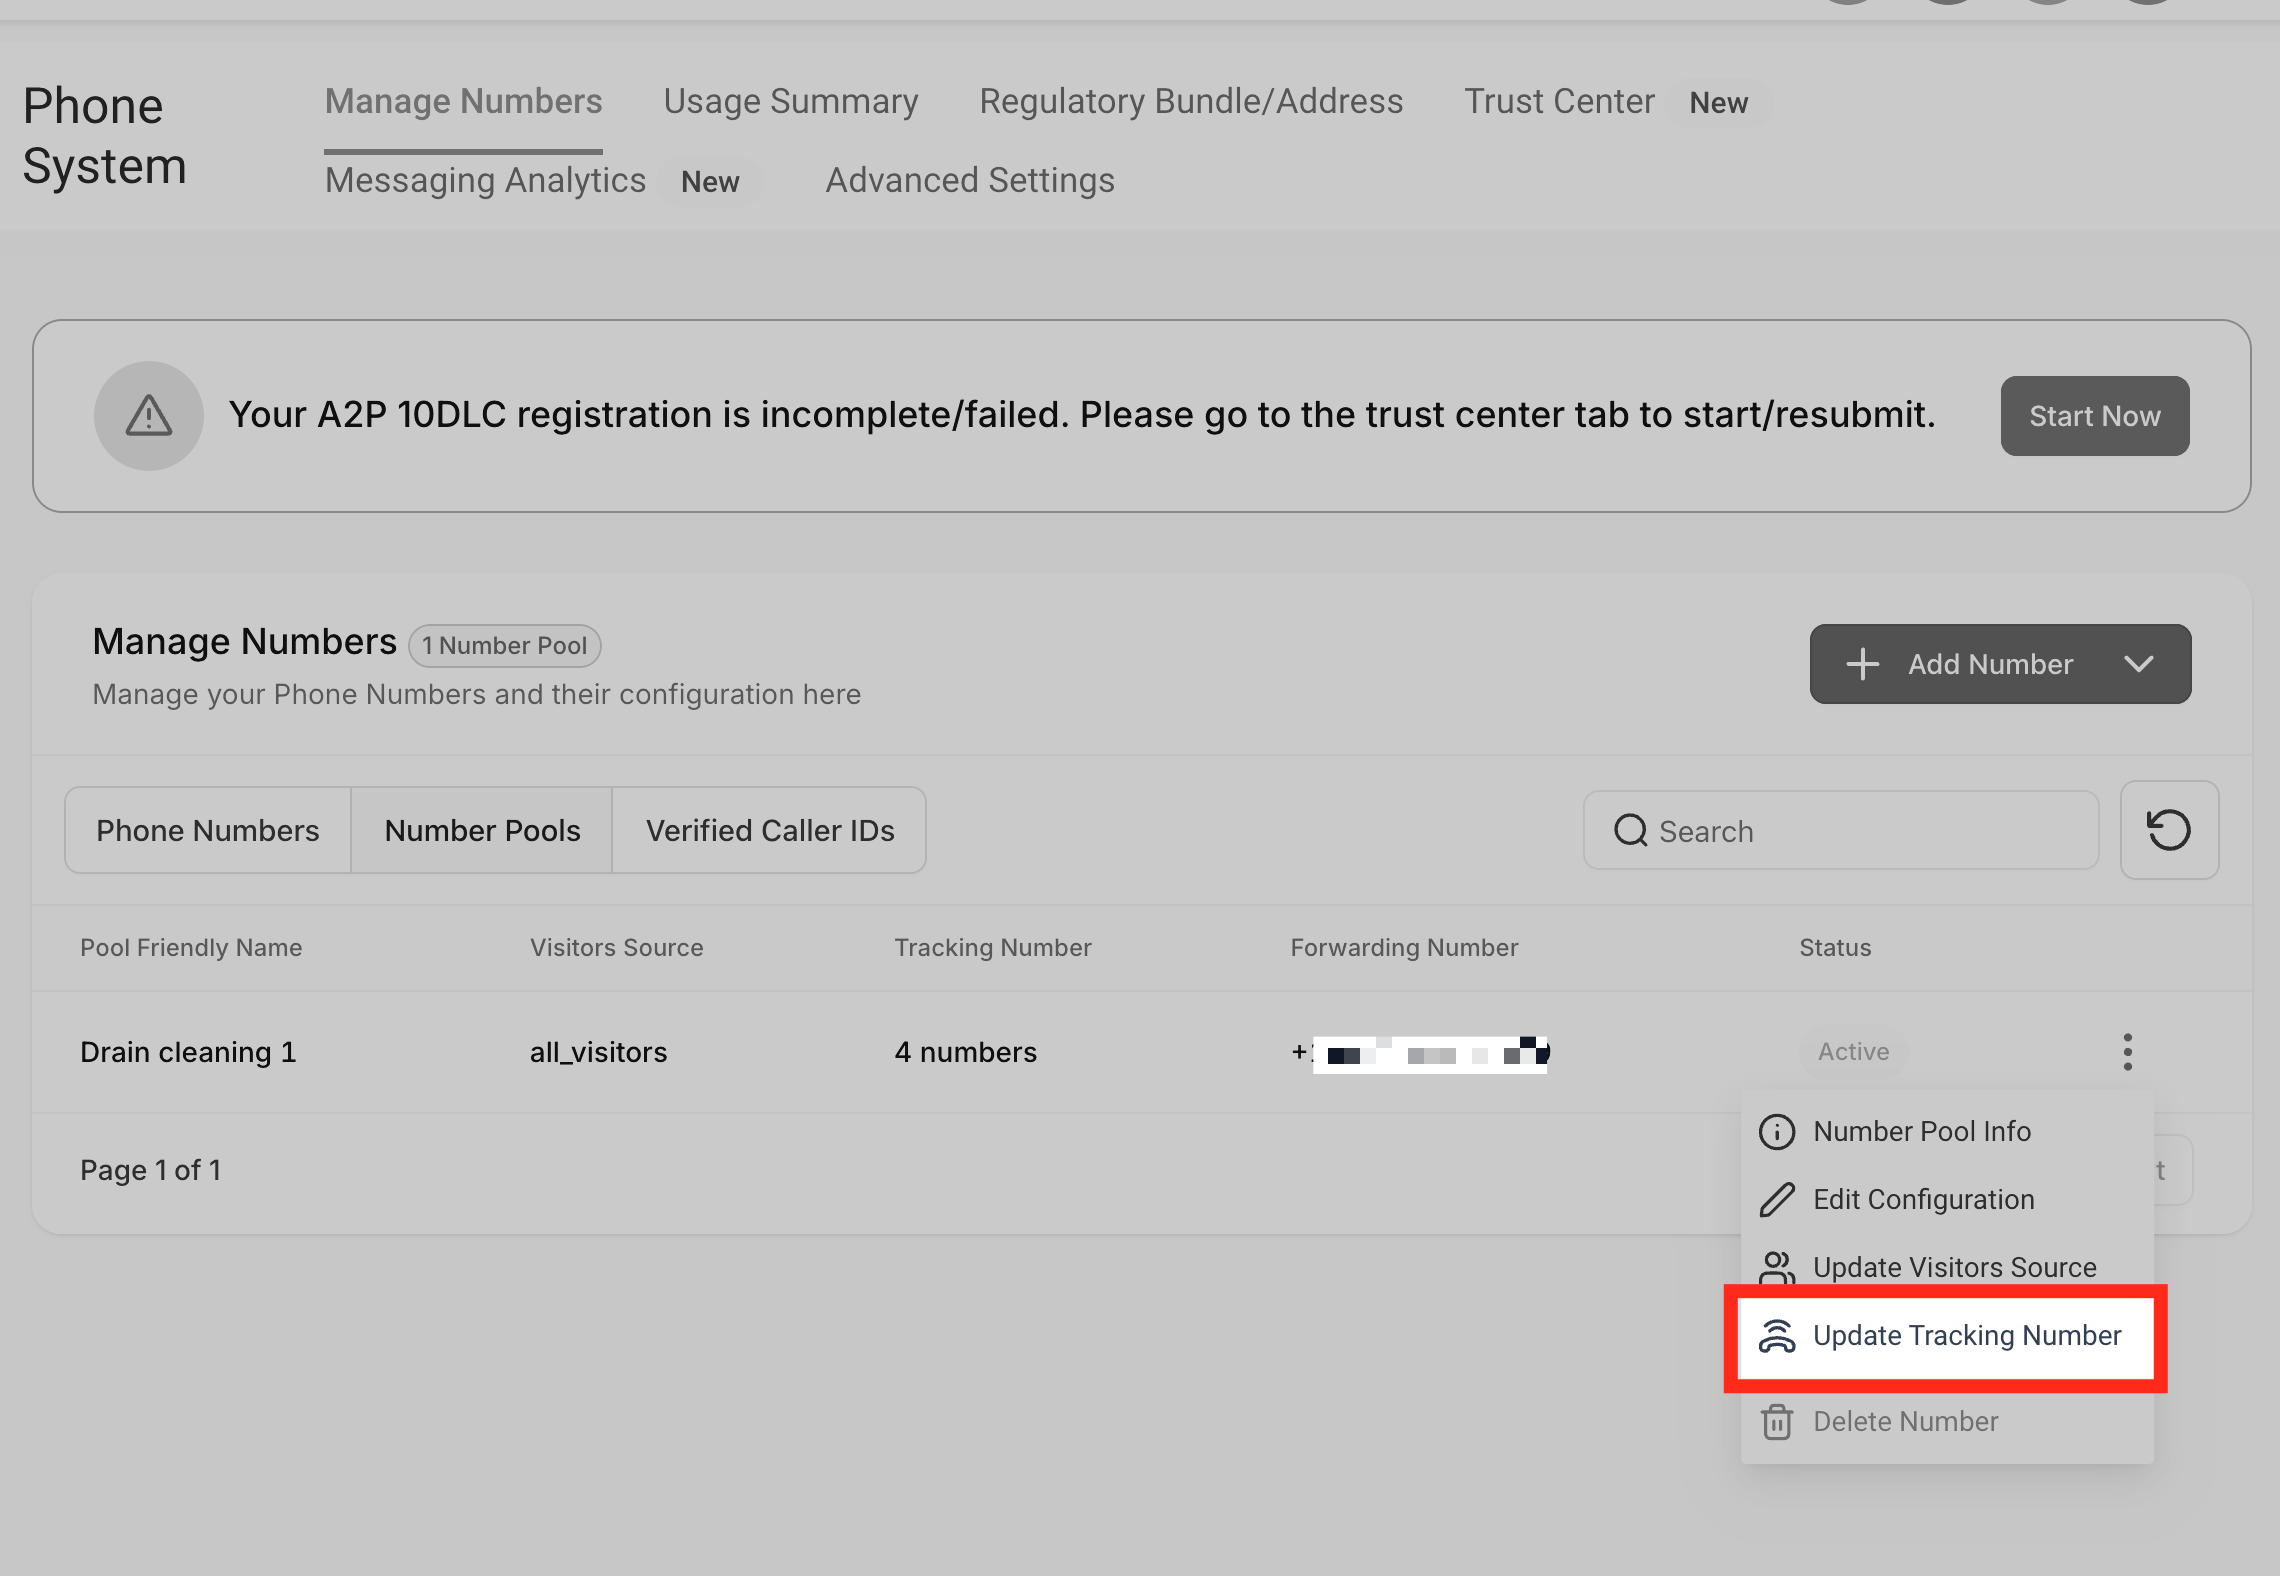
- Find the number pool and click its three-dot menu.
- Select Update Tracking Number to review the swapping number used on your website.
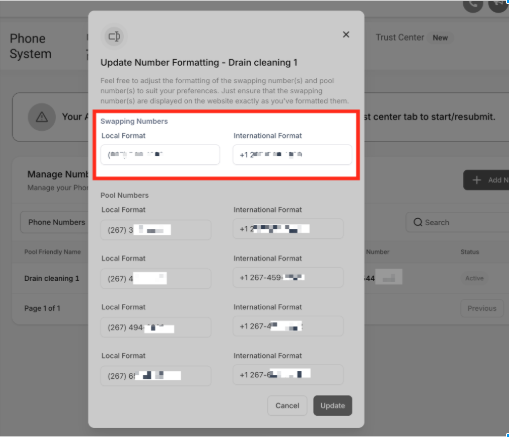
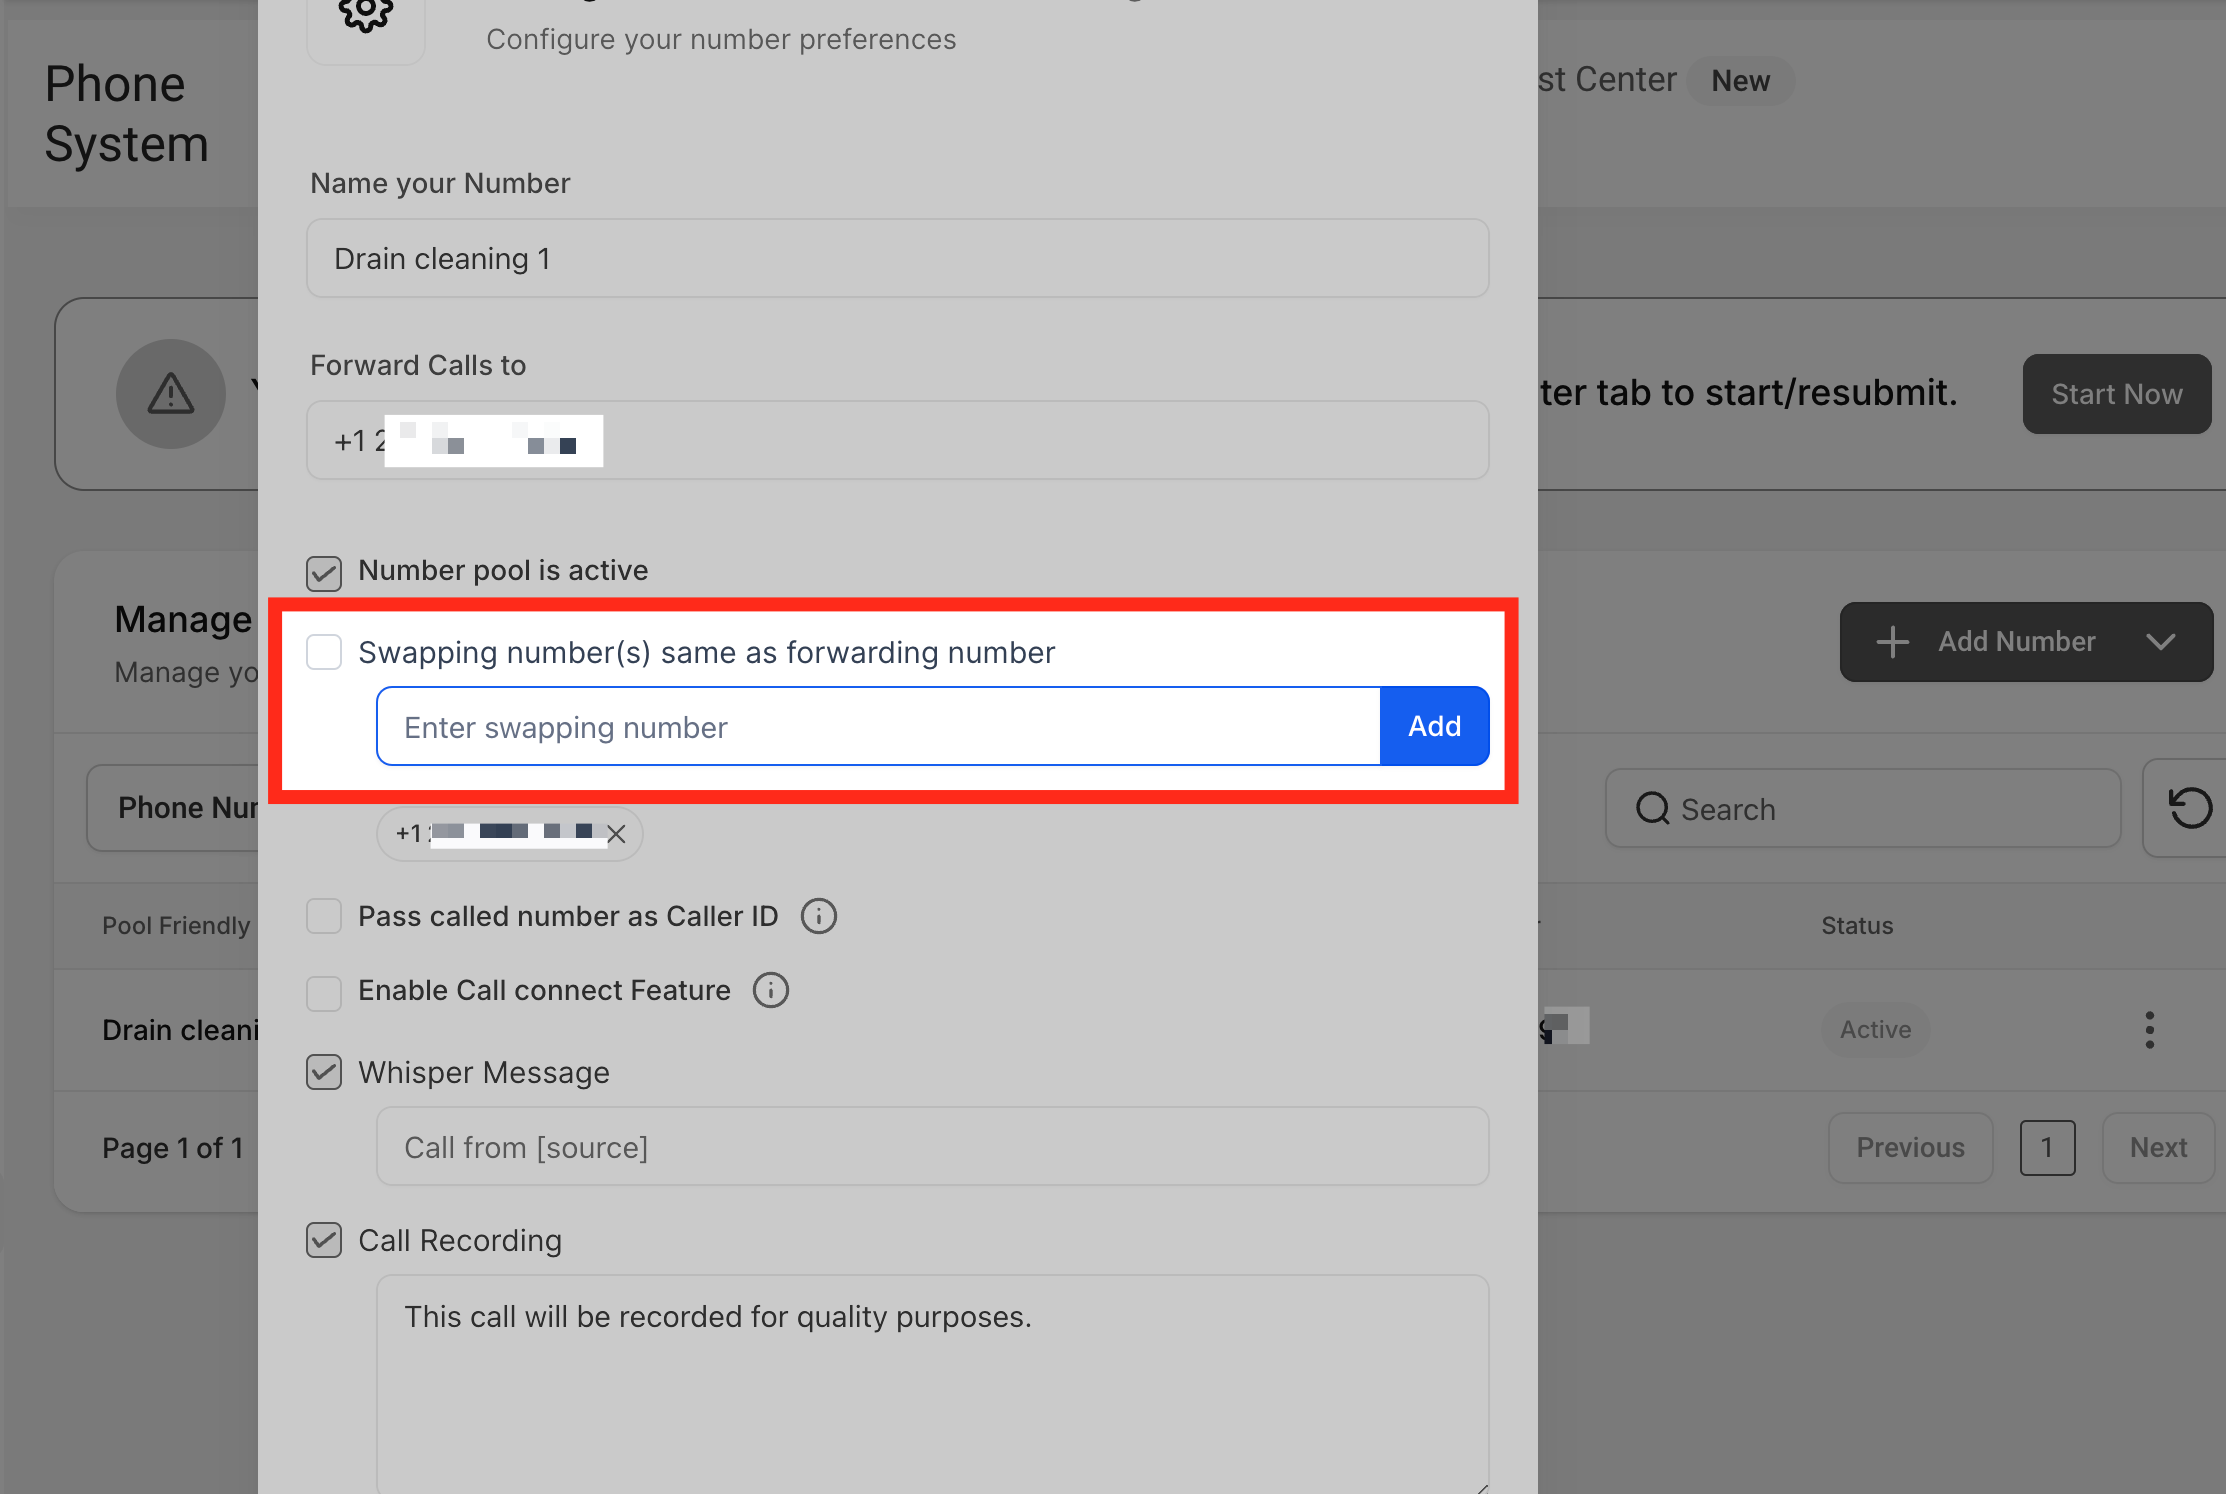
To change the configured swapping number:
- Open the pool's three-dot menu.
- Click Edit Configuration.
- Uncheck Swapping number(s) same as forwarding number.
- Enter the new swapping number in the appropriate field.
- Click Add.
Important: Do not configure a forwarding destination that routes calls back into the connected calling system. Use an external forwarding number to avoid routing loops.
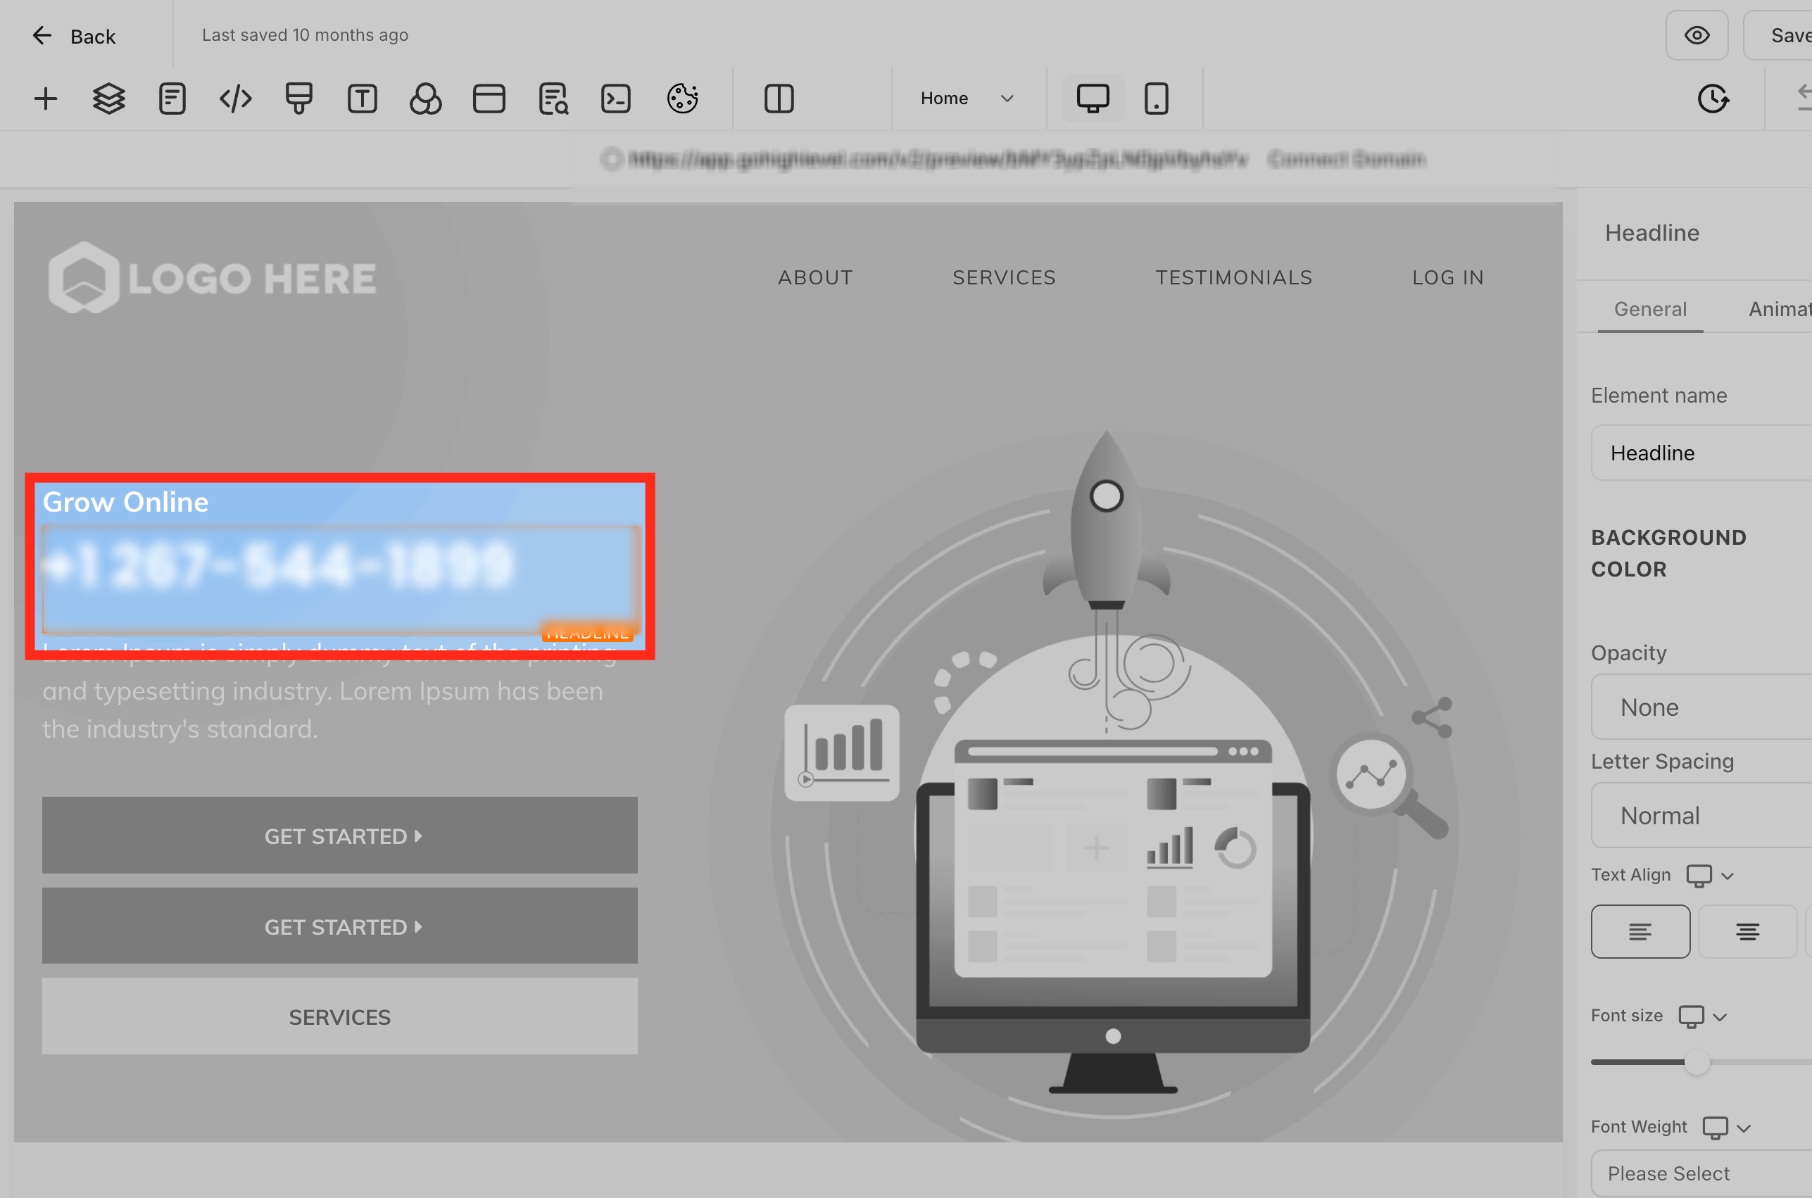
After updating the swapping number, use that number consistently on your website.
Step 5: Confirm Attribution in Call Reporting
After the number pool is running, use call reporting to review the information associated with tracked calls.
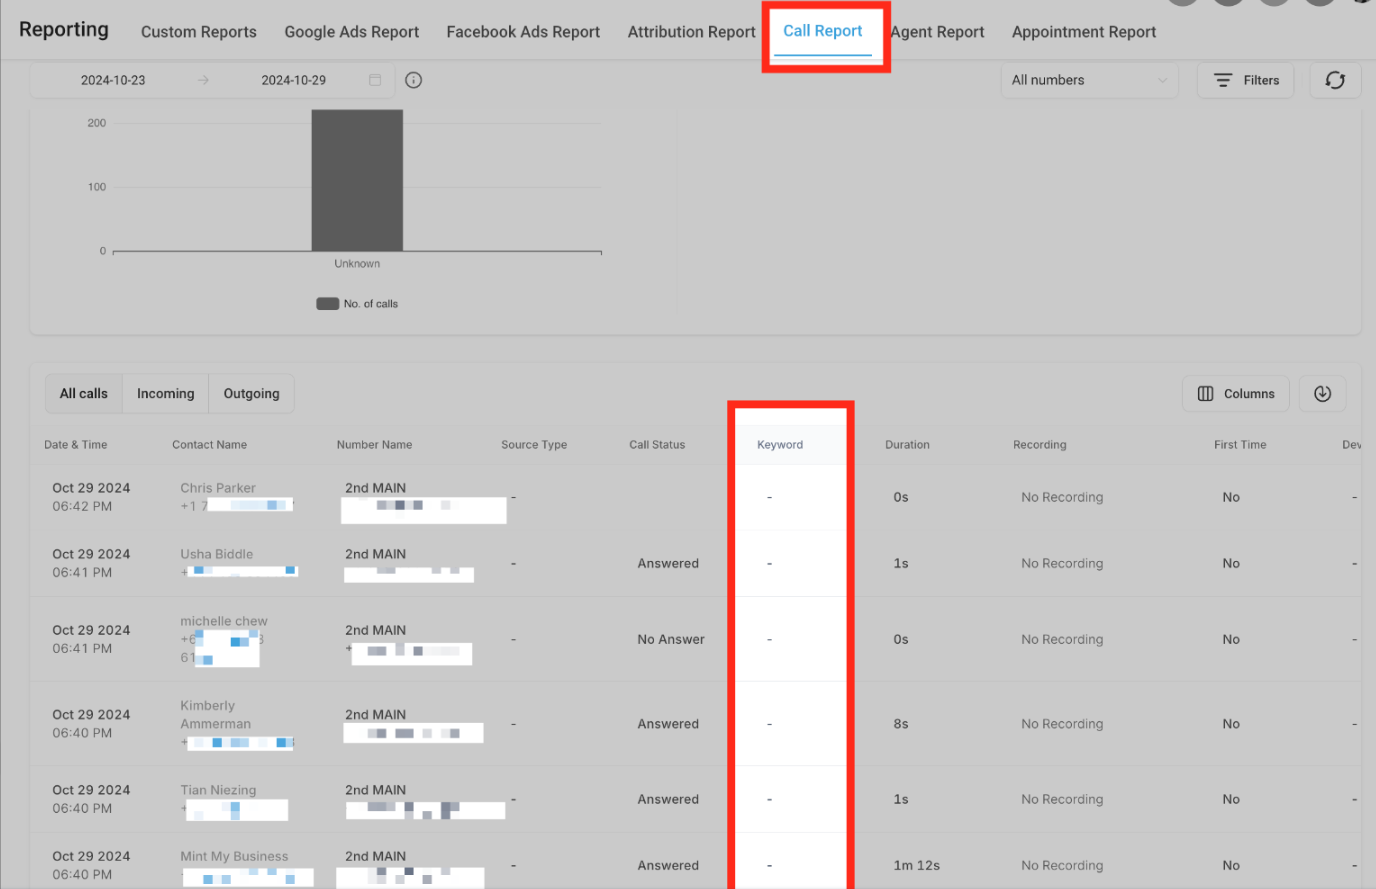
- Navigate to Reporting > Call Report.
- Find the Keyword column.
- Review the available keyword and call attribution information.
When a website visitor arrives through a tracked source and calls the displayed tracking number, call reporting can associate the call with available source and keyword information.
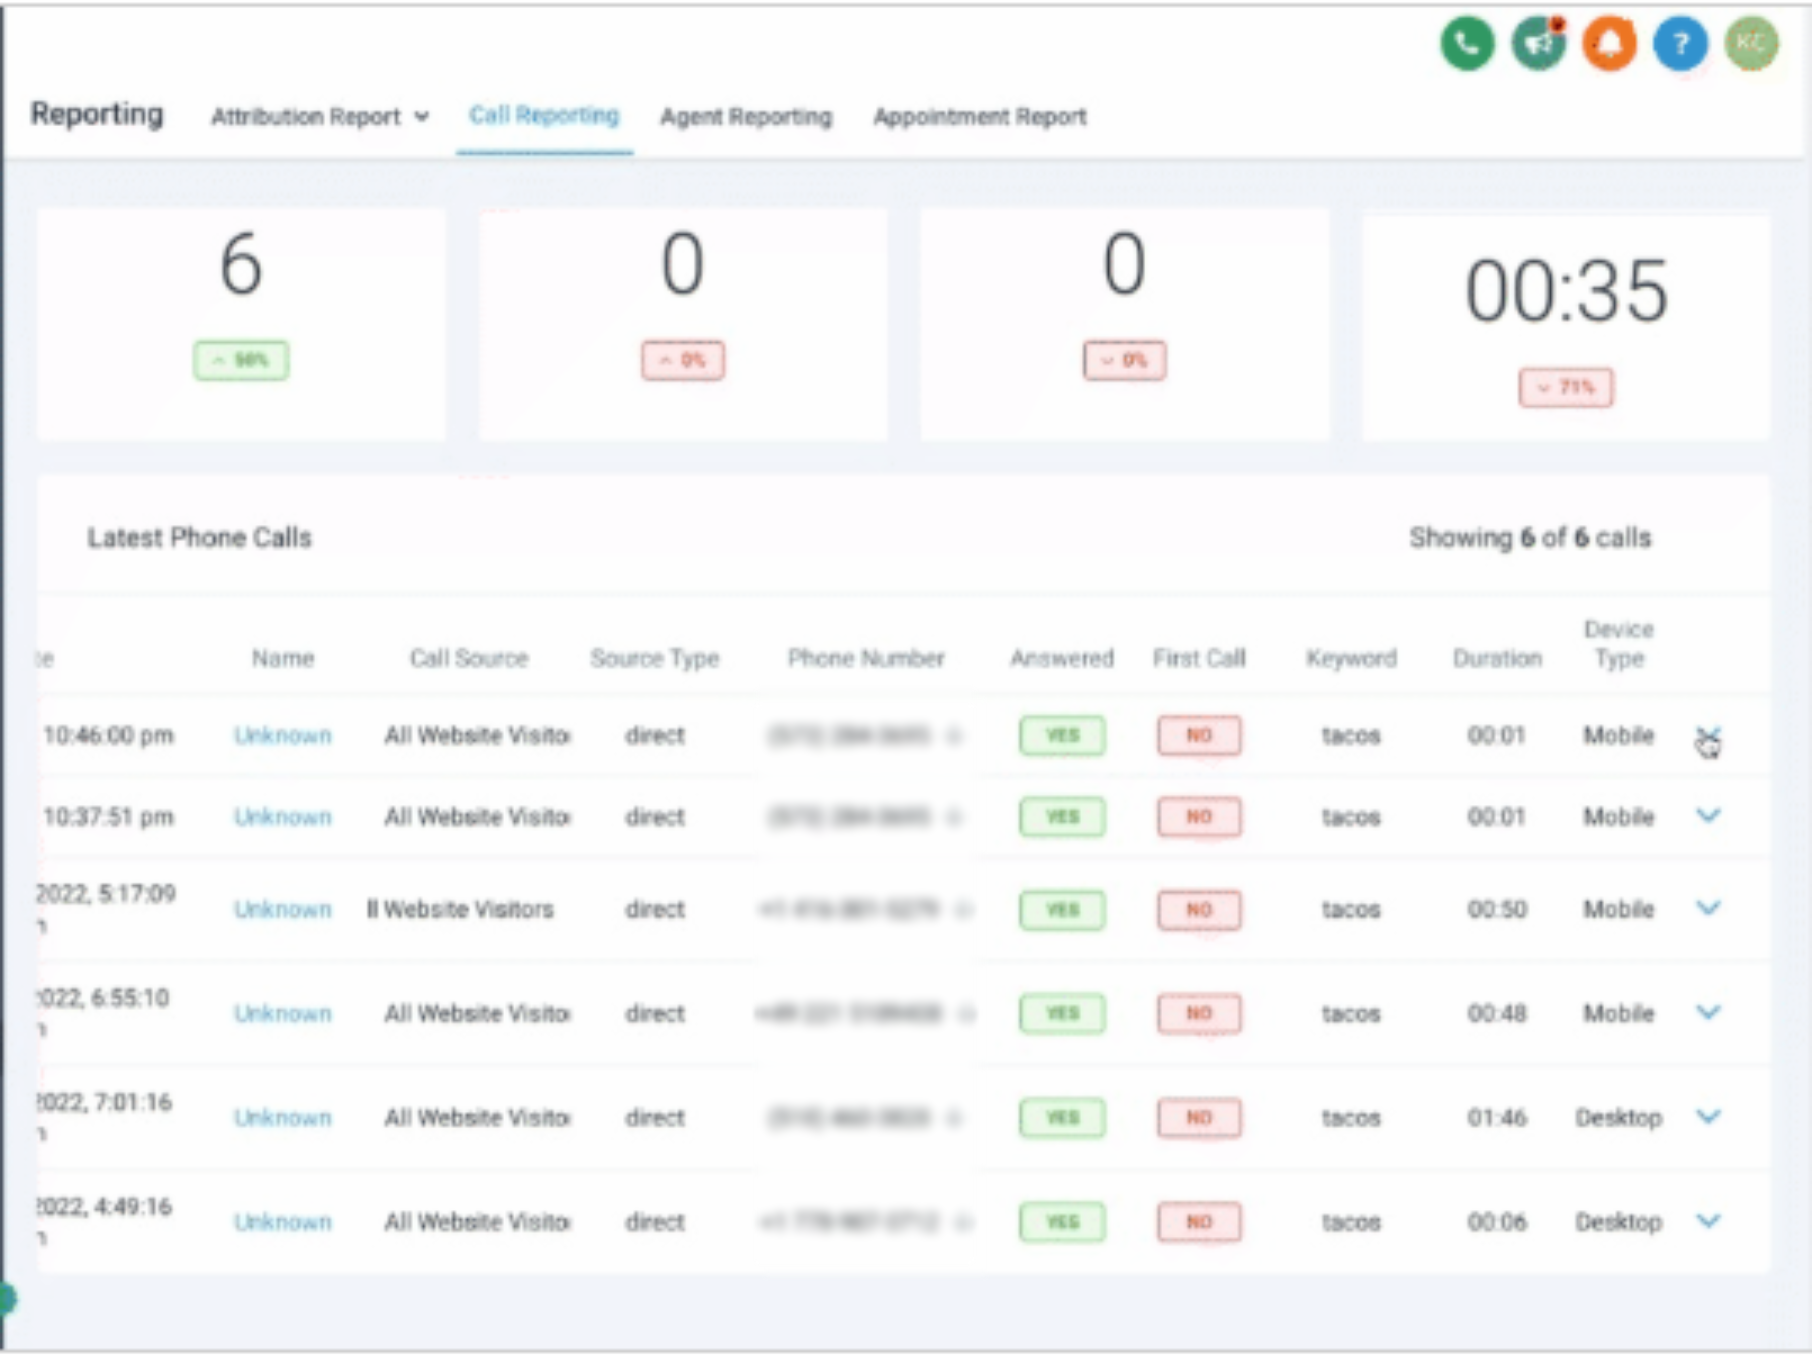
Scroll to the right and click the downward arrow to view additional information, including the page link the contact visited.
You can also click the contact's name to review their activity.
How to Test Number Swapping
After adding the tracking script to your website, test the page to confirm that phone numbers change according to the selected visitor-tracking conditions.
- Open an incognito or private browser window.
- Enter your landing page URL, such as
yourwebsite.com/landing-page. - Load the page and review the displayed phone number.
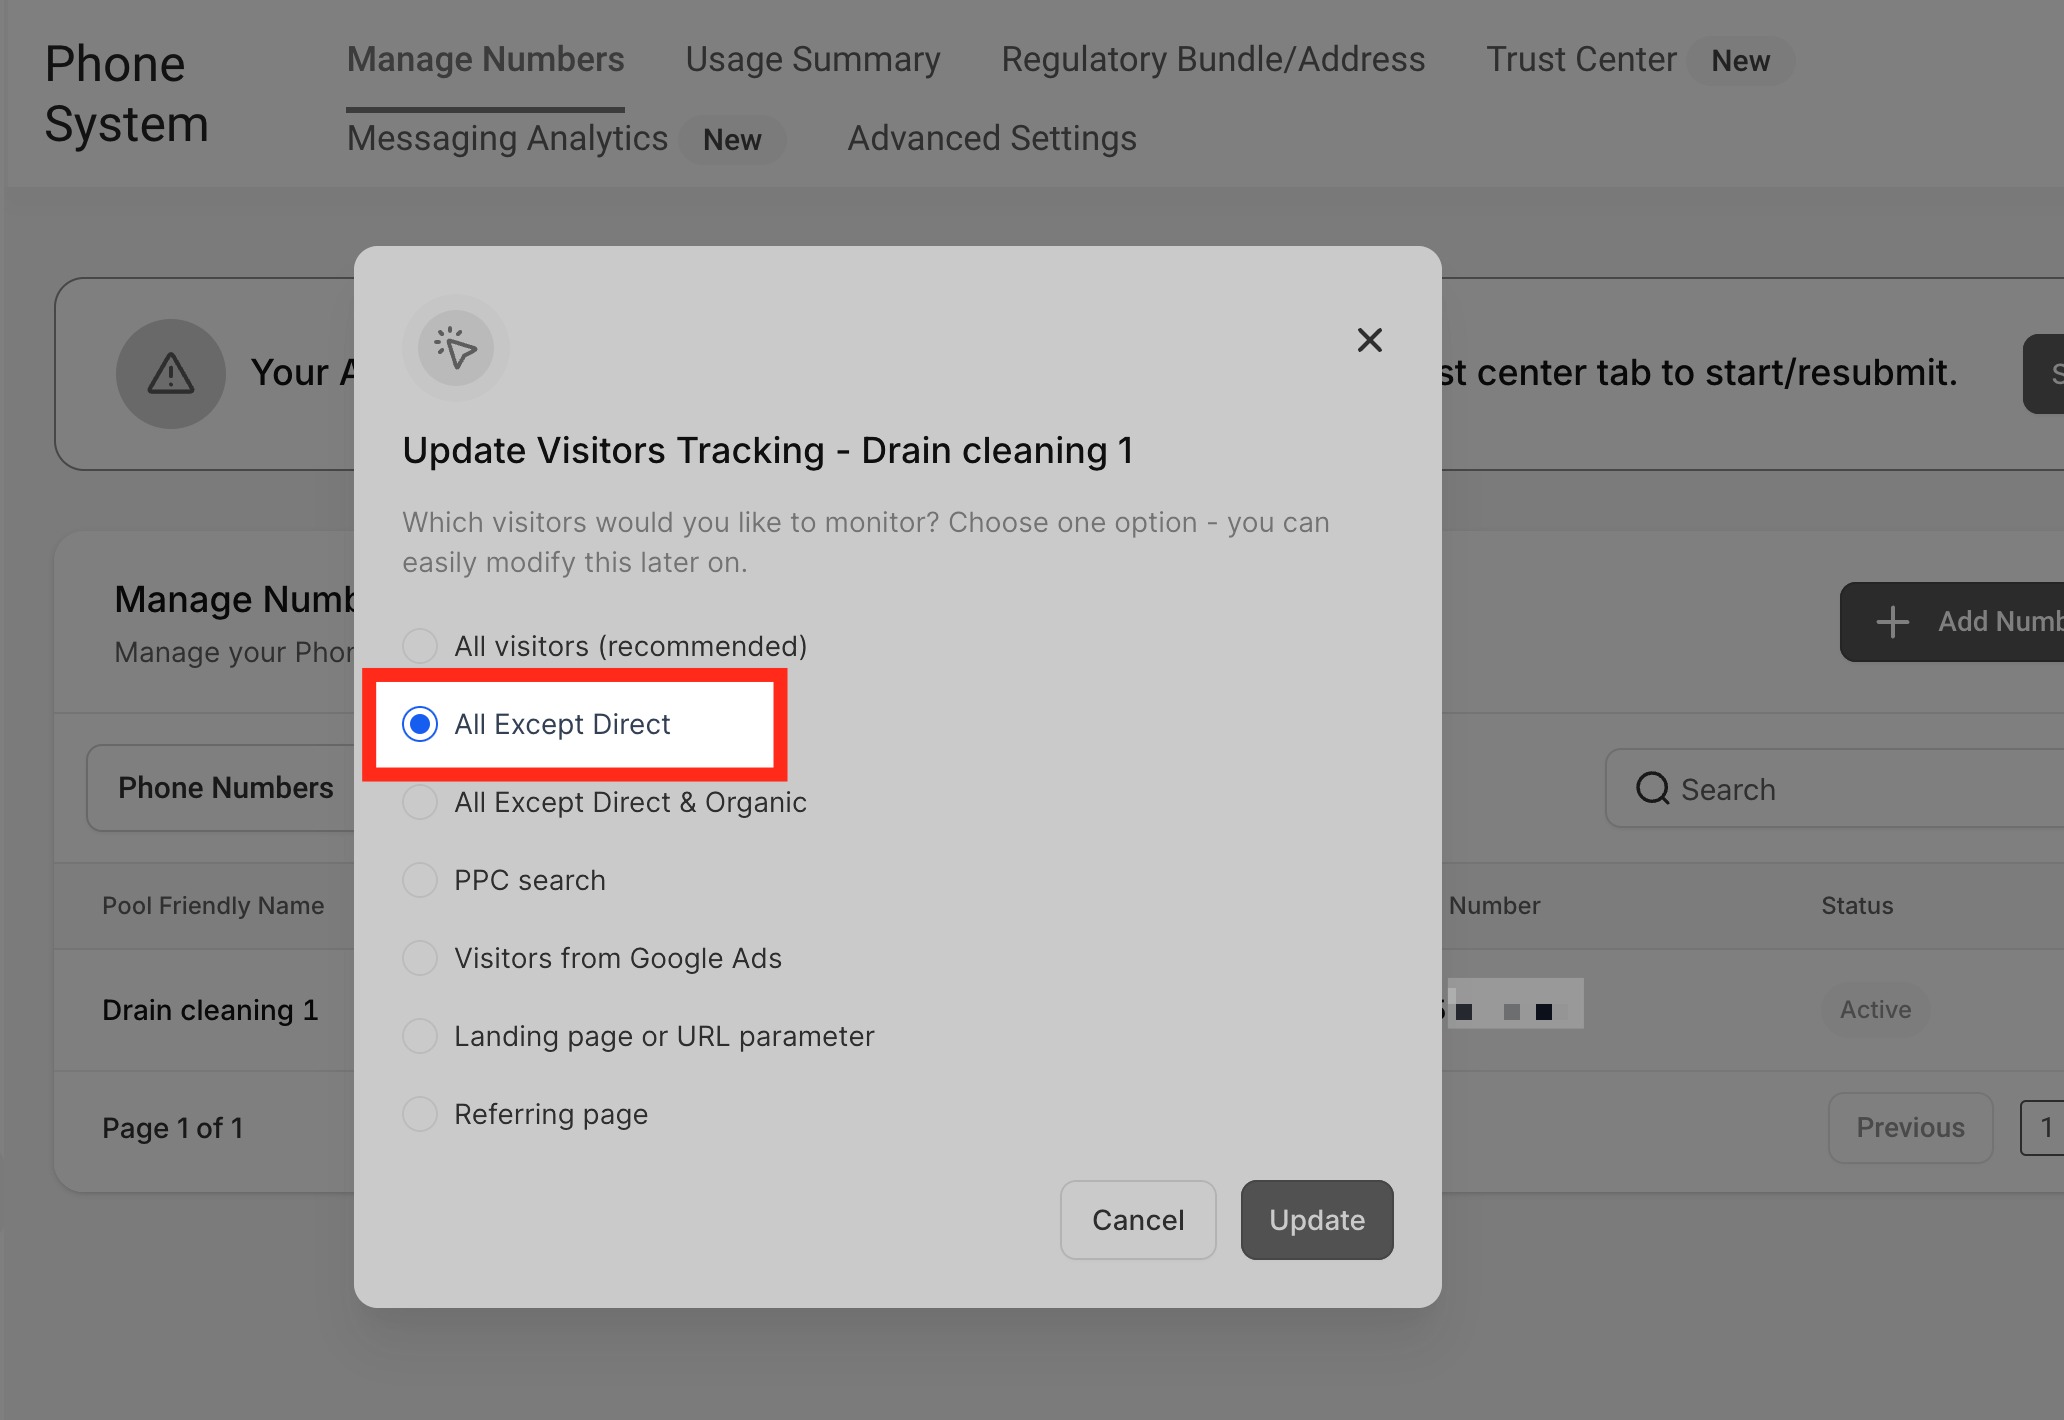
If All Except Direct is selected as the tracking option, access your landing page by clicking a link from another webpage instead of entering its URL directly into the browser.

For example, create a link labeled "Apple Smiles" that points to yourwebsite.com/landing-page, then open the page through that link.
How to Set Up Keyword Tracking
Keyword tracking helps associate incoming calls with search terms used by visitors arriving through Google Ads. Configure the keyword parameter in your advertising URL so the tracking information is available for call attribution.
- Open the relevant ad configuration in Google Ads.
- Add the parameter
?keyword={keyword}to the destination URL. - Use the updated URL for the advertisement.
For example, if the original URL is:
yourwebsite.com/landingpage
Update it to:
yourwebsite.com/landingpage/?keyword={keyword}
The keyword parameter makes the search keyword available for the associated tracking workflow.
How to Swap Numbers in a Button
You can use an HTML anchor tag with a tel: link to create a clickable phone number or call button. The phone number format must match the number configured for swapping.
Example:
<a href="tel:(972) 421-5139" class="btn btn-blue">Call Us</a>Important: The phone number inside href="tel:..." should use the same format as the visible or swapping number. Number Pool matching does not automatically normalize local and international formats.
For international numbers, use either local formatting or E.164 formatting consistently throughout the page.
Group ID
A Group ID helps control number swapping when more than one number pool is involved. It allows the tracking configuration to identify the best matching number pool and swap the appropriate number instead of replacing every number associated with different pools.
Group ID Use Case
Suppose you run two advertisements that direct visitors to the same website.
- Visitors arriving through the first advertisement see one tracking number.
- Visitors arriving through the second advertisement see a different tracking number.
You can configure the appropriate source and Group ID to control which number pool applies to each visit.
How to Configure a Group ID
Assign a Group ID to the number pool and use its group-specific snippet on your website.
- Go to Settings > Phone System > Phone numbers.
- Under Manage Numbers, open Number Pools.
- Find the relevant number pool and open its configuration.
- Click Add/Edit Group Id.
- Enter a name for the Group ID.
- Click Update.
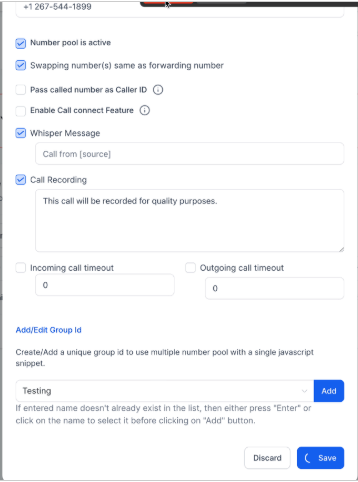
Click the information icon to copy the Group snippet and integrate it into your website footer.
Frequently Asked Questions
Q: Why should I use number pools for call tracking?
Number pools help identify where calls originate by displaying tracking numbers to visitors arriving from different traffic sources.For genuine Google Ads traffic, URL parameters such as &gclid can help the tracking snippet identify the source. When a visitor calls the displayed number, the available tracking information can be associated with the call.Call Reporting may also display keyword attribution information when the relevant data is available.
Q: Can I direct calls from a number pool to the web app or mobile app?
Yes. Enable Ring Incoming Call to selected Users in the pool's configuration and select the recipients.Set each recipient's Default Channel for Ring All to Web App or Mobile App.
Q: Do the displayed phone number and clickable tel: link need to use the same format?
Yes. Number Pool swapping uses the phone number in the exact format configured on the page.
If the displayed number and the value inside the tel: link use different formats, the displayed number may swap while the clickable link does not.
For example, the displayed phone number might be:
(02) 6193 4089
Recommended clickable link:
<a href="tel:(02) 6193 4089">Call Us</a>
Using a differently formatted value such as tel:+61261934089 may prevent the hyperlink from swapping when the displayed number uses (02) 6193 4089.
Q: Are local and international/E.164 versions of the same phone number treated as equivalent?
No. Number Pool swapping does not automatically normalize local and international formats as equivalent values.
For example, (02) 6193 4089 and +61261934089 are treated as different values for matching purposes.
Use the same format consistently across:
- The configured swapping number.
- The visible phone number on the webpage.
- The
href="tel:..."value.
Q: Can I use international or E.164 phone number formatting with number pools?
Yes. International and E.164 formatting can be used when the number format remains consistent.
For example, if the swapping number is configured as +61261934089, use the same format on your webpage.
Displayed number: +61261934089
Clickable link:
<a href="tel:+61261934089">Call Us</a>
Do not mix local and international formats for the same number when you expect the visible number and clickable hyperlink to swap together.
Need Help?
If you have questions or need assistance with a feature, contact support for further guidance. To help resolve your issue efficiently, include a brief description of what you're trying to accomplish, the steps you've already taken, and any relevant screenshots or error messages.