
Schedule your posts in advance for your Community groups and channels directly from Social Planner!
TABLE OF CONTENTS
- Scheduling Community Posts from Social Planner
- Key Benefits of Scheduling Community Posts from Social Planner
- How to Connect Community Groups in Social Planner
- How to Create and Schedule Community Posts
- Schedule Community Posts Using the Public API
- Manage Comments from Social Planner
- Important Points to Note
Scheduling Community Posts from Social Planner
Scheduling Community posts from Social Planner allows you to create content in advance and publish it to selected Community channels at the right time. Instead of manually posting inside each channel, you can use Social Planner to prepare posts, attach supported media, select the posting user, and schedule content from one centralized workflow.
Community scheduling is useful for announcements, weekly engagement prompts, course updates, event reminders, and other planned content that should appear inside your Community without requiring manual publishing at the scheduled time.
Key Benefits of Scheduling Community Posts from Social Planner
Centralized Planning: Schedule Community content from Social Planner alongside your other planned posts.
Scheduled Posting: Plan and schedule content in advance to publish posts at the desired time. This helps maintain consistent engagement and ensures your messages reach Community members when intended.
Unified Content Management: Track and manage past and upcoming posts from one interface. View post history, scheduled posts, and publishing statuses across connected Communities.
How to Connect Community Groups in Social Planner
To connect Community groups and channels in Social Planner:
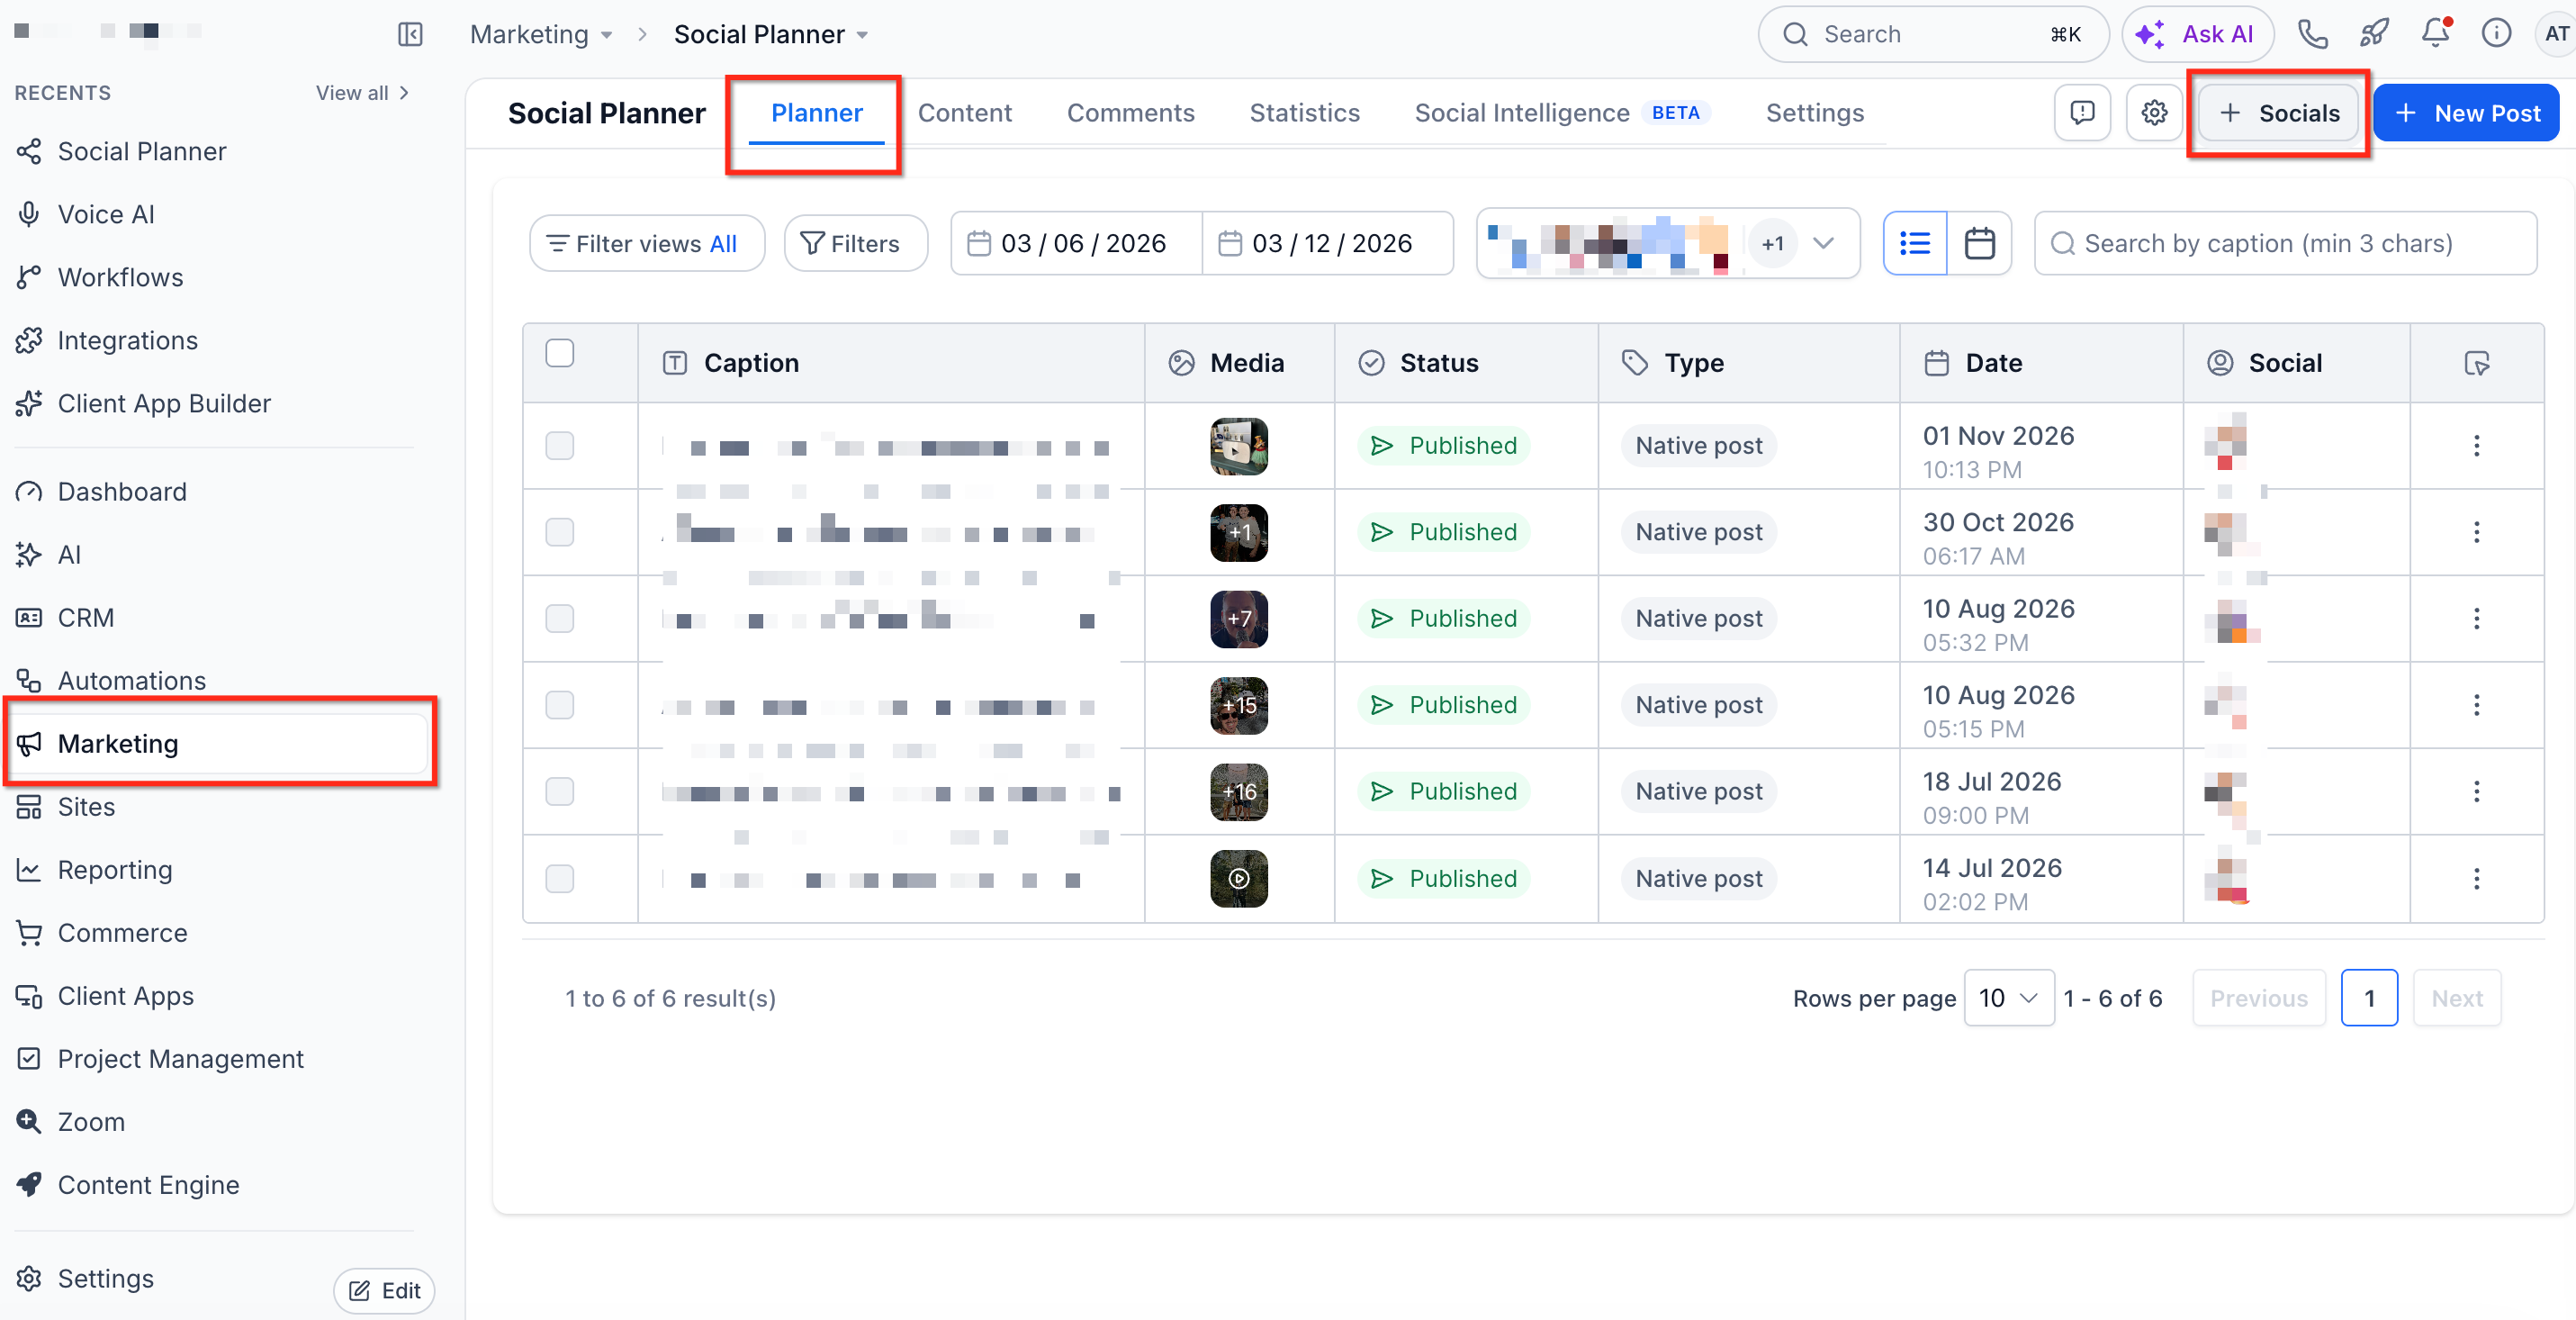
Navigate to Marketing > Social Planner > Settings.
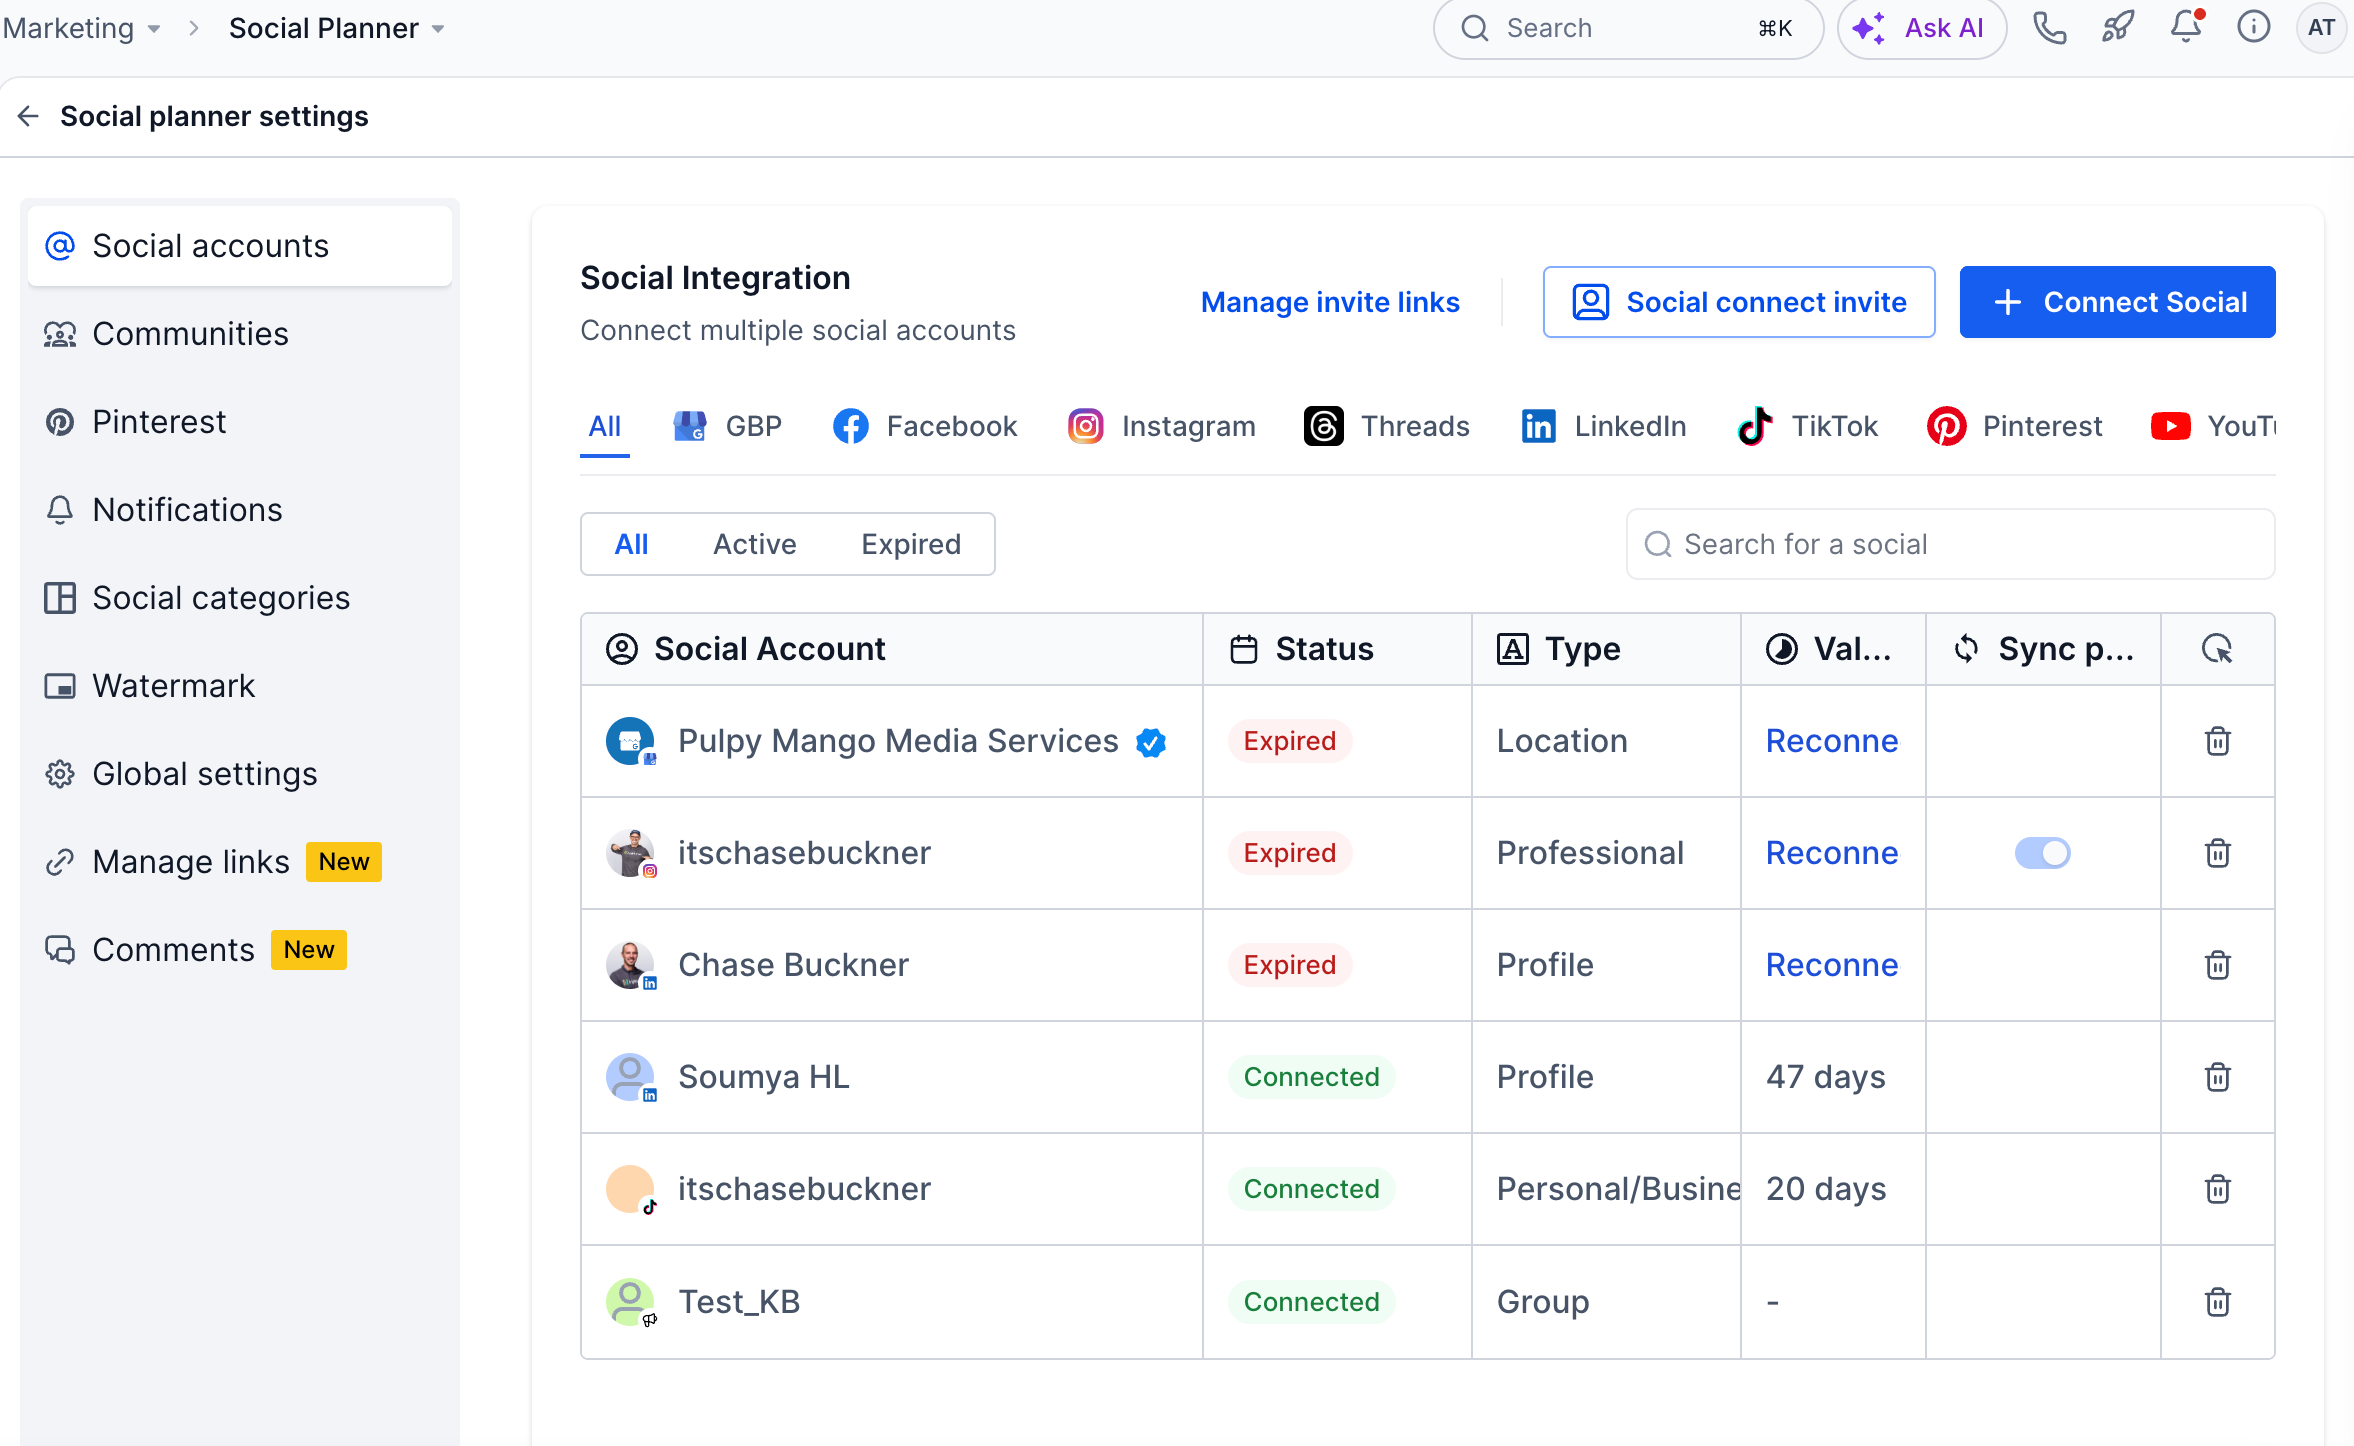
Select Communities, then click Connect Community.
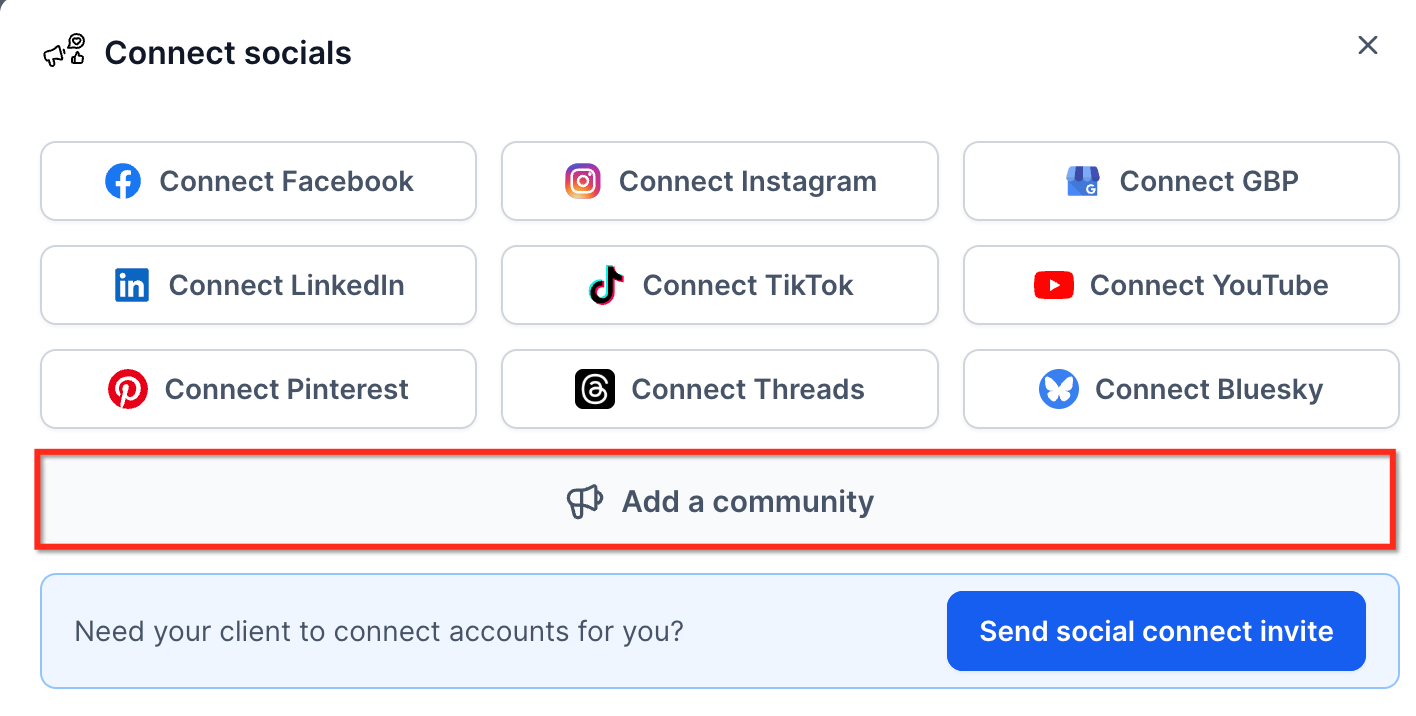
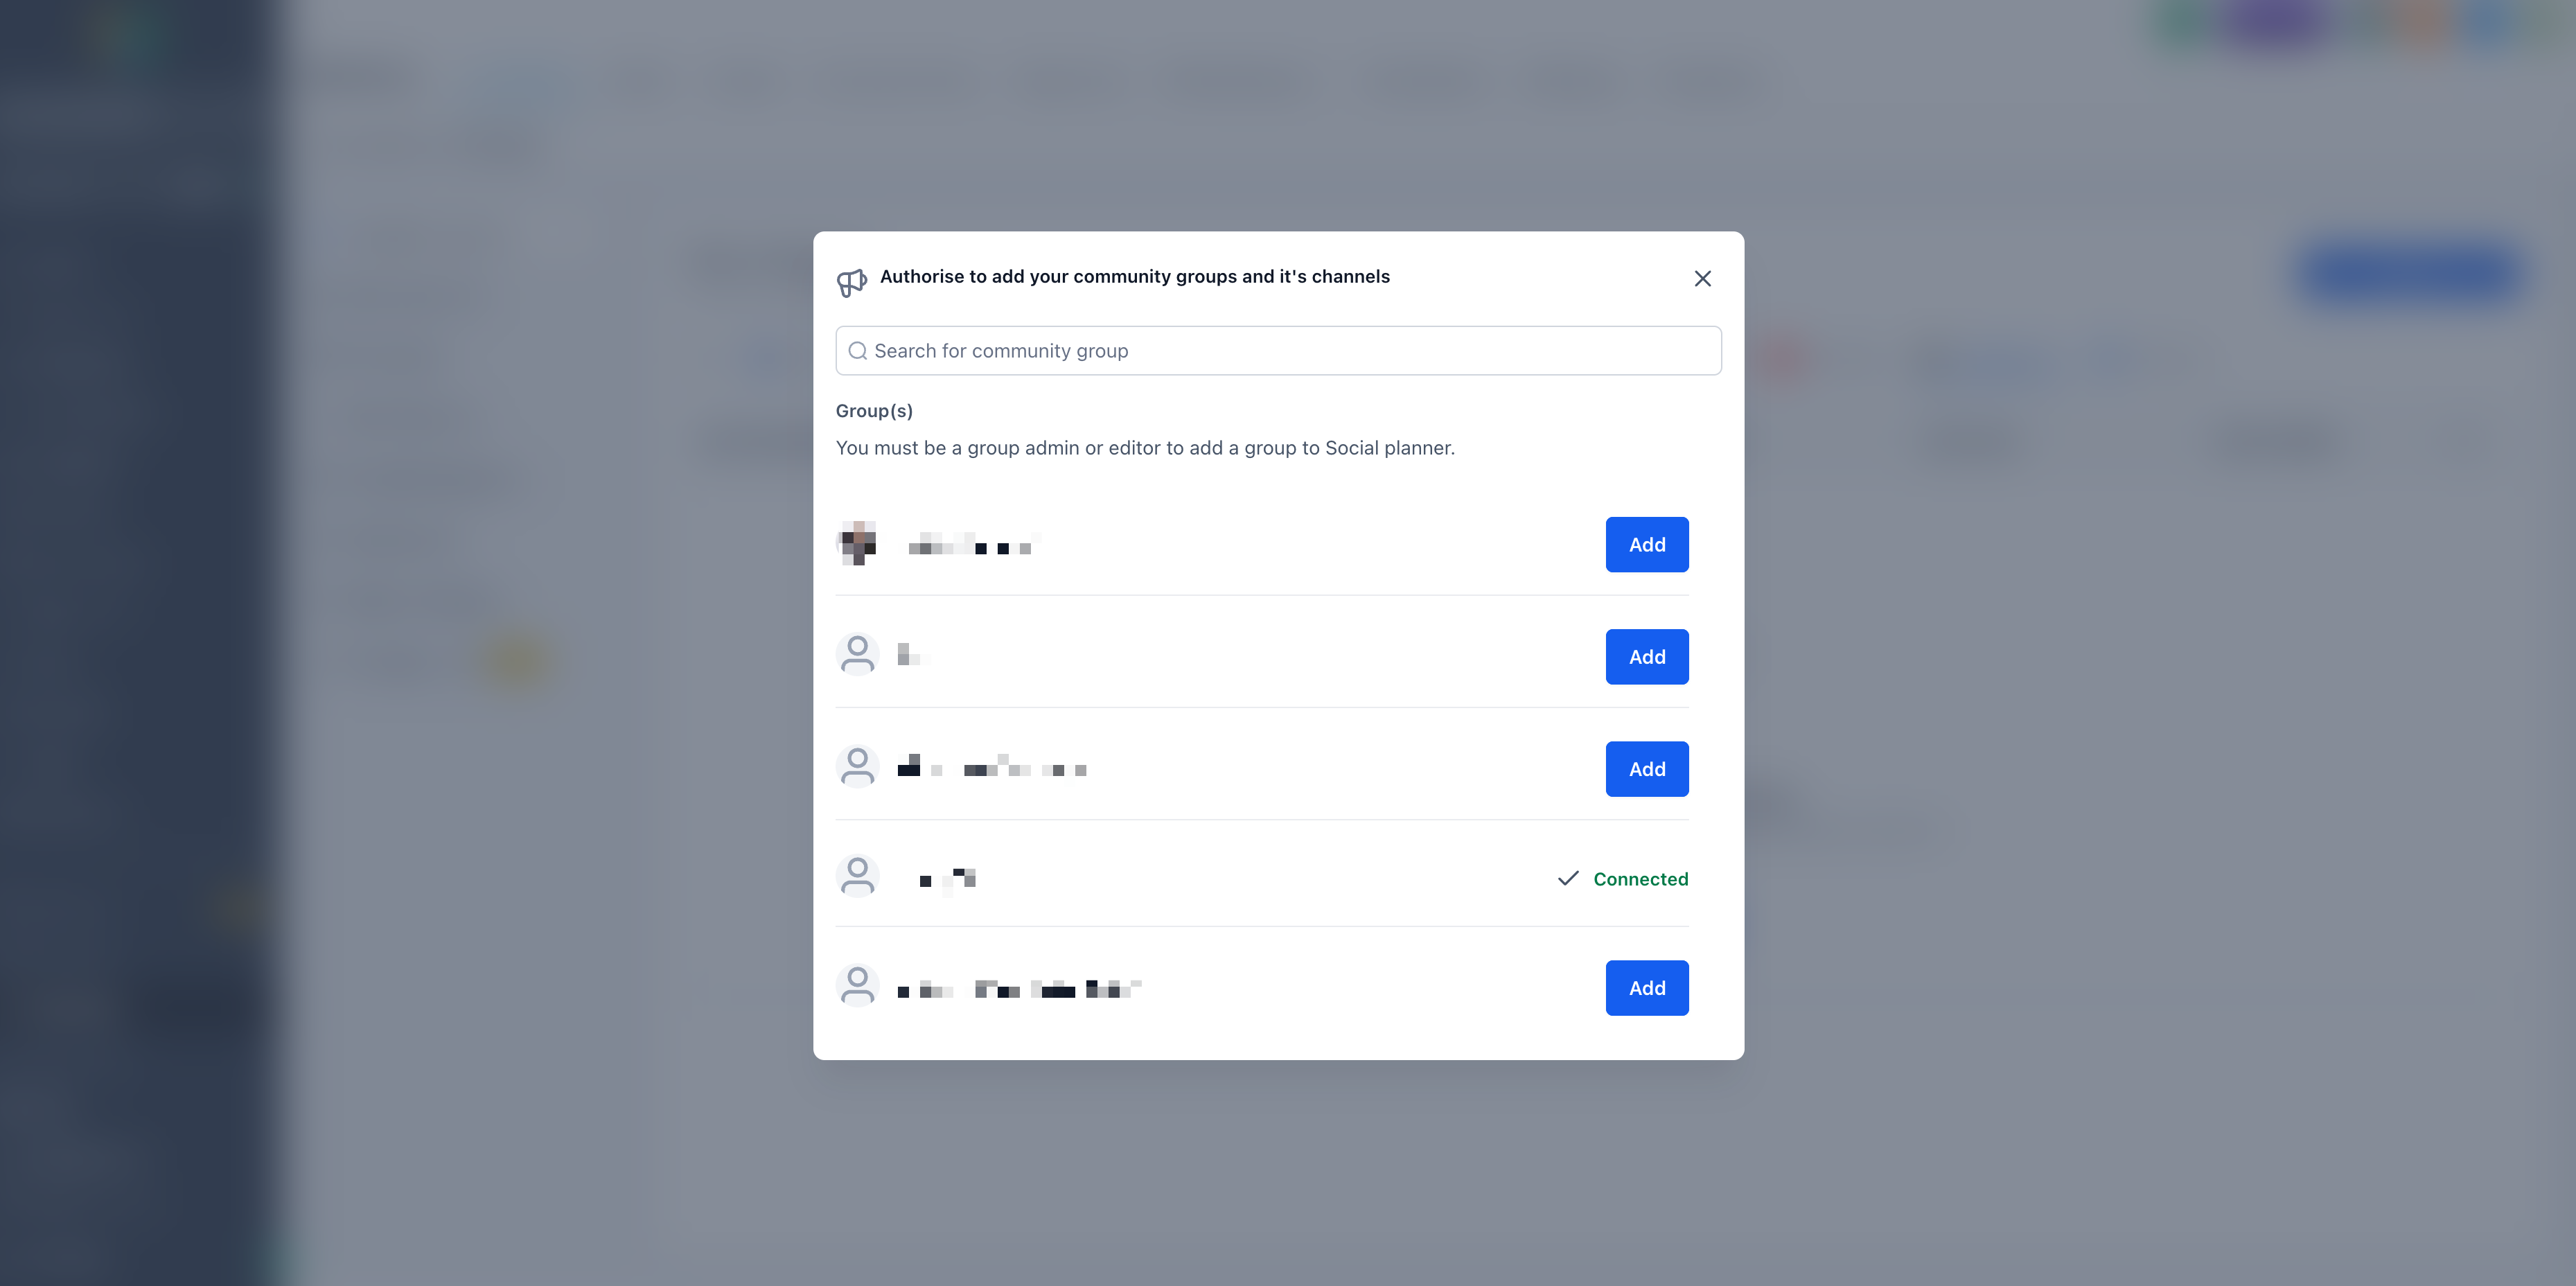
Choose the Community groups you want to make available in Social Planner.
How to Create and Schedule Community Posts
Click + New Post in Social Planner.
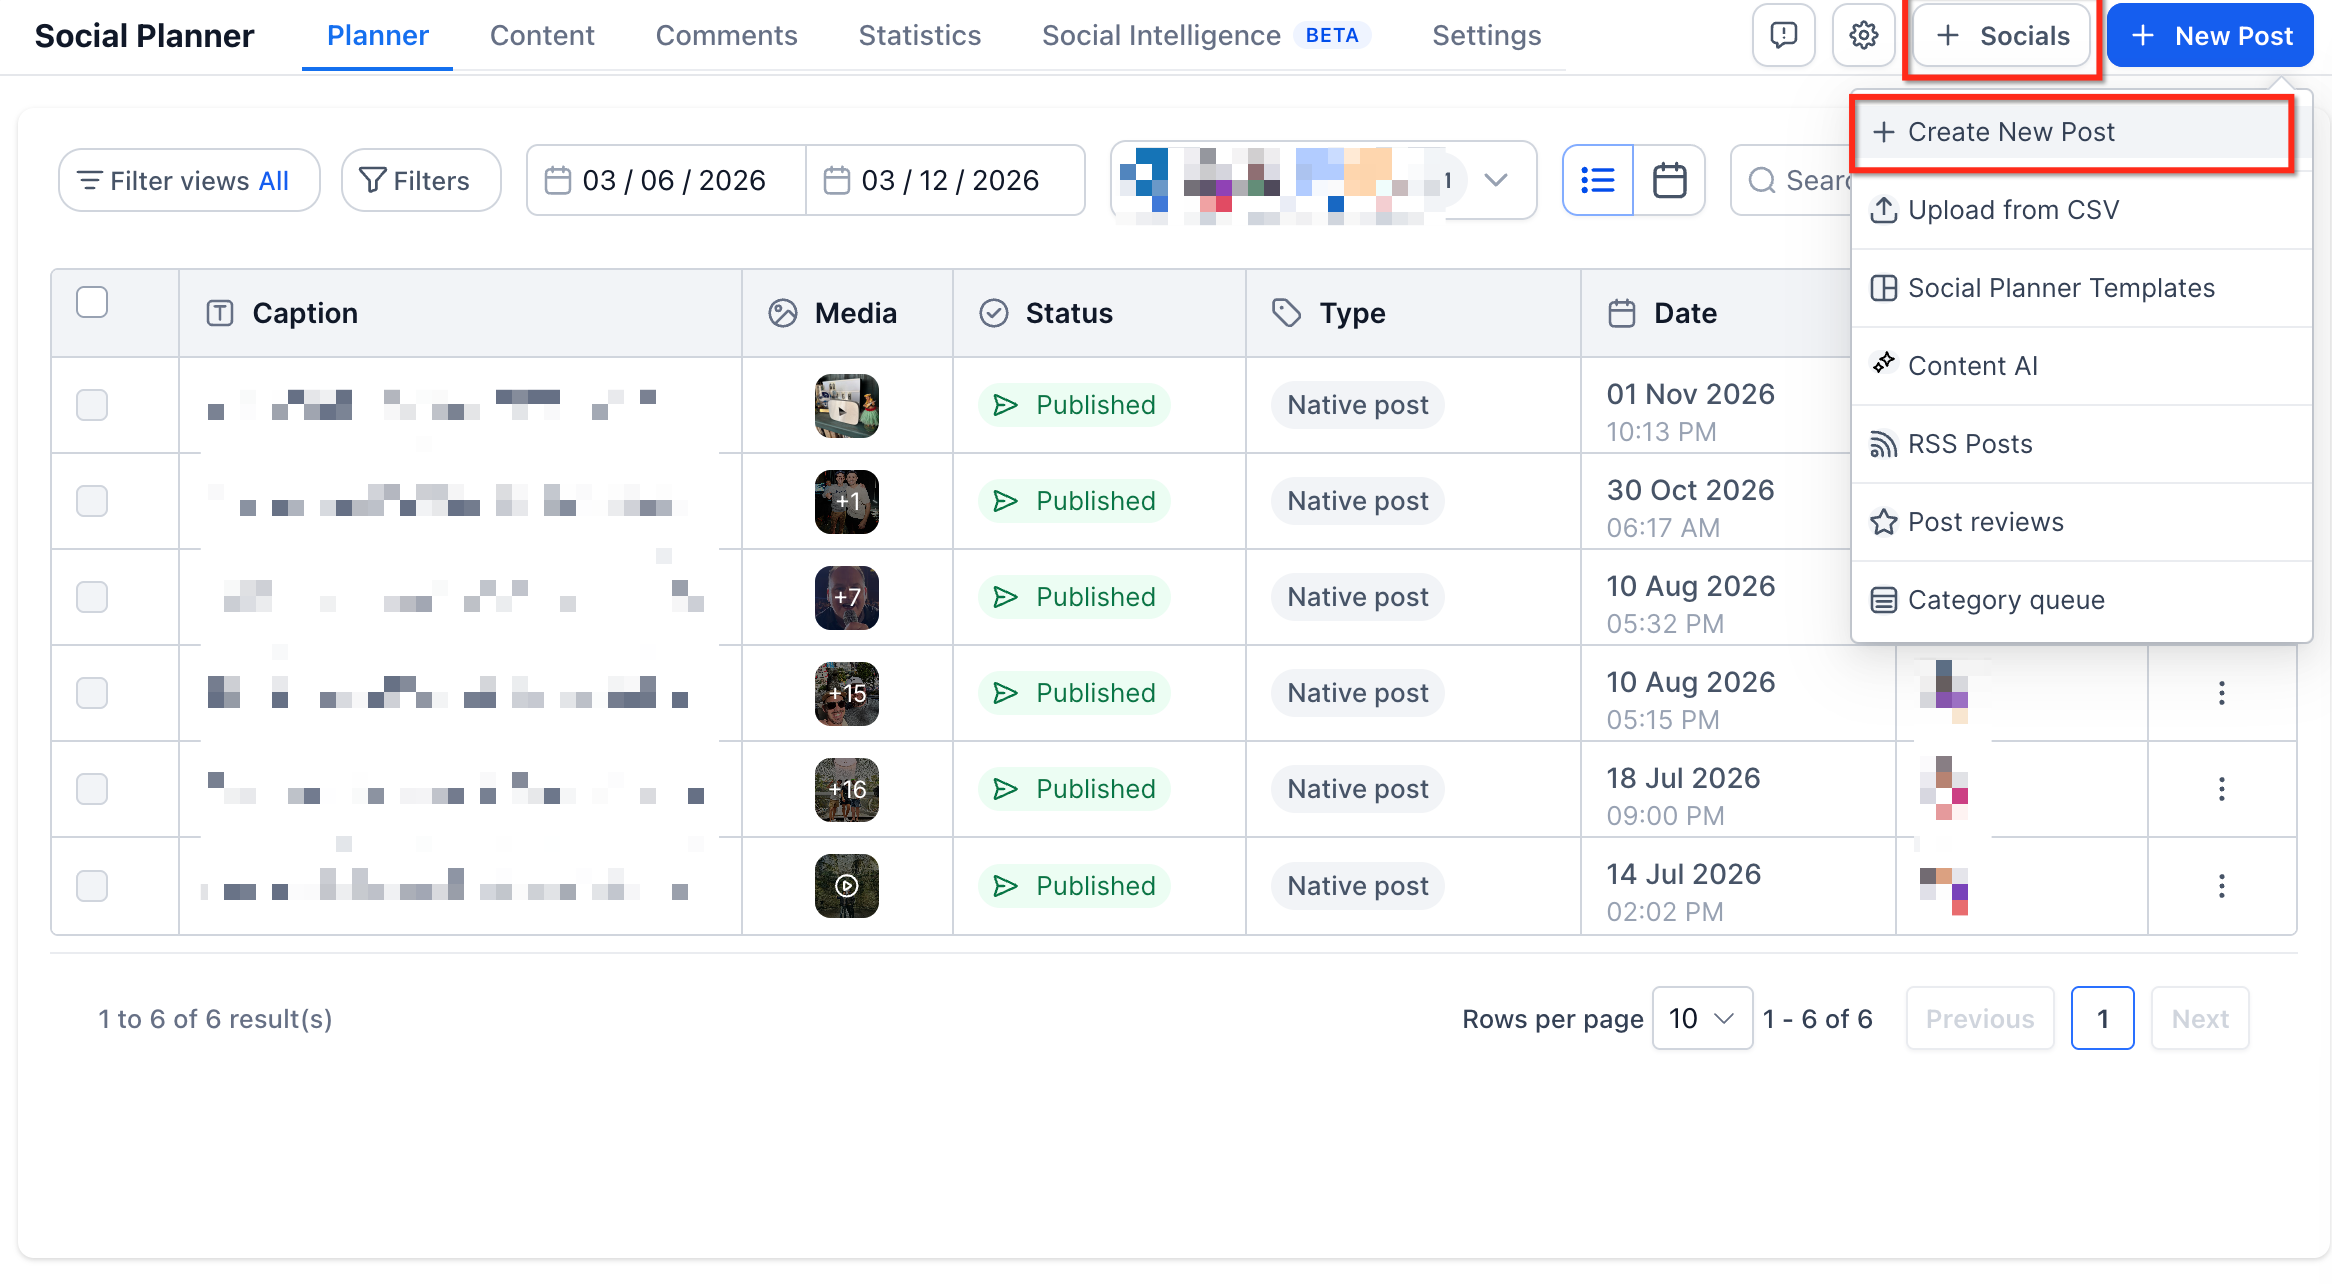
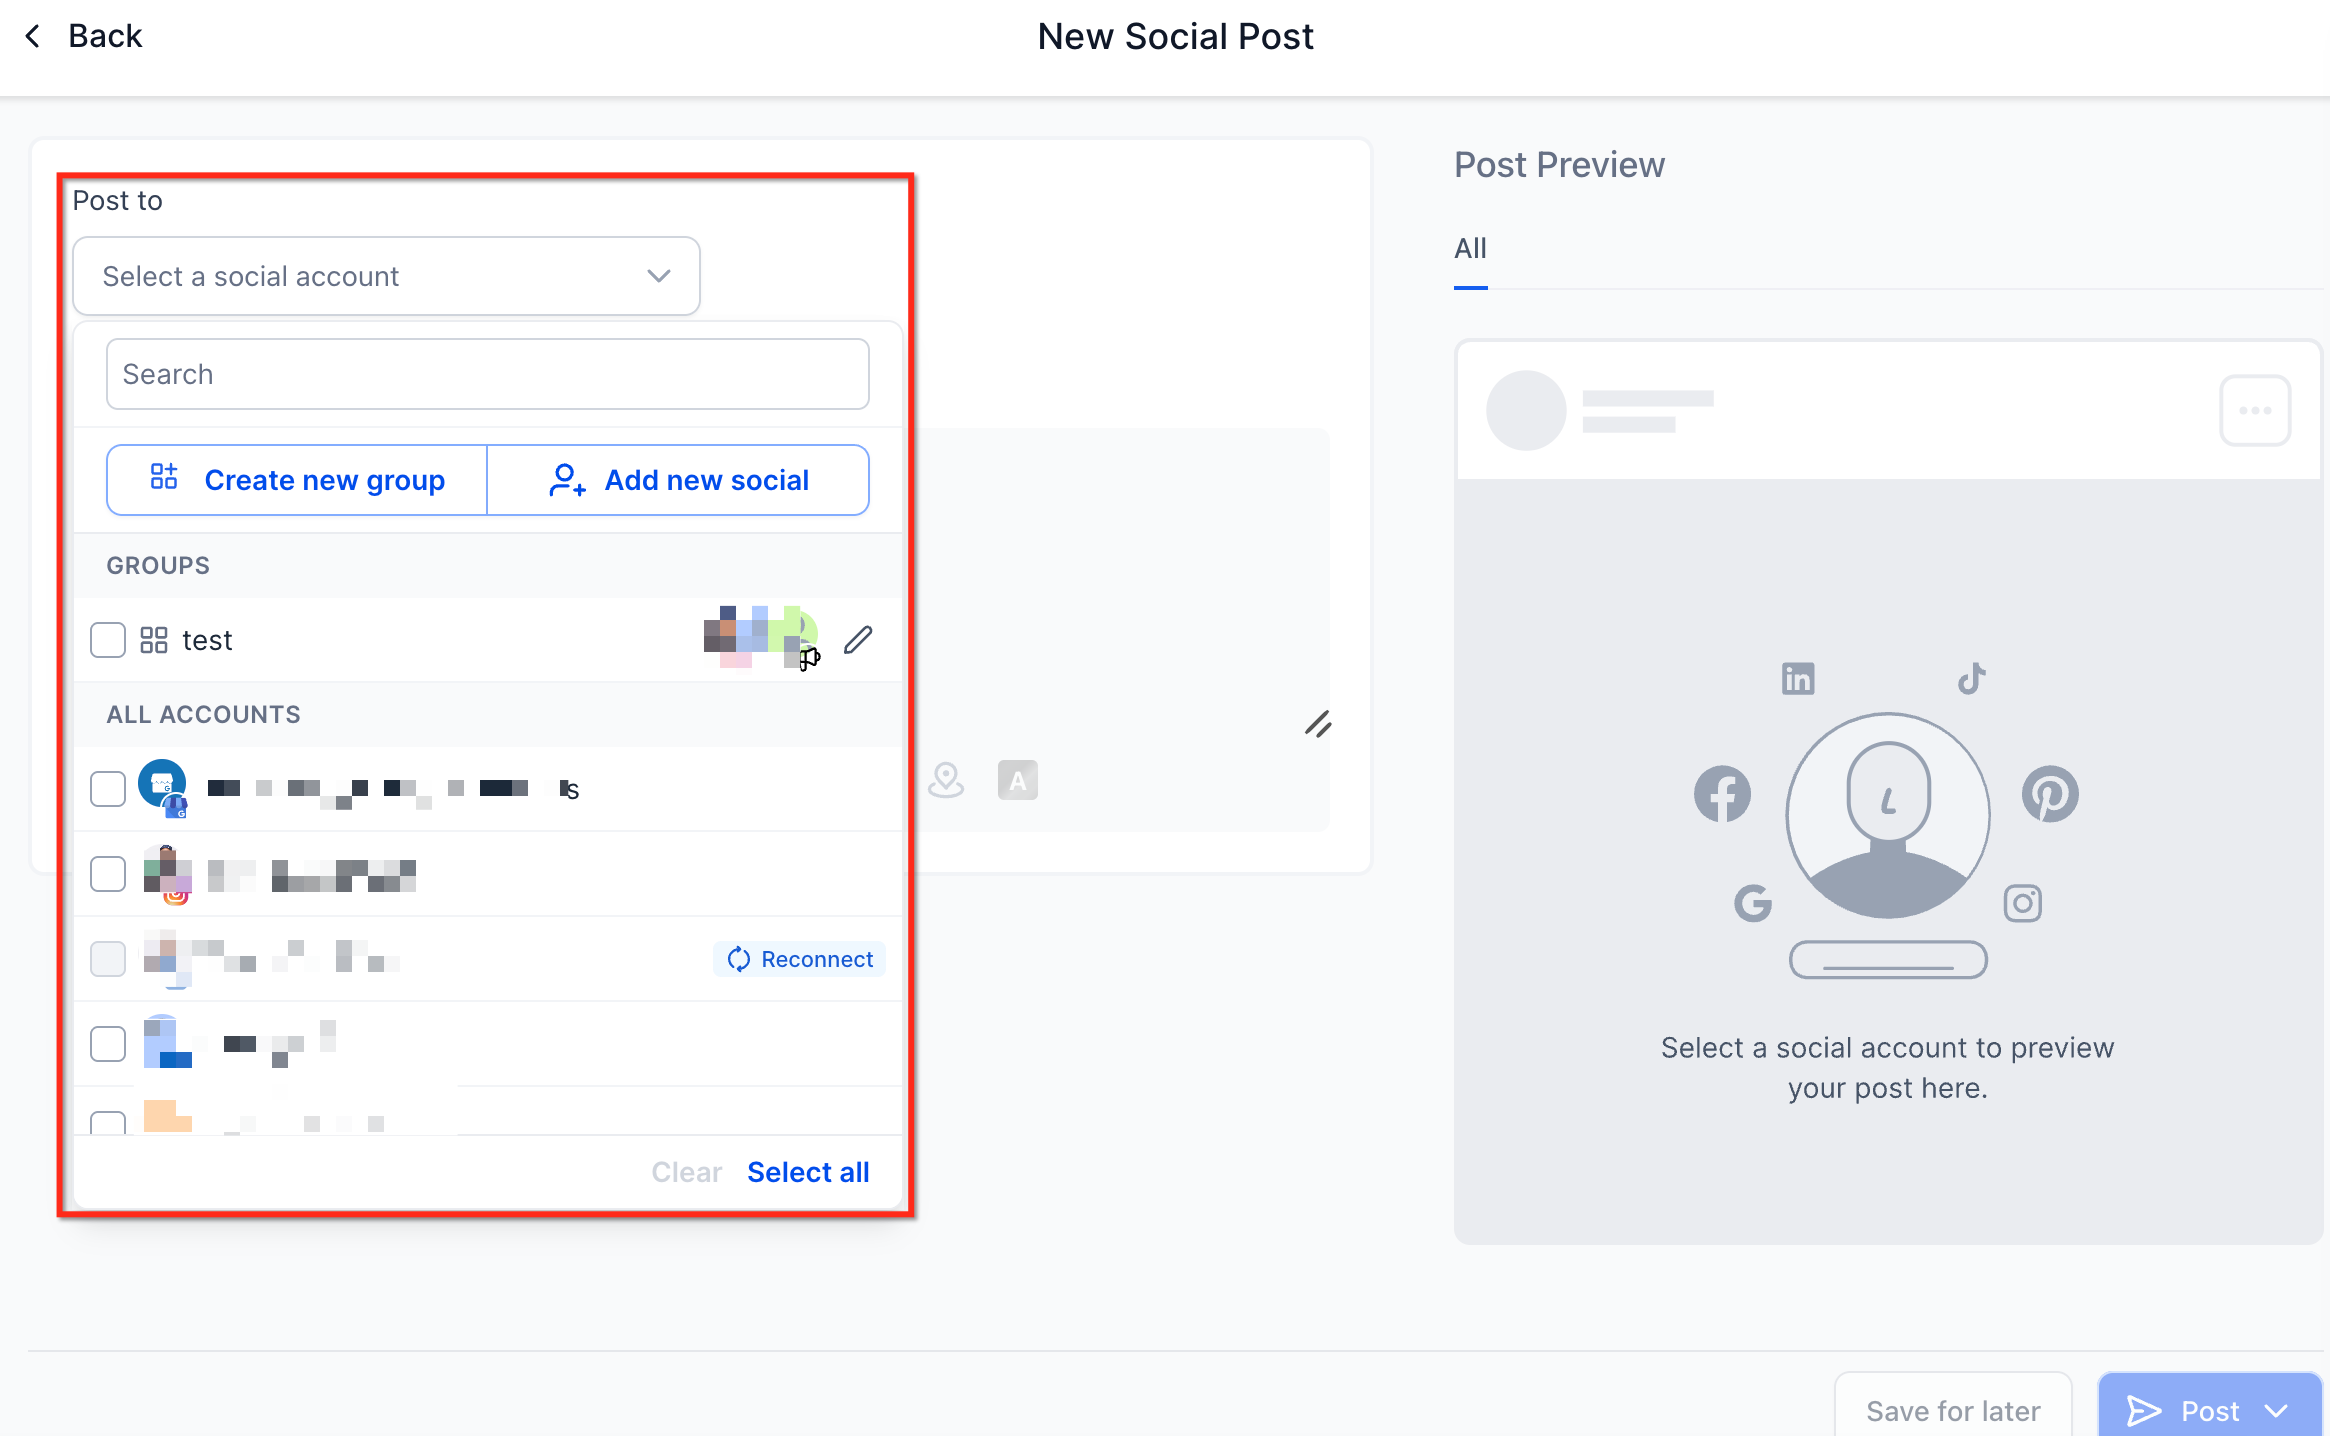
In the channel or account selector, choose the connected Community channels where you want to publish the post. You can select one or multiple Community channels.
Add your content using the rich text editor and attach supported media.
Supported Media Formats and Limits:
Images and Videos: You can attach up to 10 images or videos per post.
Images: The maximum file size is 10 MB per image.
Videos: The maximum file size is 1 GB per video, with a minimum duration of 4 seconds.
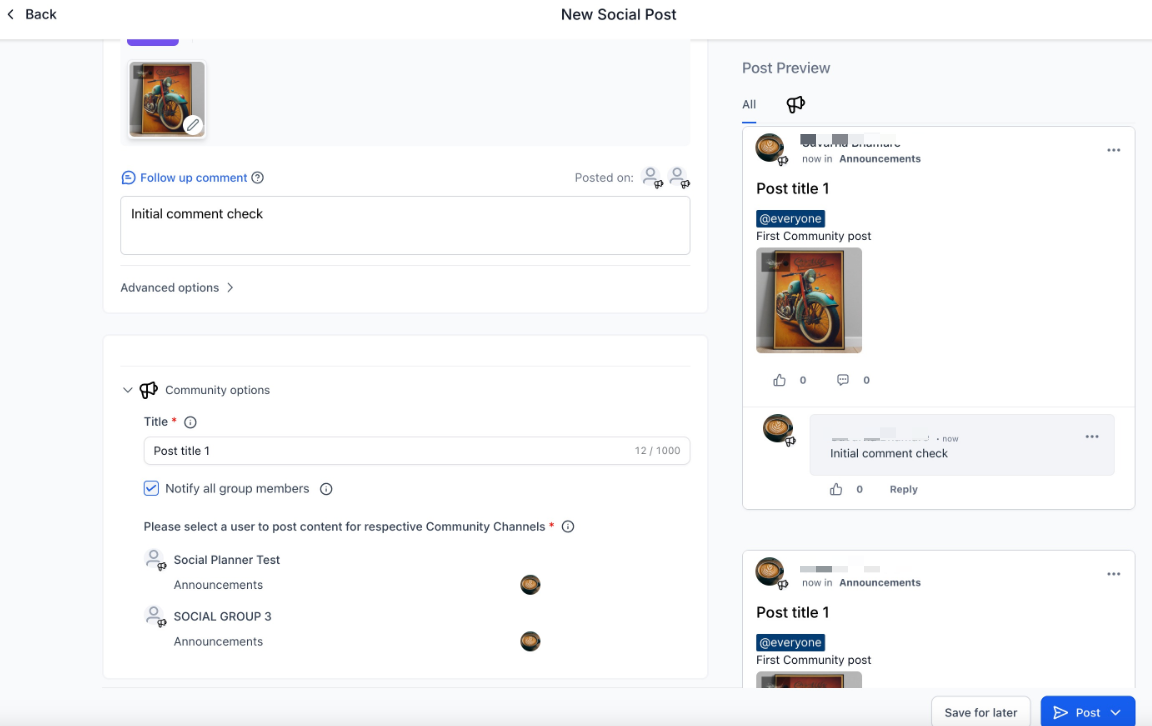
Complete the required fields, including Title, and select the User whose name will appear as the post author.
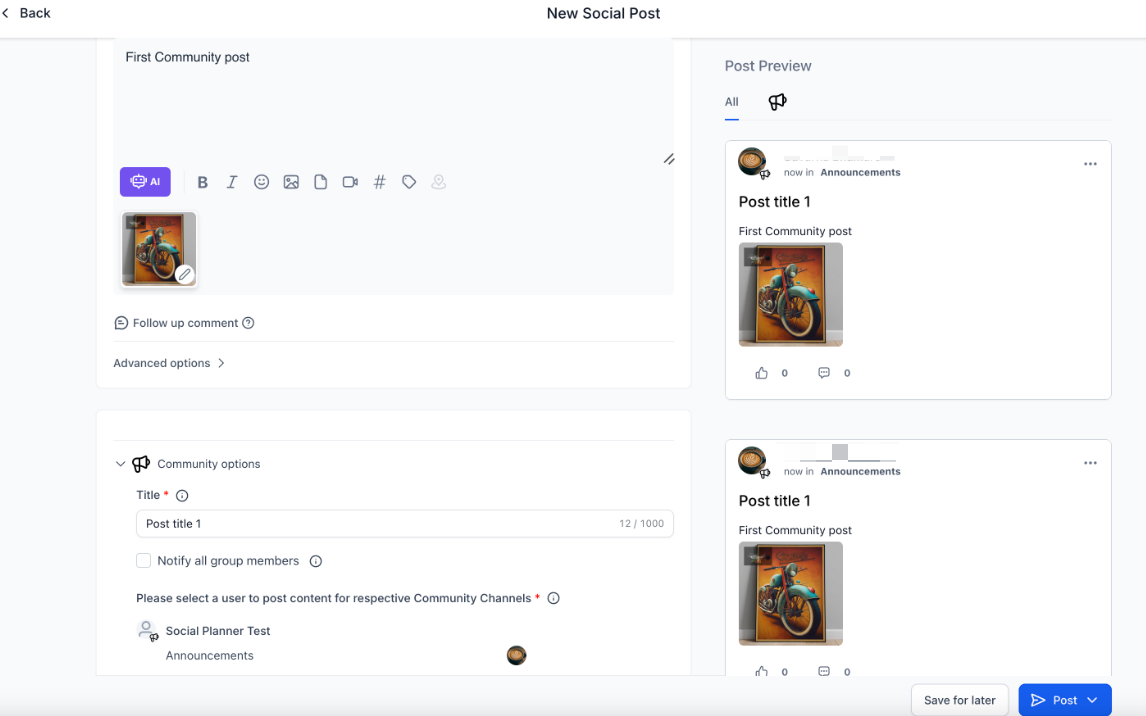
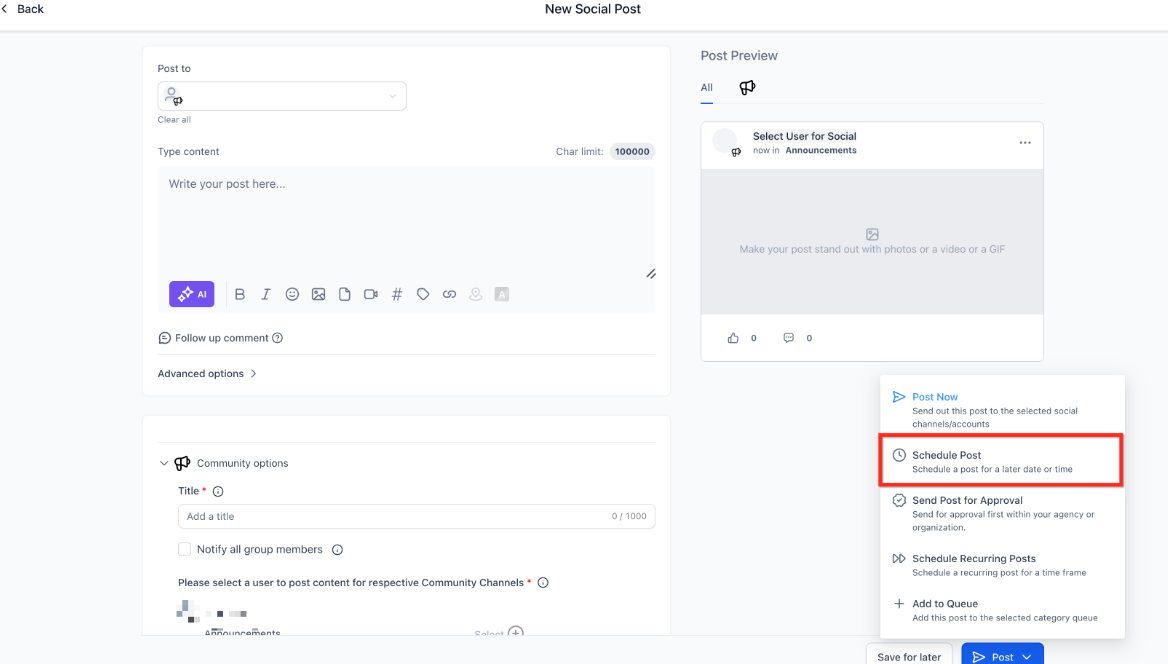
After adding the required information, click Post and select Schedule Post.
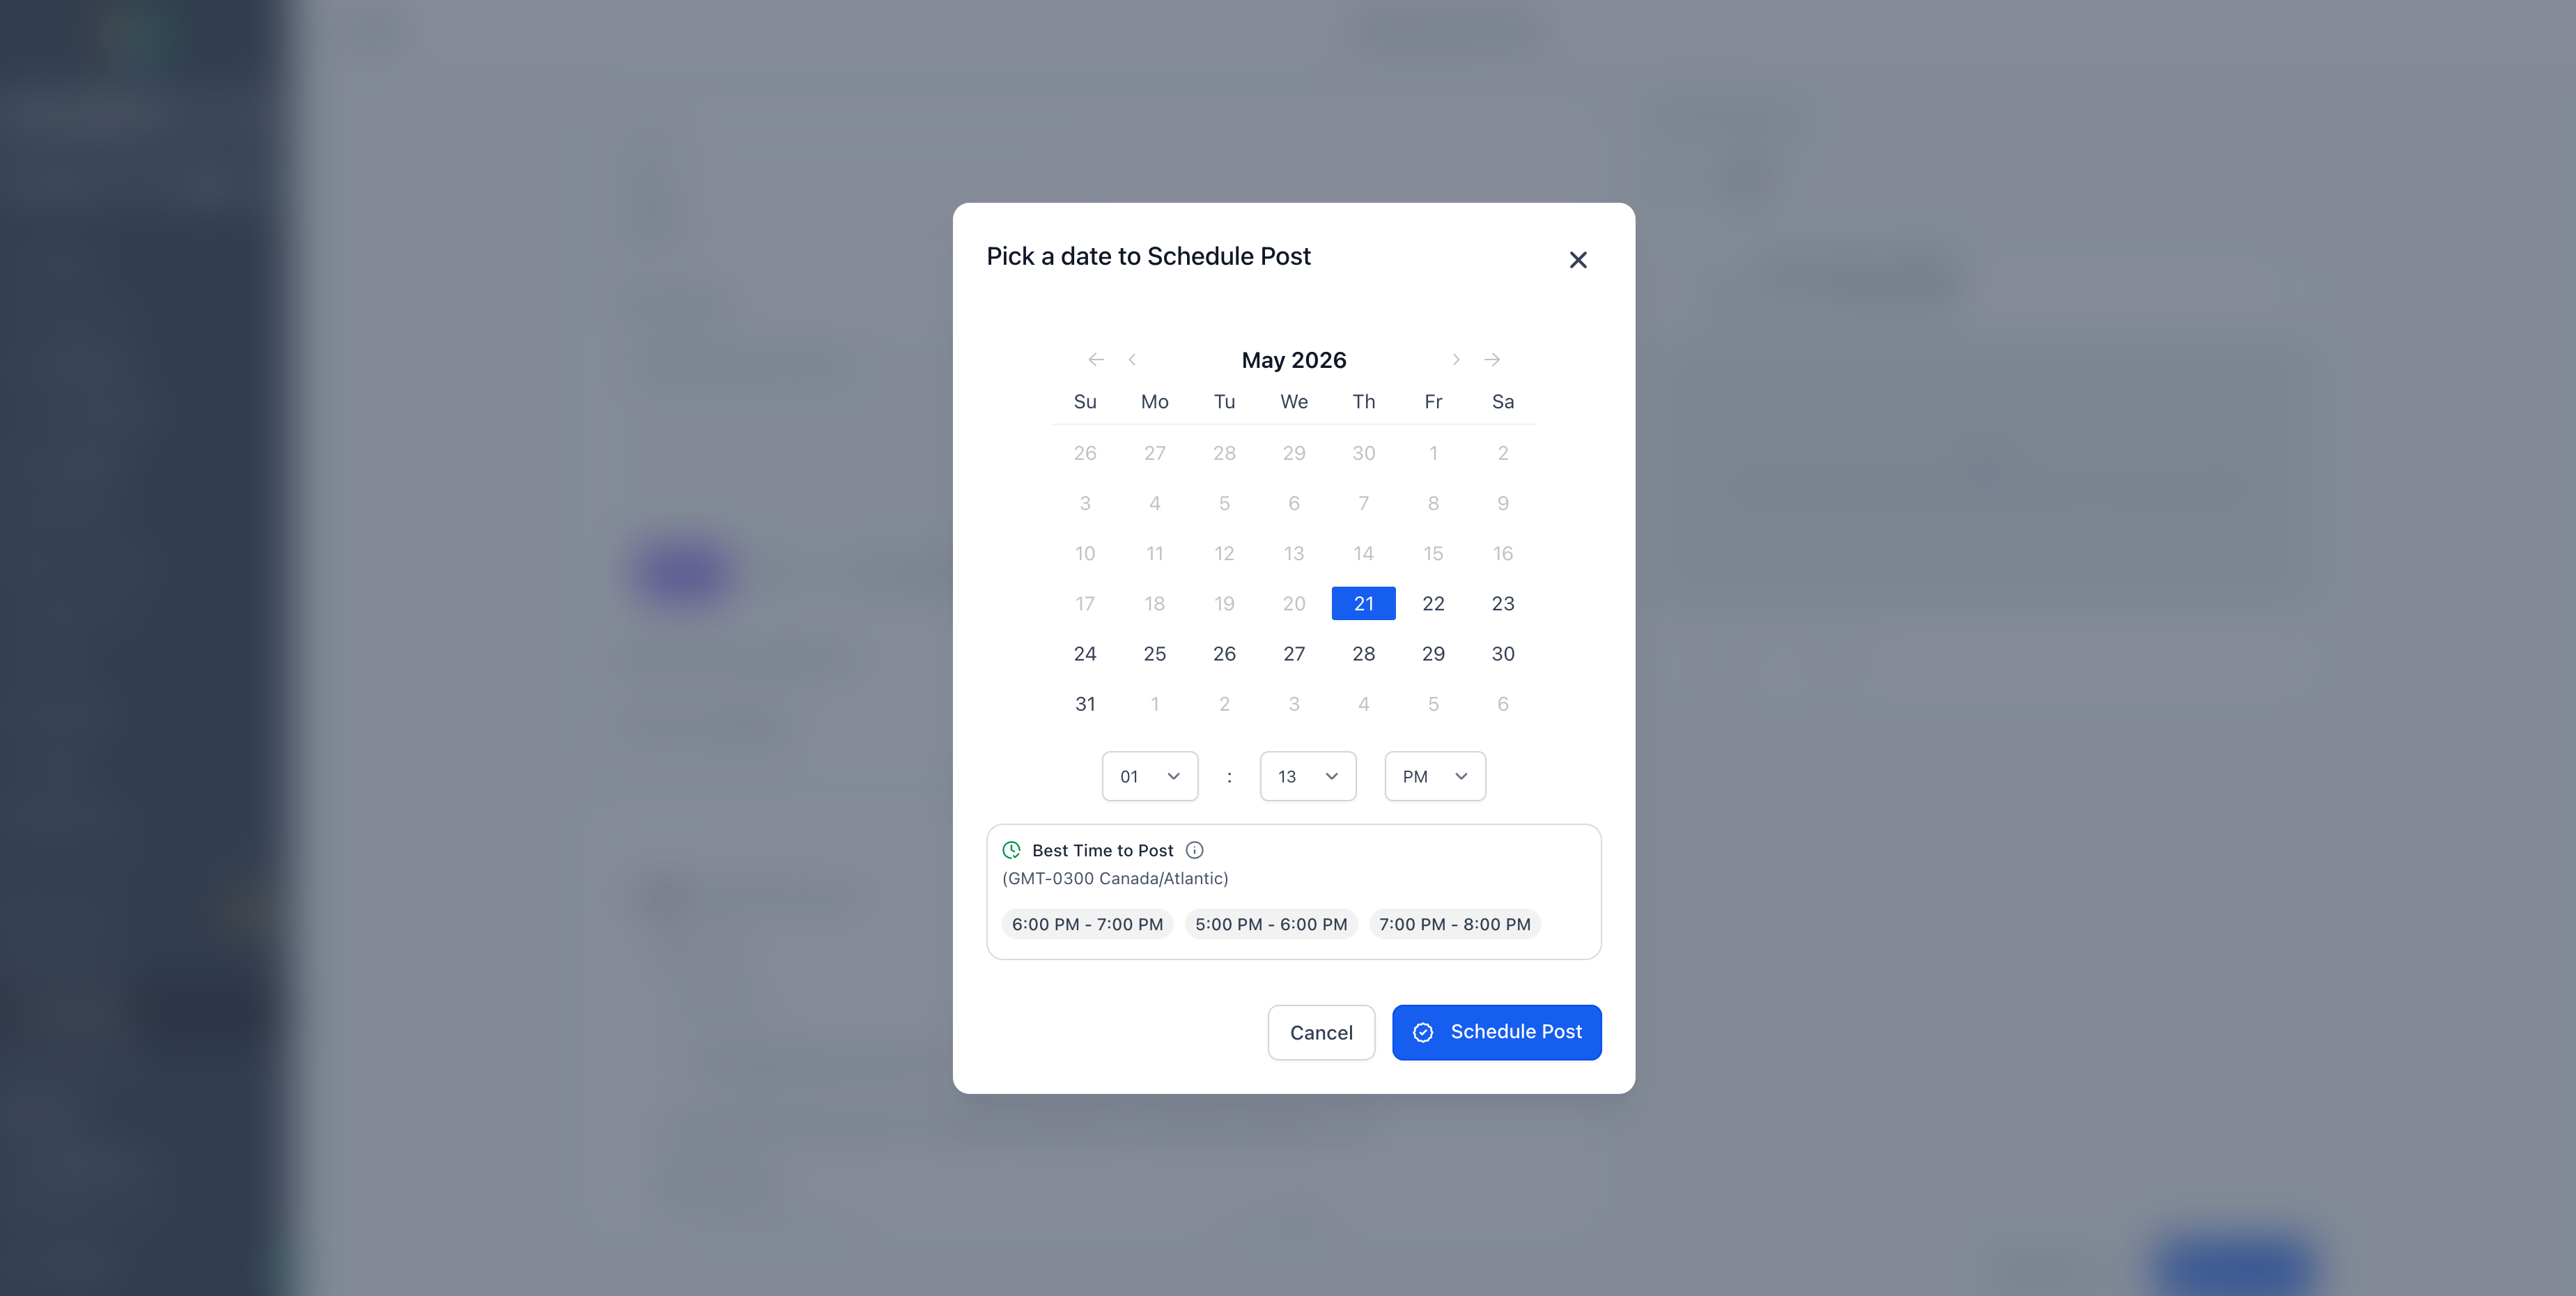
Choose the desired date and time, then click Schedule Post to confirm.
Note: Community posting is also supported through CSV and other supported post types.
Schedule Community Posts Using the Public API
Community posts can also be created and scheduled through the Social Planner public API. This allows Marketplace apps and private integrations to automate Community publishing without requiring users to create each post manually.
Developers can use the API to:
Retrieve eligible members of a connected Community channel.
Select the Community member who will publish the post.
Validate whether a selected member can still publish in the Community group.
Create and schedule Community posts.
Receive validation errors when required publishing-member information is missing or invalid.
The system also verifies the selected member's eligibility before publishing. If the member no longer has permission to publish, the post fails instead of publishing under an incorrect identity.
For implementation details, refer to the official API documentation:
Manage Comments from Social Planner
You can view and reply to comments on Community posts directly from Social Planner.
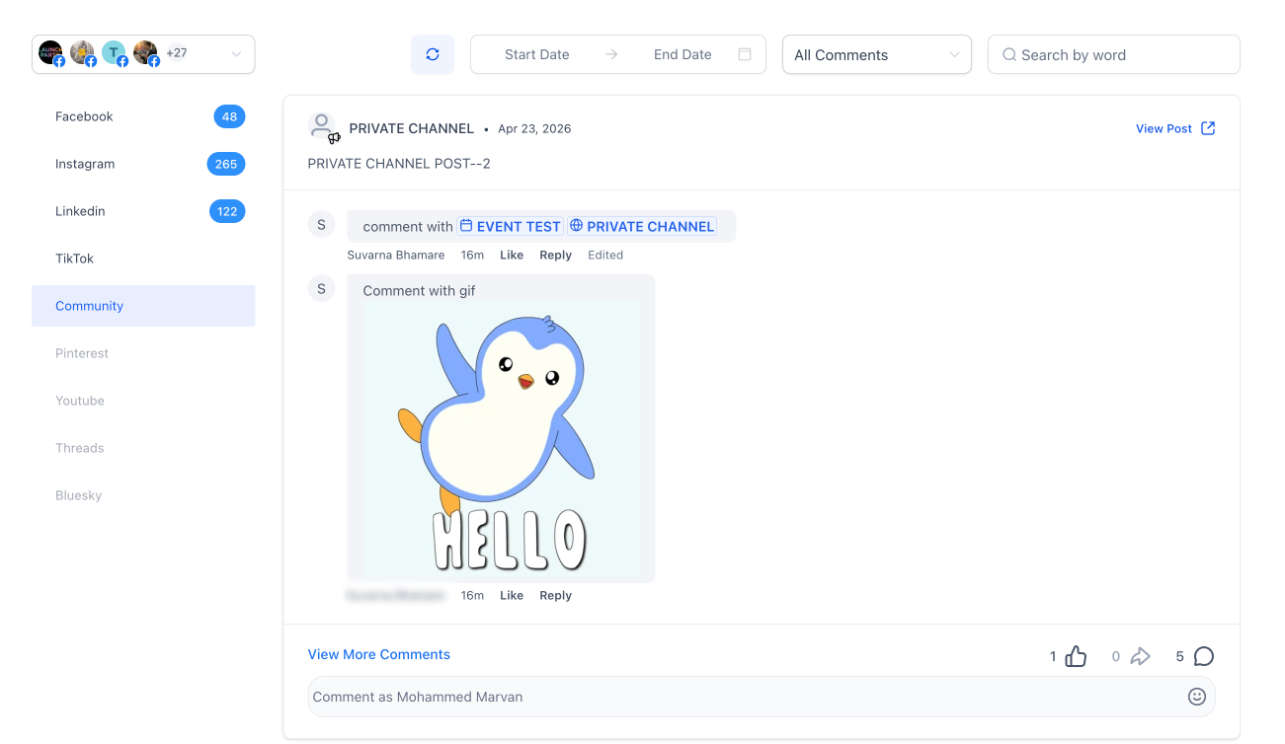
For more information, see How to Manage Comments in Social Planner.
Important Points to Note
Syncing Community Groups and Channels: New channels or changes to existing group or channel details do not automatically appear in Social Planner. Navigate to Social Planner > Settings > Communities to resync your groups and channels.
Selecting a Posting User: In Post Composer, you can select the user whose name will appear on the published post.
Setting Default Posting Users: Navigate to Social Planner > Settings > Communities to select default users for new Community posts.